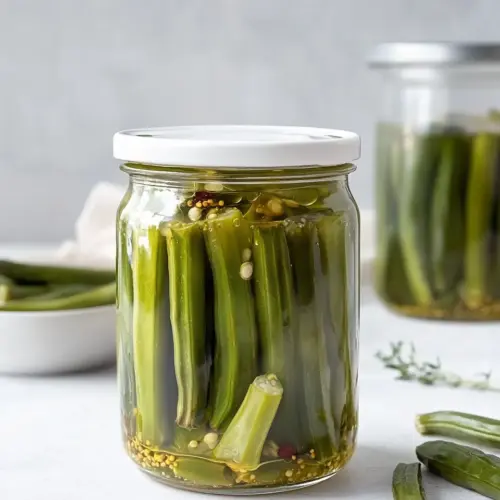
Pickled Okra
Pickled Okra delivers crisp, tangy pods with garlicky and dill notes, an easy pantry project for summer harvests. This crunchy preserve is simple yet flavorful, perfect for snacking, sandwiches, or relish trays, and makes an excellent easy weeknight addition to your condiment lineup. Try it for its bright acidity and low effort preservation that rewards you for weeks.
Equipment
- Saucepan
- Water bath canner or large pot
- Canning jars and lids
- Tongs
Ingredients
- 1 1/2 pounds fresh okra Trimmed and firm, provides the main texture and flavor of the jar; sliced or left whole, okra becomes crisp-tender when pickled and absorbs brine flavors while maintaining a pleasant snap. Store in cool conditions before pickling to preserve freshness and minimize sliminess during the process.
- 1 cup white vinegar 5% acidity Acidic and preservative, supplies the necessary acidity to safely pickle and balance flavors; using 5% white vinegar creates a bright tang that helps inhibit microbial growth and firms vegetable tissues. Combine with water to achieve the proper acidity and flavor concentration for safe preservation.
- 2 cups water Diluting and balancing, water reduces vinegar strength and controls brine concentration; it also helps extract flavors from spices and garlic during the simmering process. Use clean, potable water to ensure a neutral base that allows other ingredients to shine without overpowering acidity.
- 2 tablespoons pickling salt Salting and seasoning, pickling salt enhances flavor while helping draw moisture from the okra and create osmotic conditions favorable for preservation; it dissolves clearly without additives that can cloud the brine. Measure accurately to maintain safety and avoid overly salty or under-preserved jars.
- 3 cloves garlic peeled Aromatic and savory, peeled garlic infuses pungent, garlicky notes into the brine and pairs well with dill and mustard for classic pickled flavor. Slight bruising or cracking cloves before packing increases flavor release and ensures a pronounced garlic presence in the finished product.
- 2 teaspoons dill seeds or 3 fresh dill sprigs Herbal or seed-based flavoring, dill seeds or fresh dill sprigs offer distinctive anise-like and grassy notes that define traditional pickled profiles; seeds provide a concentrated hit while sprigs lend fresh, delicate aroma. Use whichever form is listed to achieve the intended intensity and visual character.
- 1 teaspoon mustard seeds Warm and pungent, mustard seeds add subtle heat and a nutty, sharp complexity to the brine when toasted or simmered; they also contribute texture and visual interest in the jar. Include measured seeds to ensure consistent spiciness across batches without overpowering other flavors.
- 1 teaspoon black peppercorns Spicy and aromatic, black peppercorns contribute bright heat and a sharp, peppery aroma that complements the vinegar and dill; whole peppercorns release flavor slowly for balanced seasoning over time. Pack whole for gradual infusion and to provide occasional bursts of spice when eating.
- 1/2 teaspoon red pepper flakes optional Optional heat and color, red pepper flakes introduce moderate capsaicin-driven spiciness and a pop of red in the brine; adjust quantity for desired heat level or omit for milder pickles. Add cautiously if preserving for others to avoid making the final jars too hot for general preference.
Instructions
- Wash 3 pint-sized jars and lids in hot, soapy water. Rinse well. Place jars in simmering water until ready to use.: The kitchen will smell faintly soapy then clean, and seeing the jars shimmer in simmering water reassures you they are sanitized. This step prevents unwanted microbes from spoiling the pickles, which is why the water bath is critical for safety. A common error is skipping rinsing well which leaves soap residue, creating off flavors, so be thorough when rinsing and keep jars hot before filling to prevent glass shock.
- Rinse okra and trim stems to 1/4 inch without cutting into the pods.: Fresh okra will feel slightly fuzzy when you run your fingers over it, and trimming stems to just a quarter inch preserves pod integrity. The small stem nub helps pack the jar while protecting the interior seeds, so careful trimming keeps each pod intact. Avoid cutting too deep which can let juices escape and make pickles soft, trimming precisely is key.
- In a saucepan, combine vinegar, water, and pickling salt. Bring to a boil, stirring to dissolve salt.: As the brine heats, steam will rise with a sharp vinegar scent, and the salt will disappear into glossy liquid. Boiling helps infuse the brine and ensures the salt is fully dissolved, which is essential for even seasoning. A misstep is not dissolving the salt fully, leaving gritty crystals, so stir and bring to a rolling boil to dissolve everything.
- Place garlic, dill, mustard seeds, peppercorns, and red pepper flakes (if using) into each jar. Pack okra tightly into jars.: Dropping whole garlic cloves and seeds into the jars releases aromatic oils that will mingle with the okra . Packing tightly reduces air pockets and helps the brine surround each pod for even flavor. Too loose packing can trap air and prevent full brine contact, so press jars gently but avoid crushing the pods.
- Pour hot brine over okra, leaving 1/2-inch headspace.: The hot brine will hiss as it meets cold glass, filling the jars with steam and aroma, and you will see spices float and settle around the pods. Leaving a half inch headspace is important to allow for expansion and to ensure proper sealing during processing. Overfilling can prevent a safe seal, so measure the headspace carefully and wipe rims clean.
- Remove air bubbles by gently tapping jars. Wipe rims clean and adjust lids.: Tapping jars releases trapped air, and you will notice tiny bubbles rising to the surface as they escape. Clean rims help the lid make full contact, preventing seepage or failed seals. A common oversight is not wiping the rims, which can cause jars to lose vacuum or leak brine during storage.
- Process jars in boiling water bath for 10 minutes.: As the jars sit in the rolling boil, the lids will pop slightly as the seals form, and you will hear the faint ticking of cooling glass after removal. The water bath ensures an even, sustained temperature that deactivates microbes and locks in the seal. Processing less time than recommended risks incomplete sealing, so maintain a steady boil and time it accurately.
- Carefully remove jars and let cool. Store in a cool, dark place.: After cooling, each jar should sport a slightly concave lid and a satisfying pop when pressed, signaling a good seal. Cooling concentrates flavors and clarifies the brine while the pickles rest. Storing away from light protects color and flavor; avoid jarring or tapping jars during the first 12 hours which might disturb seals.
Notes
- Sterilize jars thoroughly by boiling or using very hot dishwasher cycles, because a clean jar is the foundation of safe canning and a clear brine. Any residue can cause spoilage or off flavors, so do not skip this step.
- Trim stems carefully leaving a quarter inch, because too short or cut stems let pod juices escape which can soften the texture, and too long stems make packing awkward.
- Maintain a rolling boil during the water bath processing, because the consistent temperature is what creates a safe, long lasting seal; a simmer may not be enough.
- Use 5 percent acidity vinegar as specified, because lower acidity vinegars can jeopardize preservation and alter the bright taste that makes these pickles lively.
- Store away from heat and light to preserve color and flavor, because sunlight and warmth accelerate flavor degradation and can soften the okra over time.