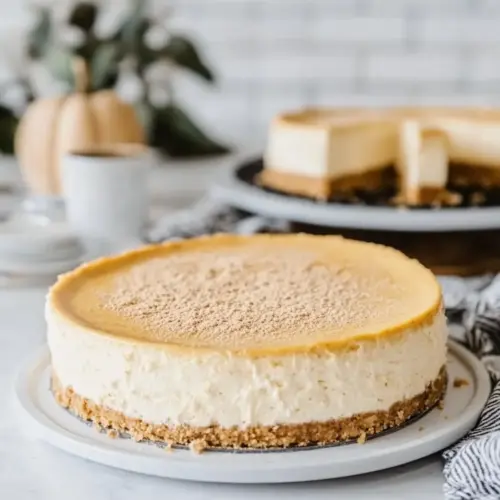
Perfectly Perfect Pumpkin Cheesecake
Perfectly Perfect Pumpkin Cheesecake is a creamy, warmly spiced dessert with a crunchy gingersnap crust. This easy to love cheesecake blends silky cream cheese and earthy pumpkin purée with cozy spices, making it a reliable choice for holiday gatherings and easy weeknight dessert plans. It slices cleanly after chilling and rewards you with consistent, impressive results.
Equipment
- 9-inch Springform Pan
- Food Processor
- Roasting Pan
- Heavy duty aluminum foil
- Electric Mixer
- Wire Rack
Ingredients
- 1 3/4 cups gingersnap cookie crumbs from about 40 gingersnap wafers Provide a crunchy, spiced base by using finely crushed gingersnap cookies to form the cheesecake crust; their molasses and ginger flavor complement the pumpkin filling and add texture contrast. Press firmly into the pan to create an even layer that supports the filling and prevents sogginess during baking. Using about 40 wafers yields the measured volume needed for a standard springform pan crust.
- 3 tablespoons brown sugar Add a touch of caramelized sweetness by incorporating brown sugar into the crust mixture; its moisture helps bind the cookie crumbs and enriches the overall flavor. Measure accurately to balance sweetness without overwhelming the spiced gingersnaps, and mix thoroughly with the crumbs for even distribution.
- 1/2 teaspoon ground cinnamon Enhance the warm spice profile in the crust by blending ground cinnamon into the cookie crumbs; a small amount lifts the aromatic character and ties the base to the pumpkin filling. Stir well to ensure consistent spice throughout the crust so every bite harmonizes with the filling.
- 1/2 teaspoon kosher salt Balance sweetness and heighten other flavors by mixing kosher salt into the crust; it sharpens the gingersnap and brown sugar notes and prevents the crust from tasting flat. Use measured amounts appropriate for kosher salt’s larger granules to avoid over-salting.
- 1/4 cup unsalted butter melted and slightly cooled Bind and moisten the cookie crumbs by adding melted unsalted butter so the crust holds together when pressed into the pan and bakes to a slightly crisp finish. Cool the butter slightly before combining to prevent melting the crumbs excessively and to ensure an even texture.
- 3 packages 8 ounces each regular cream cheese (not low fat or nonfat), at room temperature Soften and enrich the filling base by using room-temperature regular cream cheese, which provides a dense, creamy texture and tangy backbone to the cheesecake. Beat until smooth to eliminate lumps and create a velvety consistency that pairs well with the pumpkin and spices.
- 1 can 15 ounces pumpkin purée (not pre-spiced pumpkin pie filling) Provide the primary pumpkin flavor and moistness with canned pumpkin purée, ensuring it is pure pumpkin rather than pre-spiced pie filling so spices can be controlled in the recipe. Fold in gently to retain a smooth, homogeneous filling and to avoid overworking the batter.
- 3 large eggs Add structure and richness to the filling by incorporating whole large eggs; they help set the cheesecake during baking and contribute to a smooth, custardy texture. Beat just until combined to prevent excess air, which can cause cracking or puffing.
- 1 large egg yolk Increase richness and improve the custard’s stability by adding one large egg yolk, which boosts fat content and yields a silkier mouthfeel while aiding in a creamier finished texture. Combine thoroughly with the other eggs and dairy for an even bake.
- 1/4 cup regular sour cream not low fat or non-fat Contribute a mild tang and additional creaminess by stirring in regular sour cream, which lightens the filling and balances the sweetness with a subtle acidity. Use full-fat sour cream for optimal flavor and smoothness, avoiding low-fat versions that can affect texture.
- 1 1/2 cups sugar Sweeten the filling uniformly by adding granulated sugar, which dissolves into the batter to provide consistent sweetness and influence the final texture and browning. Measure carefully to achieve the intended sweetness level without overpowering the pumpkin and spices.
- 1 teaspoon ground cinnamon Deepen the warm spice character in the filling by incorporating ground cinnamon, which complements the pumpkin and enhances aromatic complexity. Distribute evenly through the batter to ensure consistent flavor in every slice.
- 1/2 teaspoon ground ginger Brighten the spice blend with ground ginger, adding a sharp, slightly peppery note that complements both the gingersnap crust and the pumpkin filling. Use measured amounts to impart warmth without dominating the overall spice profile.
- 1/8 teaspoon ground nutmeg Add a subtle sweet-woody warmth by including ground nutmeg, which works well in small quantities to round out the pie-spice blend and contribute complexity. Mix thoroughly into the batter to avoid concentrated pockets of spice.
- 1/8 teaspoon ground cloves Introduce a deep, clove-like warmth using ground cloves sparingly, as its potent flavor enhances the autumnal spice mix and adds depth to the pumpkin filling. Ensure even dispersion to maintain balance with the other spices.
- 1/4 teaspoon kosher salt Enhance overall flavor balance and seasoning by adding kosher salt to the filling, which accentuates sweetness and rounds out the spice notes for a well-balanced cheesecake. Adjust quantity to account for kosher salt’s coarser grain compared with table salt.
- 2 teaspoons all-purpose flour Stabilize the filling slightly and improve texture by whisking in all-purpose flour, which can help prevent cracking and yield a smoother set without noticeably altering flavor. Blend in uniformly to avoid lumps and ensure even thickening during baking.
- 1 teaspoon pure vanilla extract Round out and elevate the flavor profile by incorporating pure vanilla extract, which adds aromatic depth and complements the pumpkin and spices for a more complex taste. Add toward the end of mixing to preserve its fragrant notes.
Instructions
- Preheat oven to 350° F. Prepare a 9″ springform pan by lightly spraying with cooking spray.: As the oven warms, you will notice the air shift from cool to gently warm, a subtle signal that the baking environment is stabilizing. The preheat ensures even oven spring and predictable color on the crust, which matters since the crumb base needs a short bake. Spraying the springform pan helps prevent sticking, though I also recommend a light parchment circle for added insurance. One common mistake is skipping preheating which can lead to longer bake times and uneven texture. Keep the oven stable, and use the moment to ready your ingredients so nothing sits cold while baking begins.
- For the crust: In a food processor, pulse the cookies until crumbs are uniform. Add brown sugar, cinnamon, and salt, and pulse to combine. Transfer to a medium bowl and add the melted butter. Combine thoroughly with a fork. When the mixture is evenly moist, crumbly, and holds together when you squeeze a handful, it’s ready. Press the mixture evenly over the bottom, and very slightly up the sides, of your springform pan. Chill for 5 minutes, then bake for 10 minutes. Let cool completely.: In a food processor, pulse the cookies until crumbs are uniform. Add brown sugar, cinnamon, and salt, and pulse to combine. Transfer to a medium bowl and add the melted butter. Combine thoroughly with a fork. When the mixture is evenly moist, crumbly, and holds together when you squeeze a handful, it’s ready. Press the mixture evenly over the bottom, and very slightly up the sides, of your springform pan. Chill for 5 minutes, then bake for 10 minutes. Let cool completely. : At this stage the scent of gingersnap will bloom, warm and spicy, as the crumbs release aromatic oils. The goal is a mixture that clumps when squeezed; that tactile test tells you the butter is distributed well. Pressing firmly ensures the crust bonds and supports the filling, and chilling briefly helps it set so it does not slough off when baked. Baking for 10 minutes toast the crumbs, deepening flavor and producing a slightly firmer base, but avoid overbaking which can make the crust dry and brittle. If the crust seems oily, you likely used butter that was too hot; let it cool a touch before combining next time.
- Prepare a water bath while the crust cools. Heat a kettle or pan of water to a soft boil. Have a larger baking dish or roasting pan ready to set the springform pan inside. Once the crust is cooled, set the springform pan on a double layer of heavy-duty aluminum foil and wrap the foil up around the outside of the pan.: The first hiss of the hot water is a small comfort, signaling that you are building a gentle, humid oven environment. Wrapping the pan in foil is your barrier against leaks, and placing the springform into the larger pan creates a bath that regulates baking temperature and prevents the cheesecake edges from becoming grainy or cracked. Water in the bath steams as the cheesecake bakes slowly, producing a tender custard. Skipping the water bath often leads to dry edges and cracks, so take the few minutes to prepare it correctly. Ensure the foil is snug but not piercing the pan surface to avoid seepage.
- For the filling: Beat the cream cheese until smooth. Add the pumpkin purée and combine. Add the eggs and egg yolk, one at a time, incorporating each egg thoroughly before adding the next, and scraping down the sides of the bowl after each one. Beat in the sour cream. Then add the sugar, cinnamon, ginger, nutmeg, cloves, salt, and flour. Beat just until combined, then beat in the vanilla.: Beat the cream cheese until smooth. Add the pumpkin purée and combine. Add the eggs and egg yolk, one at a time, incorporating each egg thoroughly before adding the next, and scraping down the sides of the bowl after each one. Beat in the sour cream. Then add the sugar, cinnamon, ginger, nutmeg, cloves, salt, and flour. Beat just until combined, then beat in the vanilla. : The sound of the mixer changes as the cream cheese transforms from lumpy to glossy, a clear textural cue you are heading the right direction. Adding the pumpkin purée next softens the mixture, and incorporating the eggs slowly ensures a stable emulsion, which keeps the filling silky instead of curdled. Scraping the bowl is critical to avoid pockets of unmixed cheese that become lumps after baking. After adding the dry spices and sugar , mixing gently prevents over aeration that can cause cracks. A common pitfall here is rushing the eggs into a cold mixture, which can introduce lumps; make sure the cream cheese is fully softened before starting.
- Scrape the filling into the cooled crust and spread evenly. Set the springform pan in the larger roasting pan and add enough hot water from the kettle to come about halfway up the sides of the springform pan.: The visual of a smooth, glossy filling leveled across the crust is satisfying, and you will notice a faint steam rising from the water bath as it sits in the oven. The hot water temperature helps prevent a shock to the batter and supports even baking. Fill carefully so no water spills into the cheesecake, as moisture can create soggy edges. One troubleshooting tip: if the filling seems aerated or frothy, let it rest briefly to allow bubbles to settle before baking, because trapped air can cause cracking.
- Bake until the top of the cheesecake is a deep golden color and the center is set, about 90 to 100 minutes. It’s ok if there is a slight jiggle to the center of the filling. Remove the cheesecake from the oven and run a thin-bladed knife between the perimeter of the cheesecake and the pan. Let cheesecake cool to room temperature in the pan on a wire rack. Then cover and chill for at least four hours or overnight before serving. Serve chilled, topping individual slices with fresh whipped cream.: As the cheesecake bakes, the kitchen fills with a roasted, pumpkin aroma and the top slowly deepens to a warm gold. The slight jiggle in the center indicates the custard is set but still tender; overbaking will make it dry and dense, while underbaking leaves it too loose. Running a thin knife between the cake and the pan right after baking detaches the edges and prevents large cracks as it cools and contracts. Cooling on a rack allows steam to dissipate rather than collect and soften the crust. Chilling overnight improves slicing and flavor melding. A frequent mistake is slicing too soon; the filling needs time to finish setting in the fridge.
Notes
- Room temperature full fat dairy Ensure all tubs of cream cheese and the sour cream are at room temperature so the filling blends smooth without lumps.
- Test the jiggle not the timer Look for a gentle wobble in the center as the best doneness cue, rather than relying solely on minutes, since ovens vary.
- Water bath care Use hot water when pouring into the roasting pan and fill to halfway up the springform to stabilize baking and prevent a dry edge.
- Chill thoroughly Refrigerate for at least four hours or preferably overnight to let flavors meld and the texture firm up for clean slices.
- Room temp butter for crust Melt the butter and cool slightly before combining so it coats crumbs without making them greasy.
- Knife run while warm Running a thin knife around the edge right after baking reduces cracking and yields a neater appearance.