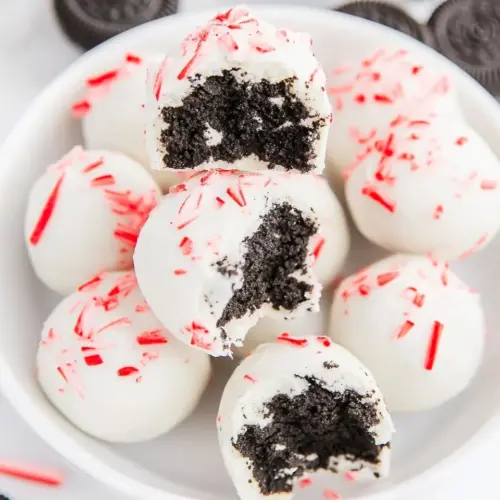
Peppermint Oreo Cookie Balls
Peppermint Oreo Cookie Balls are creamy, festive truffles made from crushed Oreos and soft cream cheese, coated in glossy white chocolate with a peppermint crunch. These easy no bake treats are perfect for holiday gatherings, offering a delightful contrast of silky centers and crisp shells. Make a big batch for parties, neighbor gifts, or holiday cookie swaps for an irresistible seasonal treat.
Equipment
- Food Processor
- Microwave-safe Bowl
- Rimmed Baking Sheet
- Parchment Paper
- Small Cookie Scoop
- Fork
Ingredients
- 36 Oreo cookies 14.3 ounce package, or other chocolate sandwich cookies Crush into fine crumbs to provide the chocolate sandwich cookie base and deliver the classic Oreo flavor throughout the mixture; ensure even texture for proper binding with the cream cheese.
- 1 teaspoon peppermint extract if you have peppermint or mint Oreos, you can skip this ingredient Add sparingly to impart a bright peppermint flavor that complements the chocolate; adjust or omit if using already mint-flavored cookies to avoid overpowering the mixture.
- 8 ounces cream cheese softened Soften and beat until smooth to act as the binding and creamy element that holds the crushed cookies together while adding richness and slight tang.
- 1 1/2 cups peppermint candy cane white chocolate melting wafers or white chocolate, see notes Melt gently to create a smooth coating that hardens around each formed ball, adding a sweet white chocolate layer with peppermint notes if using flavored melting wafers.
- 1 tablespoon coconut oil Stir into the melted coating to thin and give the chocolate a glossy finish and better flow for dipping; helps the coating set with a smoother texture.
- peppermint candies crushed, for garnish Finely crush and sprinkle over the coated balls to add crunchy texture, festive color, and an extra burst of peppermint flavor as a finishing garnish.
Instructions
- Line a rimmed baking sheet with parchment paper.: The scent of a well prepared workspace sets the tone, and the parchment creates a nonstick landing for the truffles. You'll hear the rustle of the paper as you smooth it into place, and visually you want a clean surface so coated balls do not stick. This step avoids scrapped chocolate and frustrating removals later. A common misstep is skipping parchment, which can lead to stuck truffles and broken shells.
- Place cookies in food processor and mix until cookies turn into fine crumbs. See notes if you don’t have a food processor.: When you pulse the Oreo cookies , the motor hums and the crumbs fall like fine dust, smelling richly of cocoa. Aim for a sand like texture so the filling is smooth, and tap the processor to redistribute any larger bits. If you do not have a food processor, the bag and rolling pin method works but requires elbow grease. Over processing with cream cheese later can make the mixture too loose, so keep this step strictly to drying the cookies.
- Add cream cheese and peppermint extract to the cookie crumbs. Mix with a silicone spatula or with a hand mixer on low until a dough forms. Do not mix the mixture in the food processor as the cream cheese mixture can become too liquidy.: After combining flavors you will notice the aroma shift as the tangy cream cheese melts into the crumbs and the peppermint lifts the blend. Use a silicone spatula or low speed with a hand mixer to fold until the mixture holds together like play dough. The texture should be pliable not runny; if it becomes too loose that often means the cream cheese was too warm or overmixed. Avoid using the food processor now, as it can overwork and liquefy the mixture.
- Roll the dough into balls, about one tablespoon per truffle. I like to use this cookie scoop set, for this recipe you'll need the small cookie scoop. Place each truffle on the parchment paper-lined baking sheet so they are not touching. Freeze the truffles for at least 15 minutes.: Rolling is tactile and satisfying, with the dough warming slightly under your palms and taking on a glossy sheen. I use a small cookie scoop for uniform size, then gently roll between my palms to seal any seams. Place them spaced on the parchment lined sheet so they do not touch. Freeze for at least 15 minutes to firm the centers, this helps when dipping. A problem to avoid is making balls that are too large, which will be harder to coat evenly and may cause the shell to crack under weight.
- Add the peppermint white chocolate melting wafers and one tablespoon of coconut oil (optional) to a heatproof bowl. Place the bowl in the microwave and heat for a minute at half power, then stir. Continue heating the white chocolate in thirty-second increments until it forms a smooth white chocolate sauce.: The moment you begin melting the white chocolate you will notice the aroma change to sweet and creamy, and the texture moves from solid chips to a glossy pool. Heat gently in the microwave at half power, stirring frequently to distribute heat. The coconut oil helps the melted chocolate flow and gives a satin finish. If you heat too aggressively, the chocolate can seize and grain, so patience and stirring prevent that error.
- Remove truffles from the freezer. Place truffle balls into white chocolate one at a time to coat, using a fork so excess chocolate can drip off. Place each white chocolate-coated ball on parchment paper so they are not touching each other and immediately sprinkle with crushed peppermint before the chocolate begins to harden.: As you stir the slowly melting wafers, the mixture becomes silkier and thicker, the sound is the soft swish of spoon against glass. Continue in thirty second increments until perfectly smooth, testing the pour with a spoon to ensure it coats. The reason for low heat is to preserve the glossy texture; overheating destroys the emulsion. A common mistake is rushing this stage, which leads to lumpy or separated chocolate.
- Place the pan in the freezer for 15 minutes to help the chocolate to fully harden, then enjoy!: The cold centers will feel firm when you touch them lightly, and that temperature difference is what makes the shell set quickly when dipped. Work straight away so the centers stay chilled, otherwise the heat of the chocolate can melt the interior. If the centers warm up they will be more likely to collapse under the coating, so keep them in the freezer until you are ready to dip.
- Place truffle balls into white chocolate one at a time to coat: Using a fork, lower each chilled truffle into the melted white chocolate , letting excess drip back into the bowl. The dipping sound is quiet, but visually you should see a smooth, even layer form around the ball. Remove with care and place on parchment. Immediately sprinkle with crushed peppermint candies while the chocolate is still wet so they adhere. Rushing or dipping with warm centers will cause the shell to crack or the filling to ooze.
- Place each white chocolate coated ball on parchment paper so they are not touching each other and immediately sprinkle with crushed peppermint before the chocolate begins to harden: The little sparkle of crushed peppermint against glossy white chocolate is very satisfying visually, and the aroma becomes fresher. Doing this while the coating is tacky ensures the pieces stick firmly. If you wait until the chocolate fully hardens, the peppermint will slide off and look careless, so timing is important.
- Place the pan in the freezer for 15 minutes to help the chocolate to fully harden: The freezer helps the shell set quickly and gives a clean snap when you bite into the truffles. After chilling, the surface will appear matte and firm to the touch, and handling them will not leave fingerprints. Do not overfreeze for hours as extreme cold can cause condensation when they come back to room temperature, which may affect texture. A common error is leaving them in the freezer uncovered, which can invite odors to cling to the treats.
- Then enjoy: When you bite in you'll notice the contrast of cool, creamy center and crisp coating, with a refreshing hint of peppermint . Serve them slightly chilled for best texture, and expect them to disappear fast. If you find any truffles that did not set properly, place them back in the freezer briefly to firm up before serving.
Notes
- Softening cream cheese If your cream cheese came straight from the fridge, let it sit at room temperature for about thirty minutes so it blends smoothly. Cold cream cheese will create lumps and require more vigorous mixing, which can overwork the mixture and make it greasy.
- Crushing cookies without a processor Put the Oreo cookies into a strong zip top bag and roll with a rolling pin until uniformly fine. This manual method gives you control, and you can stop when you reach the desired texture.
- Microwave melting technique Heat the white chocolate in short bursts at half power and stir between intervals. This prevents scorching and grainy chocolate, which ruins the smooth coating.
- Adding coconut oil One tablespoon of coconut oil helps the melted chocolate flow for dipping. Do not add more than recommended or the shell may remain soft and not set properly.
- Keeping truffles tidy Space the balls well on the parchment paper to avoid them touching and sticking together as they set. Use a fork to lift and tap off excess chocolate for a cleaner finish.
- Storing finished truffles Store in an airtight container in the refrigerator for up to two weeks, or freeze for longer storage. Bring to slightly chilled before serving for best texture and flavor.