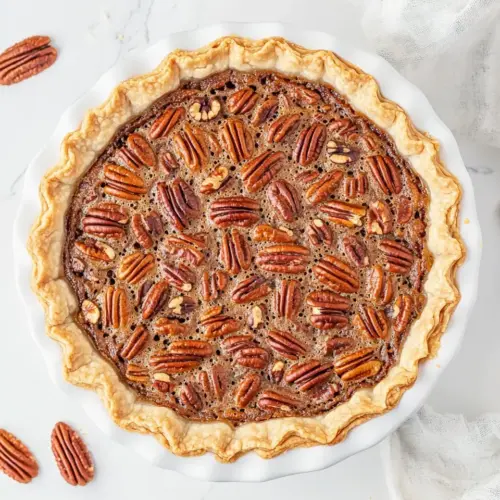
Pecan Pie
Pecan Pie is a rich, creamy and crunchy dessert that delivers deep caramelized sweetness and toasted nut flavor. This easy classic yields glossy filling and crisp crust, making it a perfect holiday centerpiece or an easy weeknight treat. Serve warm or chilled for irresistible slices everyone will reach for.
Equipment
- 9-inch pie pan
- Large Mixing Bowl
- Whisk
- Oven
- Freezer
Ingredients
- 3 large eggs Whisk together to provide structure and help the filling set; eggs also add richness and a silky texture when baked. Beat until homogenous to incorporate air and ensure an even custard-like consistency throughout the pie.
- 1 cup dark corn syrup Sweeten and bind the filling while creating a deep, molasses-like flavor; dark corn syrup contributes to the glossy, chewy texture typical of pecan pie. Pour and gently combine with the egg mixture to form the base that caramelizes during baking.
- 4 tablespoons unsalted butter, melted Melt and incorporate to add a rich, creamy mouthfeel and help the filling set smoothly; unsalted butter also carries flavor without adding extra salt. Stir in while warm to ensure even distribution and to meld with the syrup for proper consistency.
- 1 teaspoon vanilla extract Flavor and brighten the filling with a warm, aromatic note; vanilla extract enhances the overall sweetness and rounds out other flavors. Add a small amount to the custard to elevate and unify the taste profile.
- 1/2 teaspoons salt Season and balance sweetness by providing a subtle savory counterpoint; salt enhances depth and prevents cloying flavors. Measure carefully to avoid overpowering the delicate custard and pecan flavors.
- 1/4 teaspoon ground cinnamon Warm and complement the nutty profile by adding subtle spice and complexity; ground cinnamon contributes a faint aromatic warmth. Use sparingly to prevent masking the pecan and caramel notes.
- One unbaked pie crust Hold and support the filling as the container for the pie; an unbaked pie crust provides structure and a buttery, flaky base. Crimp or prepare the edges before pouring to ensure even baking and an attractive presentation.
- 2 cups pecans Top and define the texture with a rich, crunchy element; pecans supply nutty flavor and contrast to the syrupy filling. Scatter evenly and press lightly into the filling so they partially emerge as they toast during baking.
Instructions
- Preheat oven to 375℉. Spray a 9-inch pie pan with nonstick spray.: As the oven warms you will notice the air taking on a dry, warm quality, which helps the crust begin to cook as soon as it hits the heat. This initial high temperature is important so the crust sets quickly and avoids becoming soggy from the filling. One aromatic clue is a faint toasty note in the air as the oven reaches temperature. A common error is preheating for too short a time, which can lead to uneven bake; always wait until the oven signals it has reached the full 375℉ before inserting the pie. If your oven runs hot or cold, use an oven thermometer to ensure accuracy, because a few degrees can affect how the filling firms. Also, spraying the pan prevents sticking and helps with release; if you skip this, the pie may cling and break when you serve it.
- In a large bowl, whisk together the eggs and corn syrup. Add the melted butter, vanilla, salt, cinnamon and whisk to combine. Set aside.: As you whisk the eggs and dark corn syrup together, you should see the mixture become smooth and slightly glossy, developing a uniform amber color. This visual signal means the sugar and protein are beginning to integrate, which leads to even setting during baking. The aroma will be sweet and faintly molasses like from the syrup, and the melted butter will lend a subtle buttery scent once incorporated. I like to whisk in one direction with a steady rhythm to ensure full integration; uneven mixing can lead to pockets of syrup that do not set properly and create a gummy texture. A troubleshooting tip is to temper the melted butter if it is very hot; pour it in slowly while whisking so you do not cook the eggs . If lumps form, keep whisking vigorously until smooth, but if the mixture looks curdled you may need to start again with fresh eggs .
- Set the pie crust in the pan. Press the dough gently into the pan. Crimp the edges. Place the pie pan in the freezer for 10 minutes.: Pressing the dough evenly into the pan creates uniform thickness, which helps the crust bake at the same rate across the base and edges. When you crimp the rim, you create a decorative barrier that also strengthens the edge so it stands up against the weight of the filling. Chilling the crust in the freezer firms the fat in the dough, resulting in a flakier, less shrunken edge when baked. You will feel the dough go from supple to slightly firm after chilling, and it will be easier to handle. Avoid overworking the dough while pressing, because excessive handling warms the butter and can make the crust tough. If your crust warms too much, pop it back in the freezer until it feels cold to the touch.
- Pour the filling into the frozen pie crust. Then arrange the pecans on the pie filling in a decorative manner.: As you pour, the filling will be glossy and viscous, flowing slowly into the crust. The contrast between the fluid filling and the cold crust is important, because a frozen crust reduces the chance of a soggy bottom. When you arrange the pecans , press some lightly into the filling so they anchor, and place others on top for visual texture. The heat from the filling will slightly warm the nuts, releasing their aroma. For even baking and an attractive top, try placing whole pecans in concentric rings or a simple lattice; this helps each slice contain visible nuts. A typical mistake is overcrowding the surface which can prevent the filling from rising properly under the nuts, so leave a little breathing room between pieces if you want clear contrast.
- Bake for 45 to 50 minutes, until the center is set and not jiggly.: During baking you will see the filling bubble gently around the edges and the surface darken to a glossy, deep amber. The audible hint is a faint, steady bubbling, and visually the center should lose its wet shine and only wobble slightly when nudged. This indicates the custard proteins have coagulated and the sugars have caramelized just enough to form that signature top. To avoid overbaking, which yields a rubbery texture, start checking at about 45 minutes; the pie may still be slightly soft but will firm as it cools. If the crust edges brown too quickly, tent them with foil to prevent burning while the center finishes cooking. A common misstep is removing the pie immediately; cooling is critical, because the filling continues to set as it loses heat, giving you clean slices rather than a runny mess.
Notes
- Toast the pecans: Lightly toasting the pecans in a dry skillet before assembling enhances their nuttiness and aroma, giving a deeper flavor to each bite.
- Edge protection: If the crust edges brown too quickly, tent them with foil halfway through baking to keep the rim golden without burning.
- Presentation tweak: Arrange whole pecans in concentric circles on top for an elegant look that makes slices look picture perfect.
- Chill before slicing: Refrigerate the baked pie for at least two hours to make slicing neater and to let the filling fully set.
- Make ahead: Bake the pie a day in advance and store it covered in the refrigerator; flavors meld and the texture remains excellent for up to three days.