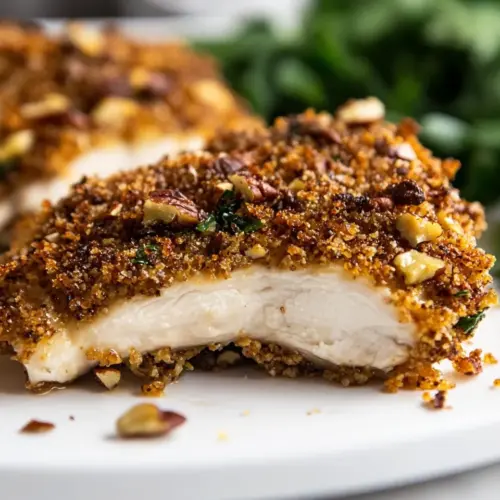
Pecan Crusted Chicken
Pecan Crusted Chicken delivers a crunchy, toasty coating with a sticky honey mustard finish. This easy weeknight dinner balances savory spices, chopped pecans, and gluten free panko for a reliably crisp crust. Juicy chicken breasts get a restaurant quality sear with minimal fuss, making it perfect for simple entertaining or family meals.
Equipment
- Rimmed Baking Sheet
- Cooling rack
- Rolling pin or meat masher
- Large rimmed plate
- Large Bowl
- Instant read thermometer
Ingredients
- 4 boneless, skinless chicken breasts (about 1 lb total, or 4 oz each) Butterfly or pound to even thickness and cook thoroughly to provide the primary protein and hearty base for the dish; offers a neutral canvas that pairs well with crunchy pecan coating and tangy glazes.
- 2/3 cup gluten-free panko breadcrumbs Provide a light, crisp texture when baked or pan-fried to create a crunchy outer layer; helps absorb seasonings and bind crumbs to the chicken surface for even browning.
- 2/3 cup pecans finely chopped Add a rich, nutty crunch and toasting aroma to form the signature pecan crust; finely chopping ensures even coverage and an appealing texture contrast with tender chicken.
- 2 teaspoons ground mustard Impart a warm, slightly sharp flavor to the coating, enhancing the overall savory profile and complementing the mustard elements in the glaze; mixes smoothly into dry breadcrumb mixture.
- 1 teaspoon onion powder Contribute a mild savory-sweet onion background that deepens the crust’s flavor without overpowering; works well blended into the dry mix for consistent seasoning.
- 1/2 teaspoons smoked paprika Provide a smoky, warm note to the crust to add depth and complexity; a small amount intensifies the overall flavor without making the dish spicy.
- 1 teaspoon ea salt Season the chicken and crust to enhance and balance flavors throughout the dish; ensures each bite is seasoned and brings out the natural taste of the chicken and pecans.
- 1/4 cup mayonnaise Bind the pecan-panko mixture to the chicken and add a creamy, slightly tangy layer that keeps the crust moist while baking; helps create a golden exterior.
- 2 tablespoons honey Introduce a touch of sweetness to balance the tangy mustard and savory crust; helps glaze the chicken and caramelize slightly during cooking for flavor contrast.
- 1 tablespoon yellow mustard Add a sharp, bright tang that cuts through the richness of the pecan crust and mayonnaise; contributes to the glaze’s emulsified texture and lively flavor.
- 4 teaspoons honey Provide additional sweetness for layering flavors in the glaze or finishing sauce; helps achieve a balanced sweet-savory profile and aids in caramelization.
- 2 teaspoons yellow mustard Deliver a mild, tangy kick to round out the glaze and harmonize with the other mustard components; small measure sharpens the overall flavor without overwhelming.
Instructions
- Heat your oven to 425°F and place a cooling rack on top of a rimmed baking sheet.: The room quickly fills with a faint warmth, and preheating ensures the oven is ready to crisp the coating from the moment the chicken goes in. I can smell a faint mineral note from the heating metal that makes me know it is getting hot enough. Using a cooling rack on a rimmed sheet promotes airflow around the breasts so the bottom does not steam, and it allows fat or excess mayo to drip away, leading to a dryer, crunchier crust. A common mistake is skipping the rack and placing the meat directly on the sheet which often produces soggy undersides. If your oven takes longer to stabilize, let it preheat an extra five minutes so the initial blast is consistent.
- Place chicken on a cutting board and use a rolling pin or meat masher to pound out to about 3/4-inch thick. Sprinkle generously with salt on both sides.: As you pound, the chicken relaxes and spreads into a uniform thickness that cooks evenly. The sound of the pounding is rhythmic and reassuring. When the breasts reach about 3 quarters inch, you will notice the fibers become looser and the surface evens out, which helps the crust adhere well. Salting both sides now seasons the meat internally, drawing out a touch of moisture that then reabsorbs, improving juiciness. A typical error is over pounding, which can tear the meat or make pieces too thin, resulting in dryness. Use measured force and check thickness frequently for uniform results.
- In a large, rimmed plate, mix together the panko, pecans, ground mustard, onion powder, paprika, and salt.: The dry mix develops a warm, nutty aroma as the ground mustard and paprika release their scent. Tossing on a rimmed plate helps you dredge without making a mess, and you will feel the gritty texture of the panko combined with the slightly oily crumb of the chopped pecans . This combination provides the textural contrast that will crisp up in the oven. If your nut pieces are uneven, you might get inconsistent browning, so chop to a consistent size. Overmixing can crush delicate crumbs, so fold gently until evenly distributed.
- In a large bowl, whisk the mayo, honey, and mustard together.: Whisking creates a glossy, slightly thick emulsion that clings to the meat. The mixture becomes aromatic with a sweet tang, and the glossy sheen indicates it will spread easily. This binding blend is crucial because it helps the crumb mixture adhere and contributes to moisture retention during baking. A common pitfall is not whisking long enough, which leaves the honey unincorporated and can lead to uneven sweetness. Aim for a smooth, even texture before coating.
- Use one hand to coat the chicken in the mayo mixture, shaking off any excess (it should be well-coated but not dripping). Place the chicken in the pecan mixture and use your other hand to pack on the pecan mixture to the chicken. Coat both sides and really press the pecan mixture in. Once well-coated, place each chicken breast onto the cooling rack and repeat for all the chicken.: The tactile act of pressing the crust into the meat is oddly satisfying, and you will feel the gritty mixture adhere as you press. Packing the crumbs ensures they stay attached during baking rather than falling off. The surface should feel grainy and adherent without slumping. A frequent mistake is leaving the coating loosely attached which causes it to flake off mid bake. Press firmly and evenly, and let any visible drips run off before placing on the rack to reduce sogginess.
- Spray the chicken with cooking spray and bake for 10 minutes. Flip and bake for another 10 minutes, or until the internal temperature of each breast reads 165°F with a meat thermometer.: As the chicken bakes, you will hear a faint sizzle and smell the nuts toasting as steam escapes. After the first ten minutes, the edges may begin to show light browning, and flipping promotes even color and crispness on both sides. Use an instant read thermometer to ensure an internal temperature of 165°F, which guarantees safety while keeping the meat juicy. A common error is relying on time alone rather than temperature, which can lead to undercooked centers or dried out edges. Check thickness and start checking temperature a few minutes early if breasts are larger than usual.
- Turn the oven to high broil and broil until browned, about 1 to 3 minutes. Watch closely as the crust will burn quickly!: The broiler delivers intense radiant heat that rapidly deepens color and adds extra crunch. You will see the crust blaze to a deep golden brown and smell the caramelized honey and toasted nuts. This step is a finishing flourish that should be watched like a hawk because the sugars in the glaze and honey brown very fast. A typical mistake is walking away during broiling, which can turn the crust from golden to charred within seconds. Keep the oven door slightly open if your broiler allows it and stand ready with oven mitts to pull the tray out instantly.
- Whisk together the remaining honey and mustard.: The final glaze should be glossy and balanced, with the sweet honey smoothing out the piquant mustard. Whisking releases aroma and creates a pourable consistency that will drip in beautiful ribbons over the hot crust. This quick sauce harmonizes the overall flavor, giving a bright finish against the rich nutty crust. If mixed too early, the glaze can separate, so prepare it right before serving for the best texture.
- Drizzle the honey mustard mixture over the cooked chicken and let it rest for 5 minutes before slicing and serving.: The residual heat helps the glaze meld into the crust while the brief rest allows juices to redistribute through the chicken . You will notice the glaze sinking slightly into the crust and the aromas becoming more integrated. Cutting immediately can cause juices to run out and make the meat drier on the plate, so rest patiently for those five minutes. A common misstep is skipping the rest which leads to less juicy slices and a messier presentation.
Notes
- Prep ahead Mix the dry crumb and nut blend in advance and store it in an airtight container for up to two days to save hands on time when assembling.
- Room temperature chicken Let the chicken sit at room temperature for about 15 minutes before baking so it cooks more evenly between edge and center.
- Oil spray choice Use a neutral oil cooking spray just before baking to promote browning without adding excess moisture that could soften the crust.
- Broiler distance Position the rack two to four inches from the broiler element so you get a quick golden finish without risking immediate charring.
- Thermometer tip Insert the thermometer into the thickest part of the breast to ensure the most accurate reading and avoid overcooking.
- Leftover storage Refrigerate cooled cooked chicken in an airtight container for up to four days; reheat briefly in a hot oven to revive crispness.