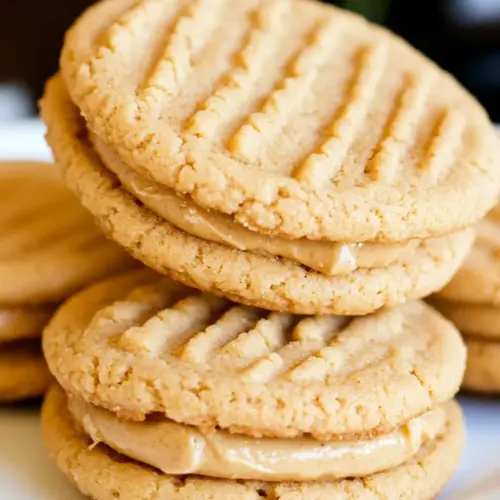
Peanut Butter Sandwich Cookies
Peanut Butter Sandwich Cookies are crispy edged, tender centered cookies filled with a fluffy peanut butter cream, offering a creamy and slightly sweet bite that’s perfect for snack time or gifting. The texture contrast and nutty flavor make them an easy crowd pleaser and a great choice for an easy weeknight baking project, promising consistent, comforting results every time.
Equipment
- Electric Mixer
- Mixing Bowls
- Rolling Pin
- Baking Sheets
- Parchment Paper
- Wire Rack
- Offset Spatula
Ingredients
- 2 cup (250 g) all-purpose flour, plus more for dusting Sifted and measured to provide structure and body to the dough; contributes gluten for chew and helps hold cookies together while baking. Adds a neutral base that balances sweet and savory flavors and can be dusted to prevent sticking when rolling or shaping. Adjusts texture when mixed with leaveners and fats to create the desired tender crumb.
- 1/2 teaspoon (0.5 teaspoon) baking soda Creamed into the dry mix to react with acidic components and provide lift; ensures cookies rise slightly and develop lightness without becoming cakey. Distributed evenly, it helps create tiny air pockets that give a pleasant bite and prevent dense results.
- 1/4 teaspoon (0.25 teaspoon) salt Blended into the dry ingredients to enhance flavor balance and control fermentation of leaveners; helps bring out sweetness and counteracts richness from fats and peanut butter. Also contributes to overall seasoning so the sweetness doesn’t become cloying.
- 3/4 cup (170.25 g) unsalted butter, at room temperature Softened and creamed with sugars to incorporate air for tenderness; adds richness, moisture, and flavor depth while contributing to spread and structure. Room-temperature butter blends smoothly with peanut butter and sugars to create a cohesive, pliable dough that bakes to a tender texture.
- 3/4 cup (193.5 g) creamy peanut butter Creamed with butter and sugars to supply nutty flavor and additional fat; helps create a tender, moist crumb and distinct peanut flavor throughout the cookie. Its creaminess improves mouthfeel and enables good incorporation with dry ingredients for uniform texture.
- 1/2 cup (100 g) granulated sugar Beaten with butter and peanut butter to sweeten and help creaming create lightness; contributes fine granularity that influences spread and chew. Works with brown sugar to balance sweetness and aids in caramelization for browned edges.
- 1/2 cup (110 g) light brown sugar Mixed with granulated sugar and fats to add moisture, deeper caramel notes, and chewiness; its molasses content helps maintain soft texture in the finished cookies. Balances sweetness while providing slight chew and complex flavor.
- 1 egg Beaten in to bind ingredients together and add moisture and richness; contributes to structure and helps with leavening from trapped air in the beaten egg. Adds color and improves the cookie’s cohesive texture during baking.
- 1 teaspoon vanilla extract Whisked with wet ingredients to add aromatic sweetness and enhance overall flavor depth; complements peanut butter and vanilla-forward profiles. Small amount lifts the aromatic profile without altering texture significantly.
- 6 tablespoons unsalted butter, at room temperature Softened and used in the filling to ensure a luscious, spreadable consistency; increases richness and helps stabilize the filling when creamed with peanut butter and powdered sugar. Room-temperature butter blends smoothly to create a silky texture for sandwiching cookies.
- 3/4 cup (90 g) powdered sugar Sifted into the filling to provide sweetness with a fine, melt-in-mouth texture; helps thicken and stabilize the butter-peanut butter mixture for piping or spreading. Creates a smooth, creamy filling that holds shape without grittiness.
- 3/4 cup (193.5 g) creamy peanut butter Combined with butter and powdered sugar in the filling to impart pronounced peanut flavor and creamy body; reinforces the cookie’s peanut theme and contributes to a cohesive, flavorful sandwich center. Its oil content helps maintain softness and spreadability.
- 3 tablespoons heavy cream Added to the filling to loosen and smooth the mixture for proper piping or spreading; contributes a touch of richness and helps achieve desired consistency without thinning the filling excessively. Small amount improves mouthfeel and helps the filling set to a pleasant creaminess.
Instructions
- In a medium bowl, whisk together the flour, baking soda, and salt; set aside.: As you whisk these dry ingredients, notice the faint flour scent shifting from raw to slightly toasted depending on your flour. This step ensures the baking soda distributes evenly, which prevents uneven rise while baking. Combining now also avoids pockets of leavening that could cause one area to puff more than another. A common mistake is underwhisking, which leads to uneven texture in the cookies, so take a moment here to get a uniform mixture.
- Beat the butter, peanut butter, and sugars with an electric mixer on medium-high speed until light and fluffy, 2 to 3 minutes. Add the egg and vanilla and beat to combine, scraping down the sides of the bowl as needed. Reduce the mixer speed to low and add the flour mixture, mixing until incorporated, about 1 minute.: When creaming, watch the mixture transform from dull and dense to pale and aerated, and listen for a slight change in the motor sound as resistance drops. The sugars begin to dissolve and the fats trap tiny air bubbles, which are crucial for tenderness and subtle lift. Scrape down the bowl occasionally so everything incorporates evenly. If you skip scraping, you risk pockets of uncreamed butter that will alter texture and baking consistency.
- Divide the dough in half, and shape into two rectangles. Wrap in plastic and refrigerate at least 30 minutes or up to 1 day.: After adding the egg and vanilla, you will see the mixture become glossy and more cohesive, the aroma brightening as the vanilla unfolds. This step helps bind the dry ingredients later and encourages a consistent crumb. Scraping prevents streaks of unmixed egg, which could lead to uneven dough moisture. A mistake here is overbeating the egg, which can cause excess elasticity in the dough.
- When ready to bake the cookies, preheat the oven to 325 degrees F. Line two baking sheets with parchment paper. If you refrigerated the dough longer than 30 minutes let it stand at room temperature to soften a bit. On a lightly floured work surface, roll out the dough to a 1/4-inch thickness. Using a sharp knife or pizza cutter (my favorite for cutting dough like this!), cut the dough into 2 1/2-by-1-inch rectangles. Using the floured tines of a fork, score the top of each cookie. Transfer cookies to prepared baking sheets, placing 1 1/2 inches apart, and refrigerate until firm, about 15 minutes.: With the mixer low, the flour blends in without creating too much gluten, preserving tenderness. You should see the dough come together around the paddle, slightly sticky but manageable. Mixing too long or on high will develop gluten and produce tough cookies; under-mixing leaves streaks of flour, so aim for that sweet spot.
- Bake until lightly golden around the edges and firm in the center, 15 to 20 minutes. Transfer to a wire rack to cool completely.: When shaping, the dough feels cool and slightly pliable, which helps create neat rectangles for even rolling. Wrapping each rectangle tightly prevents dry spots and makes the dough easier to handle after chilling. A frequent error is wrapping loosely, which allows the surface to dry out and crack during rolling later.
- Meanwhile, make the peanut butter filling. Combine the butter, powdered sugar, peanut butter, and heavy cream and beat with an electric mixer on medium-high speed until light and fluffy, about 5 minutes, scraping the sides of the bowl as needed. Use immediately, or transfer to an airtight container and refrigerate up to 3 days. If refrigerated, let filling stand at room temperature to soften before using.: Chilling firms the fat, which leads to cleaner cuts and steadier cookies during baking. The chill also allows flavors to meld and the dough to relax, making it less prone to shrinking as it bakes. If you leave it beyond a day, let it sit briefly to take the chill off so rolling is easier. Avoid trying to roll unchilled dough, which results in misshapen cookies and excessive sticking.
- Using an offset spatula, spread 1 tablespoon of filling onto the flat sides of half of the cookies. Sandwich with remaining cookies, keeping the flat sides down. Unfilled cookies can be kept in an airtight container at room temperature for up to 1 week. Once filled, cookies are best eaten the same day, but can be kept in the refrigerator for up to 3 days.: Preheating ensures even heat from the start, so the cookies bake consistently. You should smell a faint warm air as the oven approaches temperature, and all racks should be positioned to allow airflow. Baking without preheating leads to uneven spread and inconsistent textures, so always wait until the oven reaches the set temperature.
- Line two baking sheets with parchment paper: Lining sheets prevents sticking and encourages even browning, plus it simplifies cleanup. Parchment creates a slight buffer so bottoms brown gently instead of scorching. If you skip parchment, rotate sheets midbake and watch closely for uneven coloring, or you may end up with bottoms that are too dark.
- If you refrigerated the dough longer than 30 minutes let it stand at room temperature to soften a bit: Letting the dough warm slightly makes rolling smoother and prevents cracks. It should still be cool to the touch, but pliable enough to roll to a quarter inch thickness without tearing. A common misstep is waiting too long and returning to overly soft dough that spreads excessively while baking.
- On a lightly floured work surface, roll out the dough to a 1/4 inch thickness: Rolling to this thickness yields cookies that bake up with crisp edges and a tender center. Use gentle, even pressure and rotate the dough occasionally so it stays even. Dust the surface sparingly to avoid incorporating extra flour, which would dry the dough. If the dough resists rolling, chill it briefly rather than adding more flour.
- Using a sharp knife or pizza cutter cut the dough into 2 1/2 by 1 inch rectangles: Clean cuts yield neat, consistent cookies that look professional after baking. Pay attention to the sound of the cutter, a clean slice should be quiet and smooth. Uneven cuts will bake at different rates, creating a mix of over- and underbaked pieces, so aim for precision.
- Using the floured tines of a fork score the top of each cookie: The fork tines create a classic lined pattern and help the top brown evenly, adding a visual cue for doneness. Light, even scoring prevents tearing and preserves shape while baking. Pressing too hard can flatten the cookie excessively, so apply gentle pressure for uniform lines.
- Transfer cookies to prepared baking sheets placing 1 1/2 inches apart and refrigerate until firm about 15 minutes: Chilling on the sheet firms the cookies and helps them maintain their shape during the initial oven heat. You'll notice a slight sheen dull as they cool and set. If you skip this chill, cookies may spread too much and lose their crisp edges.
- Bake until lightly golden around the edges and firm in the center 15 to 20 minutes: As they bake, watch for a pale golden rim and a set center where the cookie no longer jiggles. The kitchen will start to smell of toasted peanuts and butter, a sure sign that flavors are developing. Overbaking dries the centers, so pull them as soon as the edges color and the centers feel firm.
- Transfer to a wire rack to cool completely: Cooling on a rack prevents steam from softening the bottoms, preserving the crisp edge you worked for. The cookies will continue to set as they cool, and the texture becomes pleasantly tender. Stacking while warm traps moisture and causes soggy spots, so allow full cooling before assembly.
- Meanwhile make the peanut butter filling: While cookies cool, the filling comes together into a fluffy center that contrasts the crisp cookie. Whipping develops air that lightens the texture, and the aroma of peanut butter brightens as it aerates. If you rush and assemble with warm cookies, the filling may melt, so ensure cookies are fully cool.
- Combine the butter powdered sugar peanut butter and heavy cream and beat with an electric mixer on medium high speed until light and fluffy about 5 minutes: This process creates a silky, stable filling with a smooth mouthfeel. Listen for the mixer tone to change as it becomes airy, and scrape the bowl so every bit is incorporated. Overbeating can make the filling slightly greasy, while underbeating leaves it dense, so aim for that soft peak stage.
- Use immediately or transfer to an airtight container and refrigerate up to 3 days: Stored, the filling stays fresh and can be softened at room temperature when ready to use. Chilled filling will firm, so allow it to come back to spreadable consistency before assembling. A common issue is applying too-cold filling which tears the cookie, so time this step to match cookie temperature.
- Using an offset spatula spread 1 tablespoon of filling onto the flat sides of half of the cookies: The spatula helps you control layer thickness and keeps the spread even, creating balanced sandwiches. One tablespoon generally provides enough filling without overwhelming the cookie, and the texture should be airy and smooth. If you mound too much, the sandwich becomes top heavy and messy to eat.
- Sandwich with remaining cookies keeping the flat sides down: Aligning the flat sides makes the sandwiches neat and stable, and pressing gently brings the textures together without flattening them. The finished cookie should feel cohesive but not squashed. Pressing too hard squeezes the filling out, so a gentle press is best.
- Unfilled cookies can be kept in an airtight container at room temperature for up to 1 week: Stored this way, they retain crispness and are ready for filling later. Filled cookies are best the same day, or chilled for up to 3 days for a slightly firmer experience. Forgetting to separate layers with parchment can cause sticking and ruin presentation, so layer carefully if storing filled.
Notes
- Chill for cleaner cuts Always chill the shaped dough until firm, because chilled fat creates sharper edges when you cut and bake, preventing spreading.
- Use room temperature butter Room temperature butter creams smoothly with sugars, producing an aerated base and a tender crumb in the finished cookie.
- Sparingly flour the surface Use just enough flour to prevent sticking while rolling, as excess flour will dry the dough and make cookies tough.
- Beat filling until light Whipping the filling for the full recommended time incorporates air, resulting in a fluffy spread that contrasts nicely with the cookie texture.
- Cool completely before filling Allow cookies to cool on a rack so the filling does not melt and the sandwiches remain neat and intact.
- Store layers with parchment When storing filled or unfilled cookies, separate layers with parchment to avoid sticking and maintain presentation.