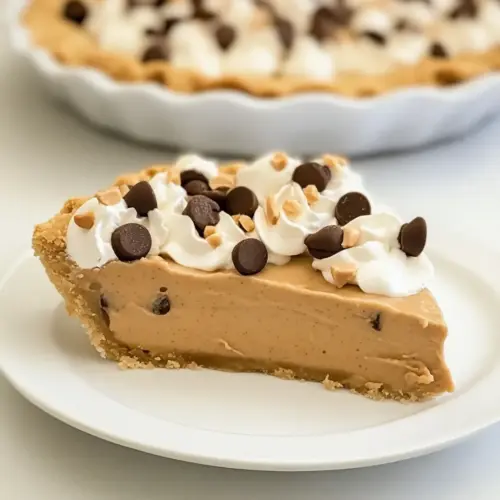
Peanut Butter Pie
Peanut Butter Pie is a creamy, nutty dessert with a crunchy cookie crust and a glossy chocolate layer. This easy make ahead pie combines silky peanut butter, tangy cream cheese, and whipped heavy cream for a light, airy filling that pleases any crowd. Perfect for casual gatherings or special occasions, it delivers big flavor with minimal fuss.
Equipment
- Food Processor
- Mixing Bowl
- Hand mixer or stand mixer
- Pie Pan or Spring Form Pan
- Microwave-safe Bowl
- Spatula
Ingredients
- 8 ounces chocolate cookies Crushed to create a sturdy, chocolatey base and add texture; provides the primary structure for the pie crust when combined with melted butter. Enhances flavor with deep cocoa notes and complements the peanut butter filling. Packs down firmly to hold the pie’s shape during slicing.
- 4 tablespoons butter, melted Melted to bind the cookie crumbs together and form a cohesive crust that sets when chilled. Contributes richness and slight gloss to the crust while helping it hold its shape. Allows the crumb mixture to compact and maintain stability during baking or chilling.
- 4 ounces finely chopped chocolate or semi-sweet chocolate chips Finely chopped to add concentrated chocolate flavor and small pockets of texture within the filling or garnish. Melts slightly when combined with warm elements or when the pie rests, creating ribbons of chocolate. Balances sweetness and provides contrast to the creamy peanut butter.
- 1/4 cup chopped peanuts Chopped to contribute crunchy contrast and nutty depth to the pie, either folded into the filling or sprinkled as a topping. Adds visual interest and reinforces the peanut profile of the dessert. Can be toasted lightly to intensify flavor before use.
- 1 cup heavy cream Whipped to create lightness and volume in the topping or filling, contributing airy texture and richness. Stabilizes whipped components when chilled and adds a creamy mouthfeel that balances denser elements. Can be sweetened slightly to complement the filling.
- 8 ounces cream cheese Softened to provide tangy creaminess and structure to the filling, helping it hold shape while offering a smooth mouthfeel. Balances sweetness with subtle acidity and adds body to the peanut butter mixture. Should be beaten until smooth for a lump-free texture.
- 1 cup creamy-style peanut butter Stirred in as the principal flavor and fat component, lending pronounced peanut flavor and creamy consistency to the filling. Provides richness and helps create a spreadable, sliceable texture when combined with other creamy ingredients. Offers savory-sweet balance that defines the pie’s profile.
- 1 cup confectioner's sugar Sifted or beaten in to sweeten and slightly thicken the filling, lending a fine texture and smooth finish. Helps stabilize the structure and enhances overall sweetness without graininess. Can be adjusted to taste for desired sweetness level.
- 14 oz can sweetened condensed milk Poured in to add rich sweetness and smooth body, increasing moisture and providing a glossy, dense texture to the filling. Acts as a binder for the creamy components and gives the pie a luscious, custard-like quality. Contributes sweetness that melds with peanut and chocolate flavors.
- 1 teaspoon vanilla extract Added to enhance and deepen overall flavor with warm, aromatic vanilla notes while rounding out sweetness. Helps unify the different elements and complements both chocolate and peanut profiles. Use sparingly to avoid overpowering delicate flavors.
- 1 teaspoon freshly squeezed lemon juice Squeezed in to introduce subtle acidity that brightens flavors and balances sweetness in the filling. Helps prevent the cream cheese from tasting too flat and can slightly firm the texture by interacting with dairy proteins. Small amounts adjust flavor complexity without becoming noticeable.
Instructions
- Add chocolate cookies to the bowl of a food processor and process until crumbs form.: The first sensory cue you should notice is the deep cocoa aroma as the cookies break down into a fine sandy texture. This even crumb is important so the butter can coat every particle and lock the crust together; if the crumbs are too coarse the crust will fall apart when you slice the pie. A common mistake is overfilling the processor bowl which leads to uneven processing, so work in batches if your processor seems to struggle. The sound is a consistent whir with occasional larger crunches when a bigger piece breaks. Visually, aim for uniformity like coarse sand, not powder, so the crust has some body.
- Add cookie crumbs to a small bowl and combine with melted butter, mix well.: Right away you will feel the warmth from the melted butter and see the crumbs glisten as they absorb it. Stir until all crumbs look evenly moistened; the mixture should hold together when pressed. The why here is simple, the fat binds the crumbs and helps them set firmly in the pan. If you skimp on butter the crust will be dry and crumbly; if you add too much it will be greasy and dense. Use the back of a spoon to press and fold so every crumb is coated.
- Firmly press the mixture into the base of a pie pan or spring form pan. Press the mixture about 1-inch up the sides of the pan.: You will notice the satisfying compact feel as the crust goes into place, and the surface will smooth under firm pressure. Pressing firmly ensures the crust holds when slicing, and building it up the sides creates structure to contain the filling. A frequent error is pressing unevenly, leaving thin spots that crumble later; take a few extra seconds to check the edges. The crust should be uniformly dense and slightly glossy from the butter .
- Melt the chocolate in the microwave: Place the chopped chocolate into a microwave-safe bowl, but reserve 1 tablespoon to add at the end. Place the bowl into the microwave for 20 seconds. Stir, then put it back into the microwave for another 20 seconds and stir again. Continue to heat then stir until the chocolate is just melted, now add the reserved chocolate from earlier and stir until it is completely smooth.: Place the chopped chocolate into a microwave-safe bowl, but reserve 1 tablespoon to add at the end. Place the bowl into the microwave for 20 seconds. Stir, then put it back into the microwave for another 20 seconds and stir again. Continue to heat then stir until the chocolate is just melted, now add the reserved chocolate from earlier and stir until it is completely smooth : As you heat the chocolate you will smell its rich scent, and stirring transforms grainy bits into a glossy liquid. Reserving a tablespoon to stir in at the end, a technique called seeding, helps achieve a smooth, silky texture and prevents overheating. Overheating is the most common mistake, leading to grainy or seized chocolate, so take short bursts and stir frequently. When smooth, the chocolate should flow like glossy ink and hold a reflective shine when tilted.
- Pour melted chocolate over the bottom of the cookie crust and spread into an even layer. Sprinkle chopped peanuts over the chocolate then place the pan into the refrigerator while preparing the filling.: The chocolate will sizzle slightly as it meets the cool crust, and spreading it quickly ensures a uniform seal that helps keep the filling from soaking into the crumbs. The chopped peanuts will press lightly into the chocolate, sticking as it sets and providing the textural contrast you want in each bite. Chill so the chocolate firms up, otherwise the filling can cause it to mix into the crust. Avoid pouring while the chocolate is too hot, which can melt the crust butter and make it greasy.
- Pour heavy cream into a large bowl and whip, either with a hand mixer or stand mixer until soft peaks form. Place whipped cream into the refrigerator.: Whipping heavy cream introduces air so the filling remains light; you should hear a gentle, rhythmic whir and see the cream thicken and form peaks that slightly curl at the tip. Stop at soft peaks to make folding easier and to prevent graininess. Overwhipping will lead to butter formation, which ruins the light texture, so pause to check frequently. Cool whipped cream helps maintain structure when folded into the filling.
- Add cream cheese and peanut butter to a large bowl, beat on medium speed until combined. Next, add condensed milk and beat until incorporated then, slowly add confectioner's sugar until incorporated. Add vanilla extract and lemon juice and increase speed to medium high, beat until filling is smooth.: When you start mixing, the combined scent of cream cheese and peanut butter becomes more pronounced and signals the base for your filling. The texture will pass through stages from lumpy to homogenous; patience here matters because smoothness prevents gritty pockets. Adding sweetened condensed milk and then confectioner's sugar gradually ensures the sugars dissolve and the mixture stays silky. Increasing speed at the end helps aerate and refine the texture. A common slip is leaving lumps of cream cheese , so scrape the bowl and beat until completely smooth.
- Stir 1/3 of the reserved whipped cream into the filling. Fold in the remaining whipped cream.: The moment you blend in the whipped heavy cream the filling lightens and you will feel it become buoyant and mousse like. Start by adding a third to loosen the base, then fold gently to keep those air bubbles intact, because that is what yields a tender final slice. Vigorous stirring will deflate the mixture and make it dense, which is the most frequent mistake at this stage. Use wide strokes and a gentle hand, turning the bowl as you fold to ensure even distribution.
- Pour filling into prepared pie pan/dish, smooth the top and sprinkle with additional chocolate or peanuts. Refrigerate for at least 3 hours before serving.: Pouring the filling releases a soft, glossy surface and a nutty aroma. Smooth the top with a spatula so each slice looks neat, and scatter the reserved chopped peanuts or extra grated chocolate for visual contrast. Refrigeration is the final step that allows the filling to set, and patience pays off because it firms without losing creaminess. A common misstep is slicing too soon, which yields a messy serving; wait the full chill time for clean slices and best texture.
Notes
- Adjust sweetness: If you prefer a less sweet dessert, reduce the confectioner's sugar slightly and rely on the sweetened condensed milk for body, tasting as you go.
- Firmness control: For a firmer pie, chill overnight; for a softer set, shorten the chill by a few hours, checking after three hours.
- Whip peak levels: Stop whipping the heavy cream at soft peaks for easier folding, but if you like a denser filling, aim for medium peaks cautiously.
- Crust texture: Pulse the chocolate cookies until fine but not powdered to keep a pleasant bite in the crust.
- Peanut crunch: Toast the chopped peanuts briefly in a hot pan to intensify flavor before sprinkling them on the chocolate layer.
- Layering technique: Spread the melted chocolate as thinly as possible for a crisp seal between crust and filling while still allowing chopped peanuts to adhere.