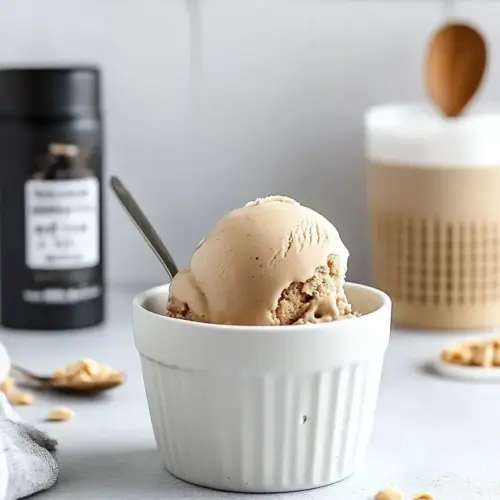
Peanut Butter Ice Cream
Peanut Butter Ice Cream is a creamy, nut forward frozen treat that blends rich peanut butter with smooth half & half for an irresistibly silky scoop. This easy, no fuss dessert delivers deep roasted flavor and great scoopability, perfect for summer gatherings or an indulgent weeknight finish. Make it ahead for effortless entertaining and watch it disappear.
Equipment
- Blender
- Refrigerator
- Ice Cream Maker
- Freezer
Ingredients
- 3/4 cup creamy peanut butter such as Jif Adds creaminess and rich peanut flavor while providing fat that creates a smooth, luscious mouthfeel in the ice cream. Helps emulsify and bind the mixture so the final texture is dense and scoopable without being icy.
- 3/4 cup plus 2 tablespoons sugar Sweetens the custard base and balances the savory peanut notes while helping to lower the freezing point for a softer texture. Contributes bulk and structure to the mixture, ensuring proper sweetness throughout the ice cream.
- 2 2/3 cups half & half Provides a balanced dairy base that contributes both fat and liquid needed for a creamy, stable ice cream. Supplies subtle dairy flavor and body while working with the sugar to control freezing and texture.
- pinch of kosher salt Enhances overall flavor by subtly boosting sweetness and rounding out the peanut profile while helping to balance the palate. Small amounts also accentuate other flavors without making the ice cream salty.
- 1/4 teaspoon pure vanilla extract Adds a delicate aromatic lift and depth to the frozen dessert, rounding out the sweet and nutty flavors. A small amount brightens the profile and complements the richness of the peanut butter.
Instructions
- Puree the peanut butter, sugar, half & half, salt, and vanilla in a blender or food processor until smooth.: The instant you start blending, you will hear a steady whir and see the mixture take on a glossy sheen, signaling that the sugars and fats are beginning to marry. The aroma will open up, the roasted, toasty notes from the peanut butter becoming more aromatic, and the mixture should look homogenous with no streaks. Why this matters, I have learned, is that a fully emulsified base prevents graininess and ensures even freezing. A common mistake I see is under-blending, which leaves little pockets of undissolved sugar or lumps of peanut butter . If you notice any textural bits, keep pulsing until everything appears smooth, and scrape the sides to capture any stuck fragments.
- Chill the mixture thoroughly in the refrigerator.: Cooling the base changes not only temperature but texture; as it chills, it thickens slightly and the flavors relax into each other, producing a rounder, more coherent profile. You will feel the mixture go from loose and warm to pleasantly cool and slightly viscous. Chilling is essential because a cold base churns into a lighter, creamier ice cream more quickly, minimizing ice crystal formation. One frequent oversight is rushing this step; try to give it adequate time in the fridge rather than forcing it into the machine warm, which can yield a greasy, dense result.
- Freeze the mixture in an ice cream maker according to the manufacturer’s instructions.: As the churn begins, the sound of the dasher moving through the mixture is reassuring, and you will see the volume increase slightly and the texture transform into soft serve. The cold, aerated stage is where ice crystals are kept small and the mouthfeel becomes luxurious. This technique matters because churning introduces air and controls the crystal structure, which ultimately defines scoopability. A troubleshooting tip: if your machine is slow to firm, confirm the base was well chilled, and do not run the maker for an overly long time past the suggested window, as that can strain motors or lead to over-churning.
- Transfer to a freezer-safe container and freeze for a few hours or overnight before serving.: Moving the churned ice cream into a container gives it time to harden to a scoopable consistency, and the quiet phase in the freezer lets the flavors settle, producing a cohesive, dense finish. Visually, you will see the surface firm up and a gentle sheen replace the gloss from churning. This step matters because warm or unsettled ice cream will be too soft to shape and may melt unevenly. A common pitfall is storing the container uncovered, which risks freezer burn and off flavors; pressing a piece of parchment directly on the surface before sealing reduces air exposure and preserves texture.
Notes
- Choose quality creamy peanut butter: The flavor foundation comes from the peanut butter, so pick a jar that has a balanced taste and smooth texture; this reduces the need for adjustments later and gives a pure nutty profile.
- Fully dissolve the sugar: Blend until the mixture looks glossy and uniform, because undissolved sugar can create an unpleasant grainy texture once frozen; scraping the blender sides helps ensure even integration.
- Chill the base thoroughly: Allow several hours in the refrigerator so the base is very cold before churning, this prevents the ice cream maker from working harder and yields a finer texture.
- Mind the churn time: Follow your ice cream maker’s recommended time window; over-churning can heat the mixture, whereas under-churning leads to an overly soft product that will develop larger ice crystals when frozen.
- Seal well for storage: Press a piece of parchment directly onto the surface of the ice cream before sealing the container to minimize air contact and preserve texture and flavor in the freezer.