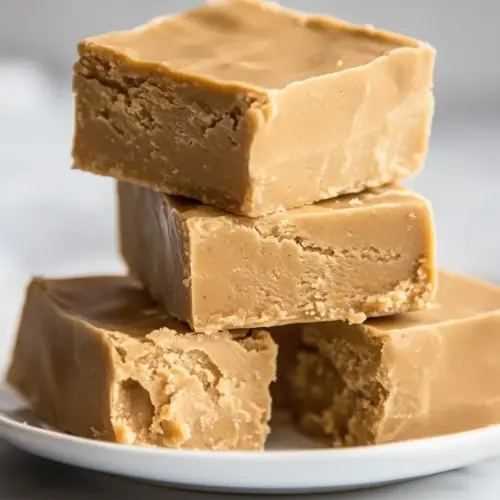
Peanut Butter Fudge
Peanut Butter Fudge is a creamy and easy no fuss treat with a rich nutty flavor and silky texture, perfect for gifting or quick dessert fixes. This simple recipe blends melted butter and creamy peanut butter with powdered sugar for a satisfyingly dense square that cuts cleanly. Make it for holiday plates or an easy weeknight dessert that always impresses.
Equipment
- Large Pot
- Spatula
- 8 x 8 inch baking dish
- Plastic Wrap
Ingredients
- 1 1/4 cups unsalted butter Melted and rich, provides the smooth fat base that carries flavor and creates a creamy, sliceable texture when chilled. Helps set the fudge by solidifying as it cools and contributes a tender mouthfeel. Use unsalted to control overall seasoning and balance sweetness.
- 1 1/4 cups creamy peanut butter Creamy and nutty, supplies concentrated peanut flavor and additional fat for structure and richness. Blends smoothly with butter and sugar to create a cohesive, velvety fudge body. Choose creamy for uniform texture without graininess.
- 1/8 teaspoons salt Balanced and subtle, enhances overall flavor by cutting sweetness and amplifying the peanut notes without becoming noticeable. Stabilizes taste and prevents the final product from tasting overly cloying. Use measured sparingly to avoid over-salting.
- 2 teaspoons vanilla extract Aromatic and sweet, adds depth and a warm, rounded finish that complements the peanut butter. Brightens the flavor profile and enhances perceived sweetness without adding sugar. Stir in at the end to preserve volatile aromatics.
- 4 cups powdered sugar Fine and absorbent, supplies the bulk of sweetness and helps the mixture thicken into a firm, sliceable confection. Dissolves into the fat to create a smooth, dense texture when thoroughly mixed. Sift if needed to prevent lumps and ensure uniform consistency.
Instructions
- Butter an 8 x 8-inch baking dish or cover with parchment paper, making sure to leave plenty of parchment hanging over the sides.: The surface of the prepared dish should gleam with a thin film of butter or be lined with parchment that extends beyond the edges for easy removal. You will notice a faint buttery scent and a slight resistance when your fingers glide over the surface, which signals proper greasing. This step matters because it prevents sticking and helps you lift the entire block of fudge once chilled. A common mistake is skipping the parchment or not greasing the corners well, which leads to tearing when you try to remove the set fudge, so take a moment to press the paper into the corners and smooth out air pockets.
- In a large pot over medium heat, melt 1 1/4 cups unsalted butter and 1 1/4 cups creamy peanut butter, stirring occasionally. Bring to a boil and remove from heat.: As the butter and peanut butter warm, you will first see glossy beads of oil forming then coalescing into a smooth pool, with a comforting, nutty aroma rising from the pot. Keep the heat at medium to ensure the fats melt evenly without scorching; the mixture should shimmer and move fluidly when stirred. This technique creates an emulsion that yields a silky final texture, and rushing with higher heat risks separation and a grainy finish. Avoid walking away during this stage because the sugars and oils can quickly overheat, producing a burnt smell that will ruin the batch.
- Stir in 1/8 teaspoon salt and 2 teaspoons vanilla extract until smooth. Add 4 cups powdered sugar and mix until well combined and smooth with no lumps remaining.: You will see the surface simmer with small bubbles around the edges, and that moment tells you the fats and peanut butter have fully melted together. Removing the pot from heat immediately keeps the mixture from overheating while still allowing residual warmth to help hydrate the sugar later. The reason this matters is that boiling briefly helps integrate the ingredients, but prolonged boil will break down the emulsion and alter texture. A frequent error is leaving it on the heat too long, which can lead to a split mixture where oil separates, so take the pot off promptly once the gentle boil appears.
- Pour the fudge mixture into the prepared baking dish and use the back of a spoon to smooth it into an even layer. Place plastic wrap over the dish and gently press down on the top of the fudge to cover. Refrigerate for 1 hour before slicing.: As you fold in the salt and vanilla extract , the aroma changes subtly, gaining depth and brightness. Stirring at this point helps incorporate those flavors evenly into the warm fat base, creating a unified flavor profile. This step enhances taste and prevents pockets of extract from dominating later. A common issue is adding vanilla while the pot is still aggressively boiling, which reduces its aromatic impact, so stir it in off heat and taste gently to ensure balance.
- Add 4 cups powdered sugar and mix until well combined and smooth with no lumps remaining: When you add the powdered sugar , the mixture will thicken quickly and begin to look creamy, shifting from glossy to a more matte, dense appearance. Use a heavy spoon or sturdy spatula to fold the sugar in, pressing out any pockets of dry sugar against the side of the pot. The final batter should be cohesive and hold its shape when scooped. This stage controls the final firmness, so under mixing leaves gritty pockets, while over mixing can overwork and stiffen the texture. If you encounter lumps, press them against the pot with the spoon until they dissolve into the mixture.
- Pour the fudge mixture into the prepared baking dish and use the back of a spoon to smooth it into an even layer: As you pour, the batter will flow thickly and fill the dish with a dense, glossy surface that loses some sheen as it settles. Using the back of a spoon to smooth ensures an even thickness which helps the fudge set uniformly and look professional when sliced. Pay attention to the corners and edges so the block is consistent from center to rim. One mistake people make is leaving uneven thickness, which causes parts to set harder than others; take a few extra seconds to level it carefully.
- Place plastic wrap over the dish and gently press down on the top of the fudge to cover: Laying plastic wrap directly on the surface prevents a dry skin from forming and helps maintain moisture while the fudge chills. You should feel slight resistance as the wrap meets the warm surface, then a cooling sensation as the mixture begins to lose heat. This protects texture and makes slicing neater later. Avoid tight presses that force the wrap into the fudge too deeply, which can leave indentations; a gentle cover is all you need.
- Refrigerate for 1 hour before slicing: The chilling phase firms the block until it can be cleanly cut into squares, and you will notice the surface lose gloss and become satiny. One hour typically delivers a firm but tender bite; longer chilling yields a more solid, candy like texture. This rest allows flavors to meld and the structure to set as the fats cool. A common misstep is slicing too soon, which results in ragged pieces and sticky knives, so wait the full hour for best results.
Notes
- Swirl in chocolate by melting a small amount of chocolate and folding it gently over the top before chilling for a marbled look and a complementary flavor contrast.
- Add crunchy texture by folding in a handful of chopped nuts or crushed crackers just before pouring to introduce a pleasing contrast to the creamy base.
- Salted top sprinkle a tiny pinch of flaky salt over the surface right before chilling to enhance the nutty notes and give a gourmet finishing touch.
- Smaller portions pour into mini molds or a muffin tin lined with paper cups for individually portioned bites that are perfect for parties and gift trays.
- Slightly softer fudge reduce chilling time by 15 to 20 minutes for a more tender, less candy like texture if you prefer a melt in the mouth feel.