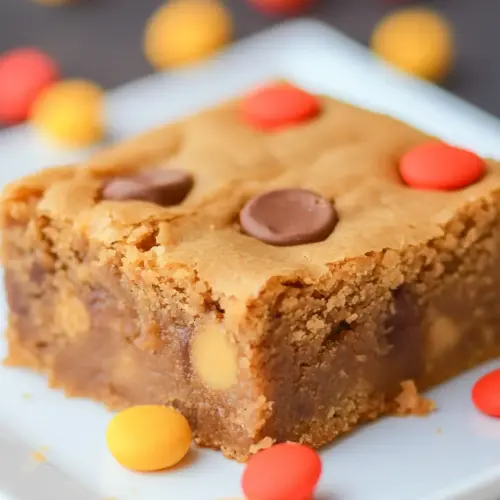
Peanut Butter Blondies
Peanut Butter Blondies are chewy, nutty, and studded with candy for playful pockets of chocolate and peanut butter. These easy bars come together with pantry staples and bake into tender, glossy squares that are perfect for snacks, parties, or treats. Rich, slightly chewy centers and crunchy candy bursts make them irresistible, and they are ideal for anyone craving a simple, crowd pleasing dessert.
Equipment
- Hand Mixer
- 9×13-inch pan
- Parchment Paper
- Wire Rack
Ingredients
- 1 cup unsalted butter melted and slightly cooled to room temperature Melted and slightly cooled to room temperature, provides rich fat for tenderness and moistness, helps dissolve sugars, and contributes to a glossy top when baked; ensures even mixing with other wet ingredients without cooking the eggs.
- 1 cup white granulated sugar Granulated and added for sweetness, promotes structure by aiding creaming with the melted butter, and contributes to lightness and a tender crumb; balances flavors and encourages caramelization at the edges.
- 1 cup brown sugar Brown and used for deeper, more complex sweetness with added moisture from molasses, enhances chewiness and adds a subtle caramel note; helps keep the blondies soft and flavorful over time.
- 3/4 cup creamy peanut butter Creamy and incorporated for intense peanut flavor, adds fat and creamy texture, and helps bind the batter while contributing to chewiness and richness; complements other peanut candies in the blondies.
- 2 large eggs Large eggs beaten and added to provide structure through protein coagulation, help emulsify fats and liquids for a uniform batter, and contribute to leavening and moisture for a tender, cohesive bar.
- 1 egg yolk Separated yolk added for extra richness and fat, increases tenderness and gives a silkier texture, and boosts binding without adding more liquid white protein that could toughen the blondies.
- 1 tablespoon pure vanilla extract Pure extract added for aromatic sweetness and depth, enhances the overall flavor profile and complements the peanut and caramel notes, and provides a subtle, rounded finish to each bite.
- 2 cups all-purpose flour All-purpose and used as the primary dry structure provider, supplies gluten for chew and form while balancing the fat to create a tender crumb; measured to keep the blondies dense but not cakey.
- 1 teaspoon baking powder Baking powder included as a leavening agent to give gentle rise and lift, contributes to a slightly lighter texture while maintaining the chewy bar characteristics, and helps even crumb development.
- 1 teaspoon salt Salt added to enhance and balance sweetness, intensify the peanut and caramel flavors, and subtly strengthen gluten structure; ensures the overall flavor profile is well-rounded and not flat.
- 1 cup Reese’s Pieces Candy pieces mixed in for fruity, crunchy bursts and colorful contrast, add texture and playful sweetness, and reinforce the peanut-candy theme with occasional chewy pockets throughout the blondies.
- 1 cup mini peanut butter cups Mini peanut butter cups added for concentrated pockets of chocolate-peanut flavor, provide gooey, melty centers and extra texture, and create indulgent bites that complement the blondie's base.
Instructions
- Preheat oven to 350°F. Lightly grease a 9×13 inch pan with baking spray, and line it with parchment paper, leaving an overhang on the sides to lift the blondies out. Set aside.: As the oven warms you will smell the faint hum of heat beginning to circulate, and that gentle warmth makes you aware the kitchen is coming to life. This stage sets the scene for even baking, so preheating is non negotiable; an underheated oven will cause the bars to bake slowly and become dense. Lining the pan with parchment ensures easy removal, and the overhang gives you leverage to lift the whole slab out without squashing it. A common misstep is skipping the parchment or not greasing underneath, which can make the edges stick and tear when you try to remove the bars, so take the extra minute to prep the pan carefully.
- In a large bowl, using a hand mixer, whisk the melted butter with white and brown sugar until combined.: Once the butter meets the sugar , you should notice the mixture become glossy and slightly more fluid, with a sweet, caramel like aroma from the brown sugar. The sound is quiet, a soft whirr as crystals begin to disperse into fat. This step helps dissolve granules and ensures an even distribution of sweetness. Overworking at high speed can incorporate too much air and change the texture, so mix just until the sugars are fully moistened. If you spot graininess after a minute, scrape the bowl and mix briefly to finish. Avoid using hot butter straight from the stove, because it can cook the eggs in subsequent steps.
- Whisk in the peanut butter, the eggs, egg yolk, and vanilla extract. Whisk until fully combined.: As you add the creamy peanut butter , the batter will thicken and take on a rich, nutty scent that makes the kitchen feel cozy. The eggs and extra egg yolk bring silkiness and body, and the vanilla lifts the overall flavor, rounding the edges of the sweet notes. You will see the batter become smooth and uniform, with a satiny sheen. Mixing until just combined prevents overdeveloping gluten later when you fold in the flour. A typical pitfall here is beating vigorously; that can introduce too much air and make the finished bars cakey rather than dense and chewy.
- Using a spatula fold in the flour, baking powder, and salt. The batter will be very thick. Fold in Reese’s Pieces and mini peanut butter cups.: The batter should look substantial, almost like a soft cookie dough, and folding preserves the silky texture you created. As you fold, the flour disappears in pockets and the sound is muted, not splattering like a thin batter. The leavening and salt integrate to balance lift and flavor. Gently fold in the Reese’s Pieces and mini peanut butter cups so they are evenly distributed without smashing them; this keeps the candies intact and ensures playful pockets of flavor. Avoid overmixing, which will overdevelop the gluten and make the bars tough.
- Transfer the batter into the prepared pan and spread it evenly. If you have more Reese's pieces on hand sprinkle some on top.: Pressing the batter into the pan gives you an even surface that bakes uniformly, and the top should look slightly glossy and dense. If you sprinkle extra Reese’s Pieces on top they will toast just a touch and provide a cheerful finish. Use a spatula to smooth the top gently; do not press too hard or you will compress air pockets that contribute to a tender crumb. A common mistake is using a wet spatula, which can leave indentations and affect the bake.
- Bake for 30 minutes, then test the blondies with a toothpick. Insert it into the center of the pan and if it comes out with wet batter, bake longer, checking every 3 minutes. If there are only a few moist crumbs, the blondies are done. Do NOT overbake as they will taste a little dry if you do!: As the bars bake the kitchen fills with warm, nutty perfume and the edges will rise slightly and brown. When you tap the pan lightly you might hear a subtle, hollow sound at the edges while the center remains tender. The toothpick test is key because oven hot spots vary; aim for a few moist crumbs, not raw batter. Overbaking dries the bars and dulls the peanut butter flavor, so err on the side of slightly underbaked if you prefer a fudgier center.
- Remove from the oven and place on a wire rack to cool completely.: Cooling on a rack allows air to circulate under the pan, preventing steam from making the bottoms soggy. You will notice steam rising and the aromas settling into a richer, more concentrated scent. Cooling also helps the bars finish setting so they cut cleanly. A common mistake is attempting to cut while too warm, which results in ragged edges and gooey slices, so be patient and let them cool fully.
- Once cooled, lift them out of the pan, cut into bars and serve.: Lifting by the parchment overhang should feel effortless, revealing a neatly set slab. Use a sharp knife and wipe it between cuts for tidy edges. The bars will have a slightly crisp top with a tender interior, and the candies should show scattered pockets of color and melted chocolate. If you see large air pockets, it may indicate overbeating earlier, so adjust your mixing next time.
- Store leftovers in an airtight container at room temperature for up to 1 week.: Stored correctly the bars maintain chew and moisture, and the peanut butter keeps them rich. You may notice slight firming after a day, but they soften again at room temperature. Avoid refrigerating as it can change texture and make them firmer than intended.
Notes
- Swap candy thoughtfully Replace or mix the Reese’s Pieces with other candies of similar size to maintain even distribution without changing bake time.
- Adjust chewiness For a fudgier center, remove the blondies from the oven when a toothpick shows moist crumbs, and allow residual heat to finish them while cooling.
- Toast for depth Toasting the chopped mini peanut butter cups very briefly before folding can deepen their chocolate notes, but watch closely to prevent melting.
- Measure flour correctly Spoon and level the flour when measuring to avoid adding too much, which results in dryer bars.
- Keep extras neat If you plan to transport the bars, cut them after they have chilled slightly so they retain shape and slice cleanly during travel.