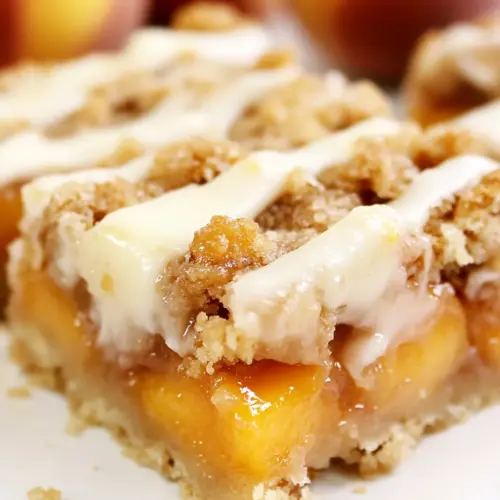
Peach Crumb Bars
Peach Crumb Bars offer a buttery crust, jammy peach filling, and crunchy crumb topping, creating a creamy yet crisp summer treat. These easy bars highlight ripe peaches and a simple glaze, making them perfect for weekend baking or an easy weeknight dessert. Make a full pan to share, they store well and travel beautifully for picnics or potlucks.
Equipment
- 8x8-inch Baking Pan
- Parchment Paper
- Mixing Bowls
- Spatula
- Oven
- Sharp Knife
Ingredients
- 1 cup all-purpose flour or gluten-free flour Provide structure and bulk to the base and topping while enabling a tender crumb; can be swapped for gluten-free flour without changing proportions. Combine with powdered sugar and melted butter to form a cohesive shortbread-like crust that holds the bars together during baking.
- 1/2 cup powdered sugar Sweeten and slightly stabilize the crust by creaming or mixing into the flour and butter; also helps create a delicate, melt-in-your-mouth texture in the base. Powdered sugar dissolves quickly, contributing even sweetness and a finer crumb than granulated sugar.
- 1/4 teaspoons salt Enhance overall flavor balance by adding a small savory note that rounds out the sweetness and brightens the flavors in the crust. Salt also controls gluten perception and strengthens the dough’s taste profile, preventing flat or cloying results.
- 1/2 cup unsalted butter melted Bind the dry ingredients into a pliable dough and create a tender, slightly flaky texture when melted and mixed into the crust. Melted unsalted butter provides rich flavor and helps the crust set firmly when chilled or baked.
- 1 cup all-purpose flour or gluten-free flour Form the crumbly topping and add additional structure and bulk that complements the base; using the same flour keeps texture consistent between layers. When combined with sugars and butter, this flour helps produce a sandy, streusel-like crumb for the bars.
- 1/2 cup brown sugar Provide deep, caramel-like sweetness to the topping while adding moisture that helps clump the crumble together for a crisp finish. Brown sugar’s molasses content also contributes color and a more complex flavor than white sugar.
- 1/8 teaspoons salt Adjust and balance the topping’s flavor profile by adding a small amount of savory contrast to the sweet crumble. Salt also helps intensify the other flavors and prevents the topping from tasting one-dimensionally sweet.
- 6 tablespoons unsalted butter melted Bind the crumble components and create rich pockets of flavor when melted into the topping; melted butter also crisps up during baking. The butter’s fat carries aroma compounds and helps the streusel develop a golden-brown color.
- 1/2 teaspoon vanilla extract Add a sweet, aromatic note that enhances the fruit and complements the vanilla-almond combination in the glaze and filling. Vanilla extract rounds flavors and deepens the overall aroma without adding body or sweetness.
- 2 1/2 cups peach chunks from about 4 large peaches Provide the fresh, juicy fruit component that forms the filling and offers natural sweetness, texture, and summer flavor to the bars. Peach chunks break down slightly during baking, releasing juices that thicken with cornstarch to create a cohesive filling.
- 1/3 cup brown sugar Sweeten the peach filling while contributing moisture and balancing acidity for a pleasantly sweet fruit layer. Brown sugar adds subtle molasses notes that enhance the peaches’ natural flavor and deepen the filling’s color.
- 3 tablespoons cornstarch Thicken the peach juices into a jammy filling by absorbing liquid and creating a glossy, sliceable consistency when cooked or baked. Cornstarch prevents the filling from becoming soggy and helps it hold its shape between the crust and crumble.
- 3/4 teaspoon cinnamon Warm and spice the filling with aromatic depth that complements the peaches and contrasts the sweet components; cinnamon pairs naturally with stone fruit. A measured amount adds complexity without overpowering the delicate fruit flavor.
- pinch of salt Brighten and balance the sweet filling with a tiny savory accent that lifts the fruit’s profile and enhances overall taste. A pinch of salt enhances sweetness perception and reduces any cloying notes from the sugars.
- 1 cup powdered sugar Sweeten and provide a smooth glaze or drizzle when combined with extracts and milk; powdered sugar dissolves easily for a fine, silky icing. The powdered sugar also adds a glossy finish and delicate sweetness to the bars’ topping.
- 1/2 teaspoon vanilla extract Introduce warm, familiar floral notes to the glaze or filling to round out flavors and provide aromatic depth. Vanilla extract in the glaze unifies the dessert’s components and enhances perceived sweetness without adding sugar.
- 1/4 -1/2 teaspoon almond extract Contribute a nutty, almond-like aroma to the glaze that complements peaches and vanilla while adding a hint of richness. Using a small amount prevents overpowering the flavor balance and provides a characteristic almond finish.
- pinch of salt Balance the glaze’s sweetness and enhance flavors by subtly boosting contrast and preventing an overly saccharine finish. A pinch of salt in the icing intensifies aroma and makes the glaze taste more rounded.
- 4 -6 teaspoons milk Adjust glaze consistency to a smooth, pipeable or drizzly texture so the icing spreads evenly over the bars; milk thins powdered sugar to desired thickness. Small additions allow precise control until the glaze reaches the perfect pourable state.
- 1 1/3 cups white rice flour Form the gluten-free flour blend’s primary structure, providing body and a neutral starch base that mimics wheat flour’s bulk. White rice flour contributes a light, tender crumb and helps dry mixtures bind without adding strong flavor.
- 7 tablespoons potato starch Improve texture and moisture retention in the gluten-free flour blend by contributing a soft, starchy mouthfeel that helps prevent crumbliness. Potato starch adds tenderness and creates a springy crumb that improves sliceability.
- 3 1/2 tablespoons tapioca flour / starch Provide chew and elasticity in the gluten-free flour mix while helping to bind moisture and give a slightly glossy finish to baked goods. Tapioca flour lends chewiness and helps the bars hold together for cleaner slices.
- 3/4 teaspoon xanthan gum Stabilize and mimic gluten’s network in the gluten-free flour blend to provide elasticity and improved structure; a small quantity prevents gummy or crumbly textures. Xanthan gum helps trap air and moisture, resulting in better rise and cohesive bars.
Instructions
- Preheat the oven to 350 degrees F. Line an 8"x 8" pan with a sheet of parchment paper.: Warmth from the oven transforms raw batter into structured crumbs, and you will smell a faint toasty note as the elements begin to bake. Make sure the oven actually reaches the set temperature by checking with an oven thermometer if you have one, because ovens can run cool or hot. A cold oven will delay browning and yield a paler crust, while an oven that is too hot can burn the edges before the center sets. Be careful when placing the pan so the parchment lays flat and does not fold up the sides, which can interfere with even baking. If your parchment slips, dampen it slightly so it adheres to the pan, and always set the rack in the middle of the oven for even heat distribution.
- Prepare the crust by mixing together the flour, powdered sugar and salt in a medium bowl until well combined. Stir in the melted butter just until well incorporated and no more streaks of flour remain.: Right away you will notice the mixture taking on a sandy, cohesive feel as the melted butter coats the dry particles; this mouthfeel predicts the tender, short texture after baking. Combine thoroughly but avoid overmixing, because excessive mixing can develop graininess or lead to a tougher crust. A common mistake is adding warm butter too quickly, which can make clumps rather than an even crumb; let the butter cool slightly before stirring. Use a spatula to scrape down the sides so every pinch of the dry mix is incorporated, and stop once the mixture looks uniformly moistened and slightly shiny from the fat.
- Pat evenly onto the bottom of the pan and bake for 12-15 minutes, turning the pan halfway through, until lightly browned around the edges. Let cool for at least 15 minutes while preparing the rest of the recipe.: When you press the crust into the pan you should feel a gentle resistance as the crumbs compact; this indicates they will hold together after baking. As it bakes the surface will look matte then begin to color at the edges, releasing a warm, slightly nutty aroma. Turn the pan halfway for even color, especially if your oven has hot spots. Avoid underbaking, which yields a soggy base, and overbaking, which makes the crust hard; the goal is light golden brown. If the center seems very soft after the time window, give it an extra 2 to 3 minutes, then cool completely to let residual heat finish the setting process.
- While the crust is baking, prepare the topping by mixing together the flour, brown sugar and salt in a medium mixing bowl. Stir in the melted butter and vanilla extract just until combined. Set aside.: The topping should feel clumpy and slightly sticky, with the sugar and butter starting to bind into chunky crumbs that will brown attractively. The scent of caramelizing sugar begins to peek through once the butter is mixed in. Do not overwork the mixture or it will become paste like instead of crumbly; you want distinct pieces that will crisp. If the butter is too hot the topping can become too loose, so aim for warm, not boiling, melted butter. Keep the bowl near your workspace so you can quickly assemble the peaches and top the bars while the crust is still warm enough for the layers to meld.
- Peel and cut the peaches into 1/2" chunks. Discard (or drink) any peach juice that's collected at the bottom of the bowl. Add the brown sugar, cornstarch, cinnamon and salt and stir until thoroughly combined.: Freshly cut peach pieces release a floral, fruity perfume that is intoxicating as you mix them with sugar and spice. The cornstarch will absorb the juices and thicken the filling as it bakes, so mix well to coat all pieces. Letting pooled juice sit can make an overly wet filling, so drain it for cleaner slices. A typical misstep is using fruit that is too soft and mealy, which can break down into mush while baking; choose peaches that are ripe but still slightly firm for defined chunks in the final bars.
- After the crust has cooled 15 minutes, pour the peach layer evenly over the top of the baked crust and sprinkle the topping over the peach layer.: When the crust is just warm rather than hot the fruit will meld without sinking entirely into the base, creating a distinct middle layer. As you spread the peaches listen for a gentle shuffle and look for an even bed of pieces. Sprinkle the crumb topping in patches rather than trying to cover perfectly, because the exposed fruit will bubble up and the exposed crumbs will form golden shards. A common issue is pressing the fruit too hard into the crust, which prevents proper thickening; instead, let gravity settle the pieces naturally and distribute the topping evenly by hand.
- Bake for 45-50 minutes or until the topping has browned and the peaches are bubbly. Cool completely before adding the glaze.: As the bars bake you will see glossy juices bubble up around the edges and a sweet perfume will fill the kitchen. The topping should toast to a warm brown with small crunchy bits, and the bubbling indicates the filling is thickening. Keep an eye on the color after 40 minutes, since oven variance changes bake time; tent with foil if the topping browns too fast. A frequent mistake is removing the pan as soon as bubbles appear, but the filling needs time to fully set; allow the full time for the internal structure to develop.
- For the glaze, mix the powdered sugar, vanilla extract, 1/4 teaspoon almond extract and salt together until well combined. Add 4 teaspoons of milk and stir. Taste and add another 1/4 teaspoon almond extract, if desired, and up to an additional 2 teaspoons of milk to reach the desired consistency. Spoon over the cooled bars.: The glaze should be smooth and glossy, offering a sweet, slightly fragrant finish that complements the fruit without overwhelming it. Start with less milk and add slowly to avoid a runny pour. The almond note is bright and can become dominant quickly, so add the extra bit incrementally. One pitfall is glazing warm bars, which will cause the icing to run off; always wait until they are fully cooled for a neat finish and cleaner slices.
- If you used all-purpose flour, cut into bars and serve. If you made the gluten-free version, chill for 2 hours and then cut.: Cooling method matters for clean slices; gluten free mixes often need extra chilling to firm up because starches behave differently. The bars will be easier to cut with a sharp knife dipped in hot water and wiped between slices for neat edges. Cutting too soon yields sloppy squares, while chilling ensures defined bars. If slices crumble, return them to the fridge briefly to firm up before serving.
- Store the bars in an airtight container for up to 3 days.: Proper storage keeps the crumb from drying out while preserving the peach flavor. Keep them at room temperature if you plan to eat them within a day, then refrigerate for longer storage. A common storage error is stacking warm bars, which traps steam and softens the topping; always cool completely before sealing. Reheat gently if you like a warm bite, and enjoy within the window for best texture.
Notes
- Use riper or firmer peaches to adjust sweetness Adjust the amount of brown sugar in the filling based on how sweet your peach is, reducing sugar slightly for very ripe fruit to preserve brightness.
- Switch to the gluten free flour mix as written Follow the listed combination of white rice flour, potato starch, tapioca, and xanthan gum for a stable gluten free crumb that slices cleanly after chilling.
- Toast the flour for extra nutty depth Lightly toasting the flour for the crust in a skillet until fragrant adds a toasty note, but cool it fully before mixing with butter so it does not clump.
- Make the topping chunkier for more texture Keep some larger pea sized pieces in the crumb topping instead of fully breaking it down to create more pronounced crunchy bites once baked.
- Adjust glaze thickness deliberately Add milk a teaspoon at a time to reach desired consistency, remembering that thicker glaze gives a bold sweet finish while thinner glaze soaks slightly into the topping.