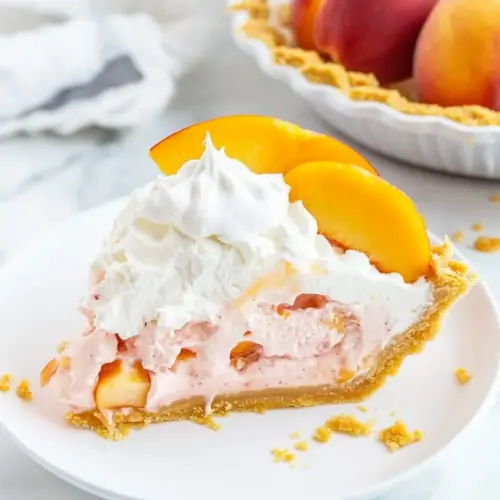
Peach Cool Whip Pie
Peach Cool Whip Pie is a creamy, no bake dessert that combines fluffy Cool Whip with juicy peaches and a crunchy graham cracker crust. This easy to assemble pie is perfect for summer gatherings and last minute potlucks, delivering a light, fruity finish that slices cleanly after chilling. Make it ahead for stress free hosting.
Equipment
- Mixing Bowl
- Spatula
- Measuring Cup
- Knife
Ingredients
- 6 ounces pre-made graham cracker pie crust Provides a ready-made buttery graham cracker base that holds the filling; use as the pie shell to save time and ensure even texture without blind-baking.
- 3 ounces instant peach gelatin Adds concentrated peach flavor and sweetness while helping the filling set; dissolve into boiling water to incorporate fruit taste and color evenly.
- 0.25 ounces unflavored instant gelatin mix Contributes extra gel-setting power and stability to the peach filling; sprinkle into cold water to bloom before combining with the warm gelatin solution.
- 1/2 cup boiling water Supplies the heat needed to dissolve gelatin powders and activate gelling properties; pour over gelatin mixes to create a smooth liquid base for the filling.
- 1/3 cup cold water Cools and dilutes the gelatin mixture to the proper consistency; stir in after the hot water to adjust temperature before folding in whipped topping.
- 8 ounces container Cool Whip (thawed (divide out 2 1/4 cups and remaining for the optional topping)) Provides light, airy creaminess and sweetness that gives the pie its signature fluffy texture; measure out most for the filling and reserve the remainder for optional topping.
- 15 ounces sliced peaches (drained and finely chopped (reserve 8 slices of peaches for optional garnish)) Supplies real fruit pieces for flavor and texture contrast; drain and finely chop to fold into the filling and reserve a few slices for garnish if desired.
Instructions
- Using a medium-sized heat-safe mixing bowl, add the instant peach gelatin. Pour the boiling water over the gelatin and stir until the gelatin is completely dissolved.: The first aroma you notice will be the concentrated fruity scent as you pour boiling water over the gelatin, which releases peach notes immediately. The sound is quiet, a soft pour and a few gentle stirs. Visually aim for a smooth, glossy liquid without grains. This step matters because fully dissolving the instant peach gelatin ensures an even color and taste throughout the filling. If you rush and leave undissolved crystals, you may end up with gritty pockets that disrupt the texture. A common mistake is not using hot enough water , which slows dissolution and can leave sediment. Take your time stirring, scraping the bowl sides, until the mixture looks clear and uniform.
- Sprinkle the unflavored gelatin over the 1/2 cup of cold water. Allow the gelatin to dissolve and bloom.: You will feel the warmth radiate from the bowl and smell the intensified peach aroma as the hot water activates the gelatin granules. Aim for a smooth, fluid mixture that glistens in the bowl. This matters because the gelatin must be fully integrated to set properly once cooled. If any residue clings to the spoon, keep stirring until it is fully incorporated. Avoid using a whisk aggressively, because excessive aeration here is unnecessary and can make it difficult to gauge dissolution. Stir patiently and make sure there are no tiny specks remaining.
- Pour the bloomed gelatin into the dissolved peach gelatin mixture and combine thoroughly.: You will see the granules sink and then begin to swell as they absorb the cold water , forming a soft, jelly like mass. The visual cue of a plumped, translucent blob indicates a good bloom. This is important because properly bloomed gelatin dissolves smoothly when combined with warm liquids. A typical error is skipping the bloom or using hot water instead, which prevents proper hydration and reduces gelling strength. Let it rest undisturbed to achieve the correct texture before combining with the peach mixture.
- Fold in 2 cups of thawed Cool Whip and the chopped peaches.: As the unflavored gelatin hydrates, it will soften and become glossy; this signal tells you it is ready. The tactile shift from powder to a sponge like gel is what you want. This process matters because insufficient bloom results in a weak set and a runny pie. Resist the urge to hurry this step by heating the mixture, as that can degrade the gelatin’s structure. If it seems grainy, give it a few more minutes to fully hydrate and swell before moving on.
- Evenly spread the peach Cool Whip mixture into the premade crust. Cover and chill for at least 4 hours.: When you add the bloomed gelatin, you will notice an immediate smoothing of the combined liquids and a deepening of the peach color. Stir gently until the two are homogenous and calf smooth. This combination is essential for an even set and consistent flavor in every bite. Failing to mix thoroughly can leave some areas that do not set properly, causing a patchy texture. Use a gentle folding motion to ensure everything is integrated without creating foam or air pockets.
- Slice the pie into eight slices. Before serving, garnish with the reserved Cool Whip and a slice of peach for each piece.: The act of folding should be slow and deliberate, preserving the airy volume of the Cool Whip while distributing the chopped peaches evenly. Listen for a soft swoosh as the spoon moves through the mixture and watch for a uniform pale peach color with visible fruit pieces. This technique matters because vigorous stirring will deflate the Cool Whip , leading to a denser filling. A common mistake is over mixing, which can make the texture heavy and less pleasant. Use a spatula and fold by cutting through the center and turning the bowl, keeping the movement light.
- Evenly spread the peach Cool Whip mixture into the premade crust: As you spoon the filling into the crust, note the contrast between the crunchy rim and the soft, cloud like filling. Smooth the top with a spatula so the surface is level, and you will see tiny peach bits dotting the mix. Proper spreading ensures each slice looks neat and holds together. If you press too hard you may compress the filling and alter the mouthfeel, so be gentle. A frequent error is overfilling the crust which leads to spillage during chilling, so keep the filling level with the rim.
- Cover and chill for at least 4 hours: Chilling transforms the mixture from loose mousse to a firm sliceable pie, and you can expect a cool, firm texture and a firm slice when done. The cold also sharpens the peach flavor and gives the pie a refreshing bite. This rest is crucial for structure; skipping it yields a runny, disappointing result. Avoid freezing as a shortcut because it can change the texture and cause the Cool Whip to weep on thawing. Set a timer so you do not rush this step.
- Slice the pie into eight slices: Clean slicing produces tidy servings with visible layers of crust, filling, and fruit. Use a warm, clean knife for smoother cuts, wiping between slices if needed to maintain a pristine presentation. This matters because clean edges make the pie more appealing and easier to plate. A common mistake is cutting too soon before the filling is fully set, which creates sloppy portions. Wait until the pie is properly chilled so each wedge keeps its shape.
- Before serving, garnish with the reserved Cool Whip and a slice of peach for each piece: The final touch brings contrast and height, adding a glossy dollop of Cool Whip and a bright peach slice that catches light and makes the pie inviting. The cool topping balances the sweet, set filling and creates an appealing tableau on the plate. Garnish just before serving to preserve texture, as extended exposure causes the garnish to weep. A typical error is over decorating which can overpower the simple elegance of the pie, so keep the embellishments light and intentional.
Notes
- Make it lighter by reducing the Cool Whip slightly and folding with a rubber spatula to maintain loft while trimming calories a bit.
- Boost peach flavor by using peach gelatin and adding a bit more finely chopped, well drained peaches to the filling for more natural fruit bursts.
- Improve texture by ensuring the unflavored gelatin blooms fully in cold water, which prevents a runny filling and yields a clean slice.
- Prettier presentation is easy, reserve uniform slices of peach and pipe small rosettes of the remaining Cool Whip around the edge just before serving.
- Travel friendly by chilling the pie in a snug container and packing the garnish separately to prevent it from getting soggy during transport.