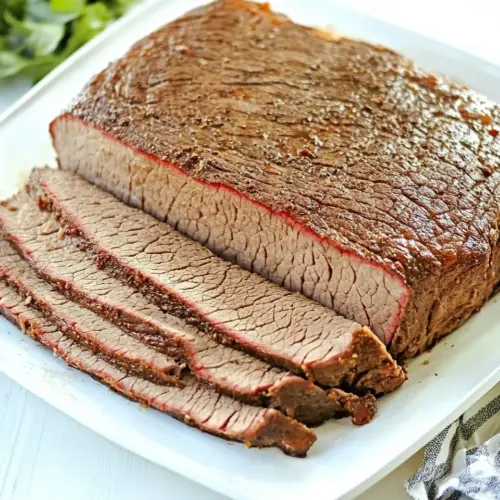
Oven Brisket
Oven Brisket is a tender, smoky roast that turns a simple beef brisket into a fork tender centerpiece. With minimal seasonings and low oven time, it delivers deep, savory flavor and melt in your mouth texture, ideal for an easy weeknight dinner or feeding a crowd. This method is forgiving and reliably delicious, making it a must try for anyone seeking comfort food done right.
Equipment
- Shallow roasting pan
- Large Dutch oven
Ingredients
- 7 pound beef brisket trimmed Season generously to build the foundational savory profile for the brisket and help form a flavorful crust during roasting. Use rubbing motions to distribute evenly over the meat surface and allow time for flavors to penetrate before cooking.
- 2 teaspoons meat tenderizer Tenderize mechanically to break down tough muscle fibers and improve overall texture, ensuring slices are more tender after long, slow roasting. Apply evenly across the surface and allow it to rest so the enzymes and granules can act on the meat.
- 2/3 teaspoon garlic salt Add a mild garlic note to enhance savory depth and complement the beef without overpowering it. Sprinkle sparingly and consider rubbing into the surface so the flavor integrates during cooking.
- 2/3 teaspoon celery salt Provide a subtle vegetal-salty flavor that enhances complexity and balances richer elements in the brisket. Distribute lightly to avoid excessive saltiness while contributing a distinctive background taste.
- 2/3 teaspoon onion salt Introduce a sweet-onion savory element that rounds out the seasoning blend and brings aromatic nuance to the roast. Incorporate with other salts to create a balanced, layered flavor profile.
- 1 teaspoon liquid smoke Impart a smoky aroma and depth that mimics slow-smoking when oven roasting, enriching the meat with a wood-fired character. Add a small amount to avoid overpowering and blend it into the surface for even coverage.
- 2 teaspoons Worcestershire sauce Enhance umami and add a tangy, savory boost that deepens the meat's flavor and complements the smoke and salts. Drizzle and rub into the brisket so the liquid penetrates fibers and melds with other seasonings.
Instructions
- Trim excess fat off the brisket.: The first impression when you pick up the beef should be tactile and visual, the fat cap looking even and the muscle fibers clear. As you trim, listen for the soft tearing of connective tissues and notice the change in weight. Leaving a thin, even layer of fat is important, because it renders slowly and bastes the meat during the long cook; removing too much will cause dryness. A common mistake is over trimming which sacrifices flavor, so aim for balance and use a sharp knife for clean cuts to avoid ragged edges that tear during roasting.
- Punch holes in both sides of the brisket with a fork.: After trimming, pricking the surface lets seasonings and marinades penetrate deeper, creating tiny channels where flavor can travel. You should feel small, repeated resistance then a quick release as the fork enters, and the meat will look slightly dimpled afterward. This step helps the meat accept tenderizers and sauces more effectively. Avoid stabbing too aggressively in one spot, which can create large tears and cause juices to leak before they have had a chance to flavor the interior.
- Sprinkle meat tenderizer on both sides.: When the powder dusts the surface, you will see a faint matte coating form on the beef . The tenderizer begins breaking down muscle proteins at the surface level, which helps create a softer bite later on. Massage it gently so it adheres and distributes evenly, paying attention to edges and corners. Over application can result in mushy texture where it's concentrated, so measure the amount and spread it thin.
- Sprinkle garlic salt, onion salt, and celery salt on both sides.: Layering these salts builds aroma and flavor in the outermost layer of the brisket. As you season, inhale the mixture of sweet and savory notes that rise from the surface; that gives you a sense of how the roast will smell as it cooks. Pat the spices in gently to ensure they stick. A common error is piling seasonings unevenly, which produces spots that are too salty or bland, so take your time for even distribution.
- Place the seasoned brisket in a shallow roasting pan lined with heavy-duty aluminum foil.: Laying the brisket in the pan should feel purposeful, the foil providing a protective, leak proof cradle that helps retain moisture. The pan supports even heat circulation around the meat and the foil permits a tight wrap. Make sure the pan is large enough so the brisket is not cramped; crowding the meat can prevent consistent cooking. If the foil is too loose, juices may escape, so wrap snugly to form a sealed environment.
- Pour liquid smoke over the meat.: As the thin dark droplets hit the surface, you will see a slight sheen and detect an immediate lift in aromatic smoke notes. Liquids like this cling and penetrate if massaged in lightly. Use it sparingly, since a little adds authentic smoky nuance while too much tastes artificial. Avoid pouring directly into one spot which concentrates flavor; instead distribute and pat for even coverage.
- Wrap tightly and marinate for 8 to 10 hours in the refrigerator, the longer the better.: During this resting stage the flavors settle and the tenderizer begins to work its magic. You will notice the meat firm up slightly as it chills, and the seasonings will seem to knit to the surface. Patience here is rewarded with deeper penetration and more even seasoning. A frequent mistake is shortening the marinating time, which makes the seasoning more surface level and less integrated.
- When ready to bake, unwrap the brisket, sprinkle Worcestershire sauce over the meat, and re-wrap tightly.: The acto of adding the sauce just before baking gives the surface a glossy, savory layer that will meld into the finished crust. You should see the sauce bead and then sink in slightly as you re wrap. Rewrapping creates a steamy environment that promotes tenderness. Avoid leaving the meat unwrapped in the oven, which can dry the surface during long cooking.
- Bake at 225 degrees for 5 to 6 hours or to your liking. I like to use a meat thermometer and cook the brisket to 195 degrees, because that's when it is fork tender.: As the oven time accumulates, the kitchen fills with a low, slowly intensifying aroma. Visual cues are subtle, the surface gently deepening in color while juices collect beneath the foil. The real indicator is texture and internal temperature, and a probe thermometer will move from firm to yielding as collagen melts. One common mistake is relying on timer alone rather than temperature and feel, which can leave the meat underdone or dry.
- Remove brisket from the oven, and allow to cook for about 25 minutes before slicing.: After the heat, the brisket needs a quiet rest so juices redistribute and the muscle fibers relax. You will notice steam easing out and the meat pulling slightly away from the foil. This lull makes slicing neater and preserves moisture. Cutting too soon forces juices out onto the board, causing a dryer slice, so resist the urge to carve immediately.
- Pour the broth into a saucepan and simmer on low heat.: The broth will emit savory steam that hints at the finished plate. Simmering concentrates flavors and reduces excess fat, creating a warm bath for reheating slices. Keep the flame low so the liquid warms gently rather than violently evaporating. A common misstep is boiling briskly which can break down the broth and oversalt it.
- Thinly slice the meat.: A sharp knife will yield clean, ribbon like slices that show the grain of the beef . Slicing across the grain shortens muscle fibers for a more tender mouthfeel. You should see moist interiors with a slight sheen from rendered fat. Dull knives tear meat and make slices ragged, so sharpen before you start.
- Place the slices in the broth to reheat.: Immersing the slices briefly aids juiciness and ensures even serving temperature. The slices will take on extra moistness and a subtle braised quality from the broth. Don t overcook here, a few minutes is enough to warm through. Leaving them too long in simmering liquid can rob texture and make them mushy.
- You may reheat this in your favorite barbecue sauce.: Warming slices briefly in sauce gives a glossy finish and an added layer of flavor. The sauce should shimmer as it warms, coating the meat without boiling. This step is optional but makes for a classic presentation. Avoid overheating the sauce with the meat too long, which can thin out the texture and overwhelm the brisket s natural profile.
Notes
- Boost smoke depth by increasing the liquid smoke slightly, rubbing it in and letting the brisket sit longer before baking.
- Adjust salt levels by reducing the combined amount of garlic salt, onion salt, and celery salt for a lower sodium profile while keeping the other seasonings intact.
- Make it saucier by finishing slices in your preferred sauce briefly over low heat so the meat absorbs a glossy coating without losing texture.
- Scale for a crowd simply by maintaining seasoning ratios and using a larger roasting pan or split pans for even cooking.
- Change serving style by thin slicing for sandwiches or thicker slicing for plated dinners, both work well with the broth reheating step.