Oreo Balls
Oreo Balls are creamy, chocolatey, and incredibly easy to make. These fudgy truffles combine finely crushed Oreos and smooth cream cheese with a crisp candy coating for a perfect bite. Ideal for easy weeknight prep or crowd pleasing desserts, they set up in the fridge and travel well, making them a reliable sweet to make again and again.
Equipment
- Food Processor
Ingredients
- 36 Oreo Cookies the 18.12 ounce 'family' size works well Crush into fine crumbs to form the base and structure of the Oreo balls; the cookie pieces provide texture and concentrated chocolate flavor. Combine thoroughly with softened cream cheese to bind the crumbs into a moldable dough that holds its shape when chilled.
- 8 ounces cream cheese softened and cut into cubes Soften and blend into a smooth binder that adds creaminess and moisture to the mixture; cream cheese also mellows the sweetness of the cookies and improves the dough's firmness. Chill briefly after incorporation to make rolling into balls easier and to ensure a creamy, stable center.
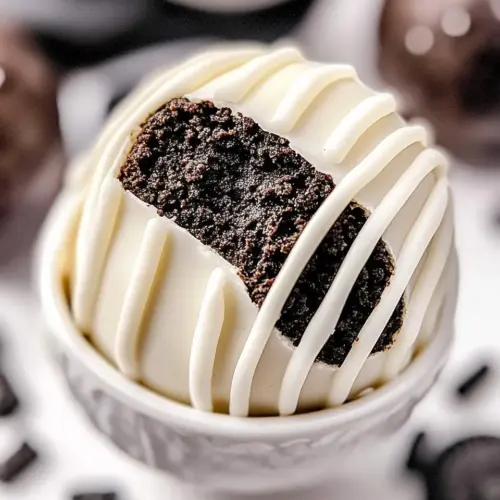
- 16 ounces vanilla candy melts or almond bark I do not recommend using chocolate chips Melt gently and use as a coating to create a sweet, smooth vanilla shell; vanilla candy melts or almond bark set quickly and provide a glossy finish that contrasts the cookie center. Choose high-quality melts for a reliable temper-free coating and consistent sweetness that complements the Oreo flavor.
- 8 ounces chocolate candy melts almond bark I do not recommend using chocolate chips Melt and use as an alternative coating to create a rich chocolate shell; chocolate candy melts or almond bark deliver a deeper, cocoa-forward exterior that enhances visual appeal and flavor complexity. Apply a thin, even layer and allow to set fully to protect the centers and produce a crisp snap when bitten.
- 1 teaspoon vanilla extract other flavors, such as peppermint, can be used Add for flavoring to enhance and balance the sweetness with aromatic depth; vanilla extract brightens the overall profile and can be swapped for peppermint or other extracts for seasonal variations. Use sparingly to avoid overpowering the cookie and cream cheese base.
Instructions
- Add Oreos to a food processor and grind to a fine crumb texture.: The aroma of crushed Oreo Cookies will fill your kitchen as the machine works, and you want the crumbs to be uniformly fine so they bind smoothly with the cream cheese . Listening for a steady, even whir and stopping to shake the processor ensures no large pieces remain. If you rush this step, you will end up with uneven texture and lumps in the filling, which makes rolling difficult and the final mouthfeel less pleasant. A common troubleshooting tip is to pulse rather than run continuously to avoid heating the crumbs, which can make the mixture greasy.
- Add cream cheese and vanilla to the food processor and pulse until fully combined and you can no longer see the cream cheese. This may take a while because the ingredients are thick. Be sure to stop the processing every so often to scrape down the sides if needed.: You will notice the mixture become denser and shinier as the cream cheese integrates, with a slightly tangy scent rising when the vanilla blends in. Scrape down the sides frequently so the processor mixes everything uniformly; otherwise you may have streaks of white or dry pockets. The reason this matters is even distribution ensures consistent flavor and structure in every ball. Avoid overprocessing, which can make the mixture too soft and sticky, making it challenging to roll.
- Line a baking sheet with wax paper or a silicone baking mat. Roll into small balls and place on wax-lined cookie sheet. The size you make the balls will determine how many you get out of the recipe. Using a one inch cookie scoop should get you at least 36 balls.: The tactile part begins now, and you will feel the mixture hold together like a thick dough that is cool to the touch. Rolling with slightly damp hands can help, but avoid wetting the mixture. The visual cue is smooth, evenly rounded balls with no visible cracks. If they crumble, the filling is too dry and needs a touch more cream cheese . One mistake is making them too large; smaller, uniform sizes set more reliably and look more professional.
- Refrigerate on tray for 45 minutes.: The refrigerator chills the centers so they firm up and hold their shape during dipping, and you will notice they become more solid and less tacky. This step also reduces the chance of a thick coating sliding off when you dip. A typical error is skimping on chill time, which leads to misshapen truffles when coated. If your fridge is particularly warm or crowded, extend the time slightly until the balls feel firm to the touch.
- Melt candy melts or almond bark according to package directions. Dip balls into melted chocolate, letting excess chocolate drip off. Place back onto lined baking sheet.: The melted vanilla candy melts or chocolate candy melts should be glossy and free of lumps before you begin. Use a fork or dipping tool and let the excess drip back into the bowl so the coating is even. The sound is almost silent, but you will see the melted coating smooth over each ball and form a shiny shell. Overheating causes separation and graininess, so melt slowly and stir frequently. If the coating thickens while you work, gently rewarm it in short bursts to maintain a fluid consistency.
- If desired, use alternate color/flavor to drizzle over balls for decoration. You can also top with sprinkles or cookie crumbs, just make sure to add them before chocolate coating sets up, which can happen quickly.: A quick decorative drizzle elevates the presentation. Use a piping bag or a fork to flick contrasting candy melts across the tops while the primary coating is still wet, so it adheres smoothly. This adds visual texture and a complimentary flavor note. A common misstep is trying to drizzle after the coating sets, which prevents adhesion, so work promptly. If your drizzle becomes too stiff, warm it slightly for a fluid finish.
- Place back in the refrigerator for at least 1 hour to allow the Oreo balls to completely set up. Store in refrigerator.: As the coating cools it snaps into a firm shell, and you will hear a faint click when you bite into it. Proper setting ensures the interior remains supple while the exterior stays crisp. Storing cold also preserves freshness and prevents the coating from blooming. Leaving them at room temperature for too long can cause the filling to soften excessively and the coating to lose its gloss. For best results, keep them chilled until serving and bring to room temperature briefly before eating if you prefer a softer bite.
Notes
- Measure by feel, not just sight, when judging the texture of the mixed filling, aiming for a dense, scoopable mass that holds shape without crumbling.
- Use room temperature tools when handling the filling, but keep the tray chilled, so the contrast prevents sticking and aids in shaping.
- Temper the coating gently by using short microwave bursts and stirring between sessions, to avoid grainy or split chocolate.
- Keep a shallow bowl of warm water nearby to rinse your dipping tools, which prevents hardened drips from marring the next truffle.
- Decorate quickly after dipping while the surface is still wet to ensure drizzles and sprinkles adhere neatly and do not slide off.
- Store smart in an airtight container in the refrigerator and remove thirty minutes to an hour before serving for easier biting.