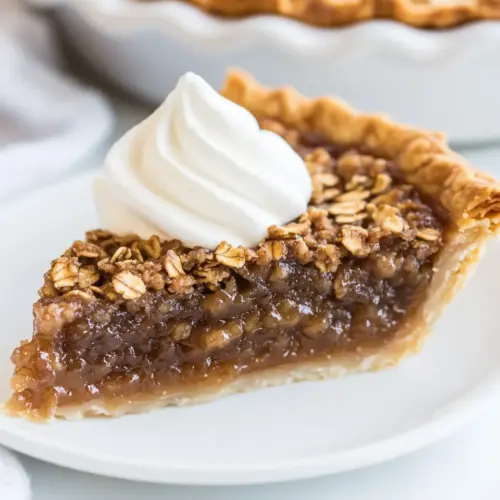
Oatmeal Pie
Oatmeal Pie brings together chewy quick oats and a silky, caramel like filling for a comforting, easy to slice dessert. This creamy but textural pie feels both nostalgic and approachable, perfect for an easy weeknight dessert or a cozy holiday table. Make it to enjoy a sweet, satisfying treat that serves a crowd and keeps well for days in the fridge.
Equipment
- Oven
- 9-inch pie dish
- Large Mixing Bowl
- Whisk
- Wire Rack
Ingredients
- 1 single 9-inch pie crust Provide a single flaky 9-inch pie crust to hold the filling and create a tender, crisp edge; blind-bake or prebake if needed to prevent sogginess and ensure an even base for the oat mixture.
- 1 cup light brown sugar Add sweetness and depth with light brown sugar, offering molasses notes that enrich the filling while helping achieve a soft, caramelized texture during baking; cream with other wet ingredients to dissolve evenly.
- 4 eggs at room temperature Bring structure and lift by incorporating four room-temperature eggs, which emulsify the filling, set during baking, and contribute to a custardy, stable texture that holds the oats together.
- 3 tablespoons all purpose flour Thicken and stabilize the filling by using all-purpose flour, which helps absorb liquids and prevents the mixture from becoming runny while providing slight body without toughness when measured properly.
- 1 teaspoon ground cinnamon Enhance flavor with ground cinnamon, contributing warm, aromatic spice that complements the sweetness and oats while balancing the overall taste with subtle complexity.
- 1/2 teaspoon salt Balance and enhance flavors using a small amount of salt, which brightens the sweetness, intensifies other seasonings, and rounds out the filling for a more satisfying result.
- 1 cup (312g) light corn syrup I use Karo Sweeten and bind the filling using light corn syrup (such as Karo), which adds viscosity and a smooth, glossy finish while preventing large sugar crystallization for a uniform, chewy texture.
- 2 tablespoons (28g) melted butter Enrich the filling with melted butter, providing a rich mouthfeel and toffee-like flavor while contributing fat that tenderizes the custard and helps distribute flavors evenly.
- 2 teaspoons pure vanilla extract Flavor and aromatize the filling with pure vanilla extract, adding warm, floral notes that deepen the overall profile and enhance the perception of sweetness without adding moisture.
- 1 cup quick oats uncooked Contribute hearty texture and chew by incorporating uncooked quick oats, which absorb some liquid during baking to create a pleasant bite and rustic oat presence throughout the pie.
Instructions
- Preheat the oven to 350°F/180°C.: As the oven warms you will notice a subtle change in the kitchen atmosphere, a dry heat that carries a faint mineral scent from the heating elements. Preheating ensures the pie begins baking at the correct temperature, which is essential for proper rise and set. If you skip this and put the pie into a cold oven the crust may absorb too much fat and become soggy, so always wait until the oven reaches temperature. A quick calibration tip is to use an oven thermometer, since many ovens run slightly hot or cool, and that small variance can change bake time significantly.
- Roll out the pie crust into a 9-inch pie dish. Pinch and crimp the edges.: You'll feel the dough yield under the rolling pin, its surface becoming smooth and slightly floured to prevent sticking. Fit it gently into the dish so the crust adheres to the sides without stretching, then create a pleasing edge by pinching and crimping with your fingers. This step creates the visual and textural frame for the filling, and if you overwork the dough it can develop toughness, so handle it with a light, confident touch. If the dough becomes too soft from warm hands, chill it briefly before proceeding to keep the shape crisp during baking.
- In a large bowl, combine all of the filling ingredients, and whisk until well combined.: As you add the light brown sugar , eggs , all purpose flour , ground cinnamon , salt , light corn syrup , melted butter , pure vanilla extract , and finally the quick oats , the mixture will go from granular to glossy and cohesive under the whisk. You should notice the batter thicken slightly and take on a warm amber color from the syrup and sugar. Whisking thoroughly helps avoid pockets of dry ingredients, which would create uneven texture pockets. A common mistake is whisking too vigorously once the oats are added, which can tear the oats and create a gummy texture, so aim for steady, controlled strokes until uniform.
- Pour the filling over the pie crust.: The filling will flow with a viscous sheen and settle into the crust, the oats floating and then beginning to absorb liquid. Pour slowly so the crust edge remains clean, and give the pie a gentle tap on the counter to release any large air bubbles. This helps the surface bake evenly and reduces the chance of large voids in the set filling. Avoid overfilling the crust, which can cause spillover and caramelized drips that burn on the oven floor; if you see spots too close to the rim, blot them before baking.
- Bake in the oven for 50-60 minutes. The filling should be only slightly jiggly in the center.: During baking you will observe the top take on a deep golden brown and a faint caramel scent will waft through the kitchen. The edge of the crust should become crisp and slightly darker, while the center will still wobble just a bit when gently nudged, which signals the custard is set but not overcooked. Overbaking results in a cracked or rubbery filling, so resist the urge to extend time beyond the recommended window unless your oven runs cool. If the crust is browning too quickly, tent the edges with foil to prevent burning while the center finishes cooking.
- Once done, place the pie dish on a wire rack and allow the pie to rest for at least two hours before slicing.: As the pie cools you will notice the filling firm gradually, the aroma mellowing into a deeper, more integrated sweetness. The resting time allows the internal structure to set properly so slices hold their shape, and it also improves the texture by letting the oats finish hydrating. Cutting too soon is a frequent error, producing a runny slice and a messy presentation, so patience here is rewarded. I like to leave it uncovered on the rack to avoid trapping steam, which can soften the crust.
- Serve with a scoop of vanilla ice cream or whipped cream.: The cold creaminess contrasts with the warm caramel notes and adds an indulgent finish to each bite, making the flavors pop and the texture more layered. If you prefer a chilled slice, serve it directly from the fridge, which yields a firmer texture and a cleaner cut. A recommended misstep to avoid is adding the topping too far in advance, which can melt and make the crust soggy; add it just before serving for the best experience.
Notes
- Swap crusts for convenience Try a graham cracker crust for a nutty, sweeter base that complements the filling, remembering that it will toast faster so keep an eye on baking color.
- Adjust sweetness with less sugar If you prefer a less sweet pie, reduce the light brown sugar by up to a quarter cup, but note this will subtly change the set and depth of flavor.
- Chill before slicing For clean, firm slices chill the pie for several hours or overnight, which firms the custard and enhances sliceability.
- Serve warm with contrast A warm slice paired with cold cream or ice cream creates a delightful temperature contrast that lifts the overall experience.
- Use quality vanilla Real vanilla adds a fragrant background note that elevates the pie, so choose a pure extract when possible.