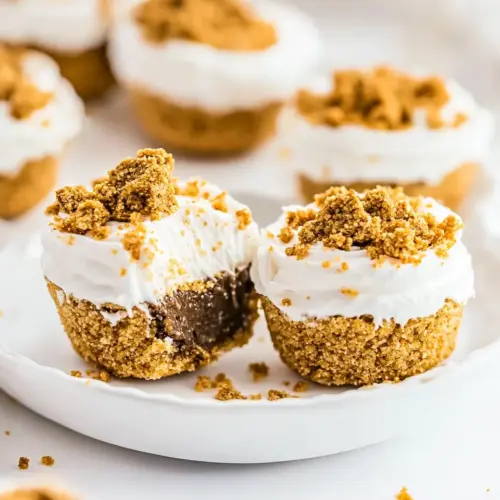
No bake Cheesecake Bites with Graham Cracker Crust
No bake Cheesecake Bites with Graham Cracker Crust are creamy, crunchy, and incredibly easy to make. These bite sized cheesecakes combine a buttery graham cracker base, cloudlike cream cheese filling, and a glossy chocolate top for an effortless crowd pleaser, perfect for easy entertaining or a sweet treat anytime. Make a batch ahead and freeze for simple, elegant desserts whenever you need them.
Equipment
- Mini Muffin Tin
- Mini muffin liners
- Handheld electric mixer
- Piping bag or disposable plastic bag
- Microwave-safe Bowl
Ingredients
- Mini muffin tin Provide a shallow, uniform surface for baking the bites and keep them neatly shaped while setting; use a mini muffin tin to support liners and maintain consistent portion sizes.
- Mini muffin liners Line cavities cleanly to prevent sticking and simplify removal; place mini muffin liners into the tin before pressing crust and filling.
- Handheld electric mixer Whip mixture efficiently to achieve a smooth, fluffy cheesecake texture; use a handheld electric mixer to beat cream cheese and sugars until creamy and lump-free.
- Piping bag or disposable plastic bag optional Pipe ganache or cheesecake filling precisely into the crust for neat presentation; use a piping bag or disposable plastic bag optional to control placement and avoid spills.
- 2 tablespoons (28 g) salted butter Melt thoroughly to bind graham cracker crumbs into a cohesive crust with rich, slightly salty flavor; measure 2 tablespoons (28 g) salted butter and mix with crumbs.
- 1/2 cup graham cracker crumbs (3 to 4 full graham cracker sheets) Provide the base texture and classic flavor for the crust when combined with melted butter; use 1/2 cup graham cracker crumbs (3 to 4 full graham cracker sheets) pressed into the tin.
- 1 heaping tablespoon (16 g) brown sugar Add subtle molasses sweetness and depth to the crust mix; measure 1 heaping tablespoon (16 g) brown sugar and mix with crumbs and butter.
- 3 tablespoons heavy cream Adjust crust or ganache consistency and add richness; stir 3 tablespoons heavy cream into chocolate or crust mixtures as needed for smooth texture.
- 3 ounces cream cheese softened Soften completely to allow smooth whipping and incorporation with sugar and vanilla; use 3 ounces cream cheese softened for a creamy cheesecake filling.
- 2 heaping tablespoons (32 g) granulated sugar Sweeten and stabilize the cheesecake filling while helping achieve the desired firmness; add 2 heaping tablespoons (32 g) granulated sugar and beat until smooth.
- 1/2 teaspoon vanilla extract Enhance and balance the filling flavor with warm, aromatic notes; incorporate 1/2 teaspoon vanilla extract into the cream cheese mixture for depth.
- 1/2 cup (3 oz) chopped semi-sweet chocolate (good quality chips are fine) Create a glossy, rich topping or drizzle when melted; use 1/2 cup (3 oz) chopped semi-sweet chocolate (good quality chips are fine) for ganache or decoration.
- 2 teaspoons refined coconut oil or vegetable oil Improve melted chocolate texture and sheen while slightly lowering setting temperature; stir in 2 teaspoons refined coconut oil or vegetable oil when melting chocolate.
Instructions
- Line your mini muffin pan with 16 liners and clear enough space in your freezer to fit the pan.: The moment you start, your senses will note the quiet thunk of liners as they nestle into each cup, and clearing freezer space ahead prevents last minute juggling when the pan is ready to chill, which saves the stress of balancing other items. Doing this first sets you up so you can move through steps without interruption. Common mistake, not preparing freezer space, can result in delays that soften the filling before it sets.
- In a medium, microwave-safe bowl, melt butter. Stir in graham cracker crumbs and brown sugar until mixture begins to clump. Drop a heaping teaspoon of the crust into each of the prepared muffin cups. If there are leftover crumbs, distribute them between the cups (or eat them 😉 ). Use the top of a wooden spoon or bottom of a shot glass to firmly pack the crumbs into the cups.: You will hear a soft pop and smell warm, toasty dairy as the butter melts, creating a glossy liquid. Stir in graham cracker crumbs and brown sugar until the mixture begins to clump, which signals the crumbs are coated and able to bind. Packing a heaping teaspoon into each cup and pressing with the bottom of a glass gives a compact base that will hold the filling, and you should feel slight resistance when the crumbs are firmly packed. If you underpack, the crust may fall apart when eating, so press firmly using even pressure to avoid crumbly bottoms.
- Pour heavy cream into a small bowl and use a handheld electric mixer, starting on low, working up to high to beat cream until stiff peaks form.: As you whip the heavy cream , listen for the whirring crescendos and watch the liquid transform into billowy peaks that hold shape, with a sheen that indicates proper aeration. Achieving stiff peaks means the cream will support the filling without collapsing; if you stop too early you end with a runny mix that will not set properly. An overwhip will turn grainy and begin turning into butter, so watch closely and stop as soon as firm peaks stand.
- In a medium bowl, combine softened cream cheese, sugar, and vanilla. Beat until well-mixed and fluffy.: When you beat the softened cream cheese with granulated sugar and vanilla extract , you should aim for a smooth, glossy texture with no lumps, and the aroma will be sweet and tangy. This process makes the base luxurious, and a paddle or beaters moving at medium speed will incorporate air without overheating. Common error, working with cold cream cheese, leaves small lumps and a grainy filling, so be sure the cream cheese is fully softened at room temperature before you begin.
- Fold whipped cream into cream cheese mixture until no streaks remain, being careful not to deflate the whipped cream as best you can. Transfer mixture to a piping bag or disposable plastic bag and snip off a corner of the bag. Use the bag to pipe the cheesecake mixture into the muffin cups, filling them about 3/4 of the way full and smoothing the top of each cheesecake as you go.: The folding stage is all about gentle motion, so you will feel the light resistance as the airy whipped heavy cream integrates into the denser cream cheese base; the mixture should become pale and cloudlike. Use a rubber spatula and make sweeping motions from bottom to top, rotating the bowl, which keeps the air intact and creates a mousse like mouthfeel. If you stir aggressively, the mixture will deflate and turn dense, losing the delicate lift that defines these bites.
- Place cheesecakes in the freezer and freeze for 10 to 15 minutes, until just set.: Piping fills each liner neatly and creates uniform tops that look finished, and as you squeeze the bag you'll feel a light, creamy resistance. Filling the cups about 3 quarters full prevents overflow when the filling settles, and smoothing the tops with the back of a spoon gives a clean surface for the chocolate. If you skip piping and spoon roughly, expect uneven sizes and a less professional appearance, so take a bit of extra time here for tidy results.
- In a small, microwave-safe bowl, combine chocolate and coconut oil. Microwave for 30 seconds and stir until smooth. If necessary, microwave in 15-second increments until melted. Use a teaspoon to drop spoonfuls of chocolate over the cheesecakes until all the tops are covered and chocolate is gone.: During this brief freeze, the filling stiffens just enough to hold its shape without fully solidifying, and you will notice the surface losing its glossy sheen. This short chill makes dipping or spooning the chocolate topping easier because the filling is firm. A common oversight is leaving them too long, which can cause the filling to freeze solid and change the texture; set a timer to avoid overfreezing at this stage.
- Freeze for 3 to 4 hours until completely solid. Remove cheesecakes from tray (leave wrappers on) and store in an airtight container or freezer bag in the freezer for up to a month.: When you heat the chopped semi sweet chocolate with the small amount of refined coconut oil , you will see a glossy, pourable chocolate form that smells deeply cocoa rich, and the oil gives the melt a smoother shine. Microwave in short bursts and stir between intervals to achieve a velvety consistency without scorching. If chocolate overheats it can seize and become grainy, so gentle, incremental warming and stirring are essential.
- Enjoy!: Stirring after the initial burst melts residual chunks and reveals a silky surface, and as you spoon the chocolate it should flow easily off your spoon in ribbons. Drop spoonfuls to cover the tops, watching the chocolate form a thin shell that sets with a quick, glossy finish. If your chocolate is too thick to spoon smoothly, warm it briefly in short bursts; forcing cold, clumpy chocolate will result in uneven coverage.
- Freeze for 3 to 4 hours until completely solid: In this longer chill the flavors knit and the chocolate topping hardens into a satisfying snap, while the filling attains a firm yet creamy texture that gives a near perfect bite. You will notice the wrappers become frosty and the chocolate loses sheen as it fully sets. A common mistake is removing them too soon, which leads to soft centers that will not slice cleanly, so allow the full time for best texture.
- Remove cheesecakes from tray leave wrappers on and store in an airtight container or freezer bag in the freezer for up to a month: The wrappers make removal tidy and protect the crust from damage, and an airtight container prevents freezer burn and preserves freshness. The sealed storage also means you can pull a few at a time without exposing the rest to warm air. Avoid stacking unwrapped bites directly on each other, as they can stick, so use layers of parchment if needed.
- Enjoy: Once thawed slightly they reveal a creamy interior and crisp chocolate top, offering the full contrast you hoped for, and the first bite gives a rush of buttery crust, tangy filling, and a cocoa finish. Serve chilled and let them sit a minute at room temperature if you want a softer mouthfeel. A simple error is serving them too cold, which can mute flavor, so allow a brief rest for optimal taste.
Notes
- Swap the chocolate finish Try drizzling melted chopped semi sweet chocolate rather than fully covering the tops for a marbled look that is lighter on chocolate but still elegant.
- Make larger servings Use a standard muffin tin to create four larger cheesecakes, increasing the bake time in the freezer and yielding a satisfying single serving dessert.
- Use a piping alternative If you lack a piping bag, spoon the filling carefully into the liners and smooth with the back of a spoon for a homemade, rustic appearance.
- Adjust sweetness Reduce the granulated sugar slightly if you prefer a tangier profile that allows the cream cheese to sing through more clearly.
- Enhance the crust Add a touch more brown sugar to the crust for deeper caramel notes and a richer base that pairs beautifully with chocolate.