New England Hot Dog Buns
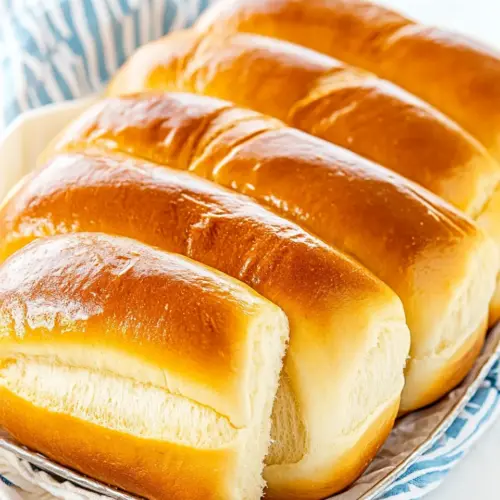
New England Hot Dog Buns are soft, pillowy rolls with straight sides and a tender crumb, perfect for hot dogs, panini style toasts, and casual gatherings. This recipe is forgiving and slightly sweet, producing consistent results for an easy weeknight dinner or a backyard barbecue. Make a batch to enjoy warm, toasted, or stored for quick meals later.
Equipment
- New England Hot Dog Pan
Ingredients
- 3 cups all-purpose flour Provides structure and bulk to the dough, forming the gluten network when hydrated and kneaded; supports rise and gives the buns their crumb and chew. Use all-purpose flour for a balanced texture that is neither too dense nor too airy. Sift or measure properly to maintain consistent dough hydration and final bun size.
- 2 teaspoon instant yeast Acts as the primary leavening agent, producing carbon dioxide that makes the dough rise quickly and reliably; ensures lightness and volume in the buns. Sprinkle evenly into the flour to distribute activity throughout the dough. Instant yeast tolerates direct mixing with dry ingredients and shortens proofing time.
- 2 tablespoon granulated sugar Adds sweetness that balances savory components and feeds yeast for consistent fermentation, contributing to a tender crumb and browned crust. Dissolve or mix thoroughly to ensure even sweetening and yeast activity. Quantity affects final flavor and caramelization during baking.
- 1/4 cup milk powder Contributes richness, enhances flavor, and improves browning while boosting the dough's tenderness by increasing water-binding capacity. Milk powder also adds dairy proteins that help with crust color and a slightly softer crumb. Mix with dry ingredients to hydrate evenly during dough formation.
- 1/4 cup cornstarch Lightens the texture by reducing gluten strength and absorbing some moisture, resulting in a softer, tender crumb suitable for hot dog buns. Cornstarch can also contribute to a finer, more delicate structure and slightly paler crust. Whisk into dry ingredients to prevent lumps.
- 1 teaspoons salt Balances flavor by enhancing overall taste perception and slightly controlling yeast activity; important for seasoning the dough so buns are not bland. Use precise measurement to avoid inhibiting yeast if overused. Mix thoroughly with dry ingredients to distribute evenly.
- 2 tablespoon butter (unsalted, softened) Adds richness, tenderness, and flavor while providing fat that shortens gluten strands for a softer, more tender bun. Use unsalted softened butter so it creams into the dough and can be adjusted for saltiness elsewhere. Incorporate during mixing to ensure an even, smooth dough.
- 1 large egg Contributes richness, structure, and helps bind the dough while enriching flavor and color; the egg improves crumb softness and gives a slightly richer mouthfeel. Beat lightly before adding to facilitate even distribution. Room temperature eggs incorporate more smoothly into the dough.
- 1 -1/4 cups lukewarm water Provides the necessary liquid to hydrate flour, activate yeast, and create a pliable dough; lukewarm temperature encourages yeast fermentation without killing cells. Adjust quantity slightly if humidity or flour absorption vary to achieve the correct dough consistency. Add gradually while mixing to control hydration.
- 1 egg (beaten, for egg wash) Creates a glossy, golden finish on the baked buns and helps set a thin crust while improving appearance and slight richness. Apply an even coat just before baking for best results and avoid heavy pooling to prevent sogginess. Use beaten egg for a smooth, shiny surface.
Instructions
- Make Dough: Add all the ingredients to the bowl of your mixer, starting with 3/4 cup of water, and mix until the dough is elastic and shiny, about 5 minutes. Add more water as needed, until the dough is smooth, soft and comes clean from the sides of the bowl.: The bowl will start to smell yeasty and slightly sweet while the mixer works, and you should hear a rhythmic sound as the dough cleans the sides; that indicates gluten development. I like to begin with about three quarters of the water and add more as needed, feeling for a smooth, slightly tacky dough that pulls away clean from the bowl. This tactile check is important because it ensures the dough has enough hydration to rise properly and yield a soft interior. If the dough feels too stiff, add water a tablespoon at a time, and if it is too sticky, dust the work surface lightly but avoid adding too much flour, which can dry the crumb. A common error is over kneading; you want elasticity and sheen, not a tough rubbery texture. Also, be mindful of water temperature, as warm water helps the yeast activate and encourages a steady rise.
- Rise: Transfer the dough to a greased bowl, cover with plastic wrap or a damp clean towel and allow it to rise in a warm, draft free environment until doubled in size.: As the dough rests in a greased bowl, you will notice it swell and become more ginchy in texture, and the aroma will deepen to a warm, fermented scent; this is your cue that fermentation is working. Place the bowl in a warm, draft free place and cover it to keep moisture in, which prevents a crust from forming on the surface. The dough should double in size, which can take longer in cooler kitchens, so be patient and check visually rather than strictly by time. Avoid the common mistake of rushing the rise by cranking up heat, which can cause uneven bubbles and a coarse crumb. If the dough overproofs, it will collapse when shaped, so aim for a gentle, consistent rise that keeps the dough tender and full of small air pockets.
- Prep Pan: Lightly grease your New England hot dog pan.: Greasing the pan helps the buns release and promotes even browning, and you will feel the pan surface slick to the touch when it is ready. I lightly oil each cavity, ensuring full coverage so the buns do not stick to the flat sides. This small step affects presentation, since tearing stuck buns from the pan ruins the straight edges we want. A common misstep is under greasing, which results in tearing during removal, so give each slot a generous swipe of butter or oil and brush out excess to avoid pooling.
- Shape Dough: Cut the dough into 10 equal pieces. To be precise, you can weigh the dough, this way you'll get 10 equal portions. Roll out each piece so that it's about 4×6-inches, then tightly roll up the shorter side to form a tube shape. Pinch the seam to seal it and then place it sealed side down, in the prepared pan. Repeat with remaining pieces.: While you shape, the dough should feel springy and hold slight tension; rolling into a tube creates layers that yield a neat oval roll with strength at the seam. Divide the dough into ten equal pieces, and if you want precision, weigh each piece; uniform portions bake evenly. Roll each piece into a roughly four by six inch rectangle, then roll tightly from the shorter side into a tube, pinching the seam to seal and placing it seam side down in the pan. This tension helps the buns rise upward rather than spread, producing those tall, straight sides. A frequent mistake is overstretching while rolling, which can break the surface and release gases, leading to a denser bun. Keep movements confident but gentle, and if the dough springs back, let it rest briefly to relax the gluten before continuing.
- Rest: Cover the pan with plastic wrap and place them in a warm, draft free environment. Let them rest for another 45 min to an hour or until doubled in size.: During the second proof, the buns will puff and the dough will feel noticeably lighter and airy, giving you a visual indicator they are ready for baking. Cover the pan to trap humidity and let the buns rest in a warm, draft free spot until doubled in size, which usually takes around forty five minutes to an hour. This step allows the yeast to finish its final fermentation, creating the soft interior and the delicate crumb structure we aim for. The common pitfall here is rushing to bake before they have puffed fully, which produces tighter crumb and less oven spring. Be patient and watch for a plump, pillowy appearance and slight jiggle when you shift the pan.
- Preheat Oven: Preheat the oven to 350°F degrees.: Preheating to the correct temperature delivers a consistent oven spring and a golden crust, and you will hear a faint settling sound when the dough hits the heat. Set the oven to three hundred fifty degrees Fahrenheit and allow it to come fully to temperature before inserting the pan. Proper preheating ensures the interior sets correctly while the exterior browns evenly. A common error is placing the pan in an oven that is still heating, which reduces oven spring and can cause uneven browning. Give the oven sufficient time to stabilize so your buns bake uniformly.
- Bake: Brush the buns with the egg wash and transfer the pan to the preheated oven. Bake for 15-20 minutes or until golden brown.: When the buns go in, the kitchen fills with a rich, toasty aroma, and you will see the tops turn a warm golden brown as the proteins in the egg wash caramelize. Brush each bun with the beaten egg to achieve a glossy finish, then bake for about fifteen to twenty minutes until color is even and the buns sound hollow when tapped. The egg wash intensifies color and adds a subtle sheen, enhancing presentation. Avoid opening the oven door repeatedly, which lets heat escape and can lead to uneven texture. If any bun seems pale at the end of baking, you can rotate the pan briefly for more even coloring, but keep door openings minimal.
- Cool: Let the buns cool enough so you can handle them comfortably. Remove them from the pan and let them finish cooling on a wire rack. Gently pull the buns apart before storing them or using them.: As the buns cool, the crumb firms slightly and the aroma settles into a warm, comforting note that signals readiness. Remove the pan when the buns are cool enough to handle, then transfer the rolls to a wire rack to finish cooling, which prevents steaming on the bottom and preserves texture. Gently pull them apart once cooled to maintain their soft sides for serving or storage. A common mistake is packing them away while still warm, which traps steam and leads to sogginess. Allow adequate cooling time so the interior sets and the bun keeps its tender but resilient structure.
Notes
- Activate active dry yeast if that is what you have, by dissolving it in a bit of warm water with a pinch of sugar for five to ten minutes until foamy; this ensures it is alive before adding to the dough.
- Weigh the dough for each portion to get ten identical buns, which helps them bake evenly and look consistent on the platter.
- Toast the flat sides before serving for a delightful contrast, they become crisp and golden while the tops stay soft and pillowy.
- Omit milk powder cautiously only if you must, because it tenderizes the crumb and improves keeping quality, though the buns will still be fine without it.
- Make a DIY tray if you lack a New England pan by placing rolls close together on a regular baking sheet to encourage soft sides, though they may not be perfectly straight.
- Store properly at room temperature in an airtight bag for up to five days, or freeze individually wrapped for up to two months to preserve freshness.