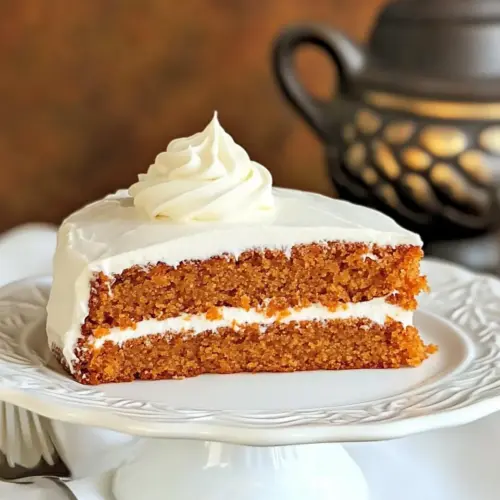
My Favorite Carrot Cake
My Favorite Carrot Cake is a moist, warmly spiced dessert with creamy frosting and tender texture, perfect for easy weeknight baking or special gatherings. The finely grated carrots keep it soft and naturally sweet, while the cream cheese frosting adds a tangy contrast. It’s an approachable, reliable cake that bakes up consistently, making it worth trying again and again.
Equipment
- Mixing Bowls
- Whisk
- Spatula
- 9 inch cake pan
- Grater
- Offset Spatula
Ingredients
- 1 cup of all-purpose flour Provide structure and gluten necessary for the cake to hold together; measure accurately and sift if lumpy to ensure even texture. Combine with wet ingredients to create the batter base and avoid overmixing to prevent toughness.
- 1 cup granulated sugar Sweeten the cake and help with moisture and tenderness; dissolve granulated sugar into the wet ingredients for even sweetness throughout. Adjust level slightly to taste but maintain balance with other flavors and leaveners.
- 1 teaspoon baking powder Leaven the cake by producing gas during baking to help the batter rise and become light; evenly distribute within dry ingredients before combining with wet components. Ensure freshness for reliable rising and avoid clumping.
- 1/2 teaspoon ground cinnamon Add warm, aromatic flavor that complements carrots and spices; incorporate into the dry mix so the cinnamon disperses evenly through the batter. Consider adjusting amount slightly for a more pronounced spice profile.
- 1/4 teaspoon baking soda Assist with tenderizing the crumb and contribute to rise when reacting with acidic ingredients; use measured quantity to avoid soapy or metallic taste. Mix thoroughly with dry ingredients for consistent activation during baking.
- 2 large eggs room temperature Bind ingredients together, provide structure and moisture, and help emulsify fats with liquids; bring eggs to room temperature to incorporate more smoothly into the batter. Beat lightly to combine without overmixing to maintain cake tenderness.
- 1.5 cup finely grated carrots about 6 medium carrots Contribute natural sweetness, moisture, and texture while supplying body and carrot flavor; grate finely for even distribution and to prevent large fibrous pieces. Pack measurement lightly and consider draining excess moisture only if batter becomes too wet.
- 1/3 cup + 1 tablespoon vegetable oil Add moisture and tenderness by coating flour proteins and carrying flavors; measure precisely as oil affects crumb density and cake moistness. Stir into wet ingredients until uniformly incorporated for a smooth batter.
- 1/2 teaspoon pure vanilla extract Provide aromatic vanilla flavor to enhance overall sweetness and depth; add to the wet mixture so the flavor infuses evenly throughout the batter. Use pure extract for a cleaner, more nuanced vanilla note.
- 4 oz . cream cheese softened Create a rich, tangy base for the frosting and contribute to creamy texture; soften to room temperature so it blends smoothly with butter and sugar. Beat until silky to avoid lumps and achieve a stable frosting consistency.
- 4 tablespoons unsalted butter softened Add richness, creaminess, and structure to the frosting while helping with spreadability; soften to room temperature to prevent lumps when creaming with the cream cheese. Use unsalted butter to better control overall frosting saltiness.
- 1/2 teaspoon pure vanilla extract Enhance and deepen the vanilla flavor in the frosting and complement the cream cheese; add after creaming butter and cream cheese so the aroma carries through. Use pure extract to maintain a natural, balanced taste.
- 2 cups powdered sugar Sweeten and thicken the frosting to a spreadable consistency while providing stability and structure; sift powdered sugar if clumpy and add gradually to control sweetness and texture. Beat on low at first to avoid powdered sugar clouds and then increase speed for smoothness.
- 1/2 teaspoon ground cinnamon Bring a subtle warm spice to the frosting that echoes the cake's cinnamon notes and adds aromatic depth; mix in small amounts and taste to balance sweetness. Sprinkle or fold gently to keep the frosting light and evenly flavored.
Instructions
- Grease and flour a 9" round or square cake pan. Set aside.: The warm, slightly oily scent of the pan when greased is a small but satisfying first cue. I use a light coating of softened butter or neutral oil and then dust with all-purpose flour tapping out excess, which creates a barrier so the cake releases cleanly. Visually, the pan should look evenly coated without lumps or clumps of dry flour. If you skip this step or do it unevenly, the cake can stick in places and break when you invert it. A common mistake is overflouring which leaves a dry patch on the cake surface, so brush out extra flour before pouring the batter. This step matters because it preserves the cake’s presentation and prevents tearing, ensuring a smooth bottom and neat slices when you flip it onto a serving plate.
- Preheat the oven to 350 degrees F.: As the oven cycles up, you can smell a faint warmth in the air that primes the baking environment. A properly preheated oven creates even lift and predictable browning, so wait until it reads steady 350 degrees F on your thermometer. If the oven is too cool, the cake will bake too slowly and may sink; if it is too hot, edges can overbake while the center remains underdone. An oven thermometer is a great investment to avoid temperature drift. I always double check the dial and give the oven a few minutes after it reaches temperature for stabilization.
- In a large mixing bowl, whisk together the dry ingredients (flour, sugar, baking powder, baking soda and cinnamon).: When you whisk the all-purpose flour with the granulated sugar and leaveners, you create an even distribution that prevents pockets of soda or powder from causing uneven rise or bitter spots. The dry mix should look uniform, with the cinnamon blending into the pale flour. You might hear a soft swish as the whisk moves and see a light dust cloud settle. If you skip thorough mixing, you can end up with streaks of unblended baking soda which will affect texture and flavor. To avoid lumps, whisk for at least 30 seconds until the mixture looks homogenous.
- In another mixing bowl, whisk together eggs, oil, vanilla and grated carrots.: The wet bowl will smell brighter, the vanilla lifting the fragrance and the fresh carrots giving an earthy sweetness. I break the eggs into the bowl first and whisk until slightly frothy, which helps with volume and integration. Adding the oil emulsifies more easily into this aerated base, and the finely grated carrots distribute gently when stirred. If the eggs are too cold, the oil can separate, so I recommend room temperature eggs for better cohesion. A common pitfall is adding chunky carrot pieces, which can create pockets of moisture; finely grating yields uniform texture and even baking.
- Add the wet ingredients to the dry ingredients and stir with a spatula until combined.: Now you will notice the batter change visually, from powdery to glossy, with thin ribbons of carrot peeking through. Use a flexible spatula and fold with gentle strokes, scraping the bowl’s sides. The reason we avoid vigorous mixing here is to protect the tender crumb; overmixing develops the flour protein and yields toughness. You should stop when just combined and no dry streaks remain. If you overwork the batter, the cake will be denser and lose that soft, yielding texture. Aim for a cohesive batter that still looks slightly lumpy from the carrots .
- Pour the batter into the prepared pan.: The batter should glide into the pan in a smooth, thick ribbon and settle with minimal air pockets. I tap the pan gently on the counter once or twice to release any trapped large bubbles; you will hear a soft thud and see the surface calm. Visually the top should be even and not overly domed. A common mistake is filling the pan too full which can cause overflow, so make sure there is a little space for rise. Ensuring an even surface helps the cake bake uniformly and produces a pleasing, level top for frosting.
- Bake the cake for 25 to 28 minutes OR until the toothpick inserted in the center of the cake comes out clean.: During baking the kitchen will fill with a warm, spicy aroma, and the cake edges will pull slightly away from the pan when it is nearing done. Look for golden edges and a springy center. The toothpick test is the most reliable indicator, but also watch for gentle browning and a set surface. If you open the oven too often, the temperature will drop and the cake may sink, so minimize peeks. Undercooking yields a gummy center, while overbaking dries it out; aim for that sweet spot when the center springs back lightly and a toothpick comes out clean.
- Cool the cake in the pan for 10 to 15 minutes. Invert gently onto a serving cake stand or plate.: After you remove the cake, the residual heat continues to set the crumb, and you will see steam lift briefly from the surface. Cooling in the pan for the recommended time prevents the cake from tearing when you invert it. When you flip, support the pan with a cloth and invert decisively so the cake releases. If you try to unmold too early the cake can break, and if you leave it too long it may be harder to remove. This brief rest also lets the interior settle so the cake keeps its shape for final presentation.
- Cool completely before frosting.: The surface should be room temperature and the interior no longer warm, which takes longer than you might expect. Frosting a warm cake will cause the frosting to soften and slide, losing definition. I like to place the cake on a rack to encourage even cooling. Visually, the exterior will look matte rather than steamy. If you rush this step, the frosting can become runny or absorb into the crumb, so patience here preserves the frosting’s texture and appearance.
- In a medium mixing bowl, beat together cream cheese and butter.: At this stage the bowl fills with a creamy scent. Whipping softened cream cheese and unsalted butter until smooth creates a stable base for the frosting. Start on low and increase speed to avoid splatter. The mixture should look pale and silky, without lumps; if you see firmness, the dairy was too cold and needs a few more minutes to soften. Lumpy frosting results from cold ingredients, so ensure both are well softened for a glossy finish.
- Add vanilla and mix well.: The vanilla brings a floral, sweet note that rounds the tang of the cream cheese. Once incorporated, the aroma will lift and the texture will feel a touch silkier. Mixing at medium speed ensures even distribution. If the flavor seems flat, a touch more vanilla brightens it, but be conservative so the frosting remains balanced. Overdoing extracts can make the frosting taste artificial, so add small increments and taste as you go.
- Add sifted powdered sugar and cinnamon and mix in well.: Adding the powdered sugar slowly keeps the frosting from becoming grainy and creates a smooth, pipeable consistency. The cinnamon adds a bridge back to the cake’s spice. The bowl will look cloudier as you add the sugar, and then glossy as it incorporates. If you add the sugar too quickly you risk a dusty, overly stiff frosting. Sifting removes lumps and ensures a silky, stable finish.
- Beat the frosting for 2 to 3 minutes.: As you beat, the frosting will aerate slightly and become light and velvety, with a smooth sheen. This step helps eliminate small air pockets and produces a consistent texture. If you overbeat for too long the frosting can become too soft and lose structure, especially in warm kitchens. Watch for a glossy texture and stop once it holds soft peaks when lifted with a spatula.
- Spread over cooled cake.: The contrast between the creamy frosting and the tender cake is immediate when you spread. Use an offset spatula for smooth, even coverage, starting from the center and moving outward. The frosting should glide without tearing the crumb; if it drags, it may be too stiff and benefit from a few gentle stirs to soften. A common error is pressing too hard which can create grooves; be light handed for a polished finish.
- Slice and serve.: A clean, serrated knife works best for neat slices. Wiping the knife between cuts produces tidy pieces and showcases the cake’s even crumb. The first slice reveals the lovely contrast between the warmly spiced cake and the tangy frosting. Serving slightly chilled keeps the frosting firm, but letting the slice come to room temperature for a few minutes enhances the flavor. Avoid cutting immediately from a very cold cake if you want the full aroma to shine.
- Store any leftovers in a covered container in the fridge.: The residual cream cheese frosting means refrigeration keeps the cake fresh and safe. When stored in an airtight container, the cake will retain moisture and flavor for several days. Bring slices to room temperature before serving to let the flavors bloom. A common storage mistake is leaving it uncovered which dries the edges, so use a snug lid or wrap securely.
Notes
- Grate finely: Finely grated carrots integrate better into the batter and avoid stringy pieces that can create uneven texture.
- Measure flour correctly: Spoon all-purpose flour into the measuring cup and level it to avoid a dense cake caused by packing.
- Room temperature dairy and eggs: Let the eggs, cream cheese, and butter come to room temperature to ensure a smooth, lump free frosting and cohesive batter.
- Don’t rush cooling: Cooling the cake completely before frosting prevents the frosting from melting into the crumb and keeps a neat finish.
- Adjust sweetness gently: If you prefer a less sweet frosting, reduce the powdered sugar by small increments and taste until balanced.