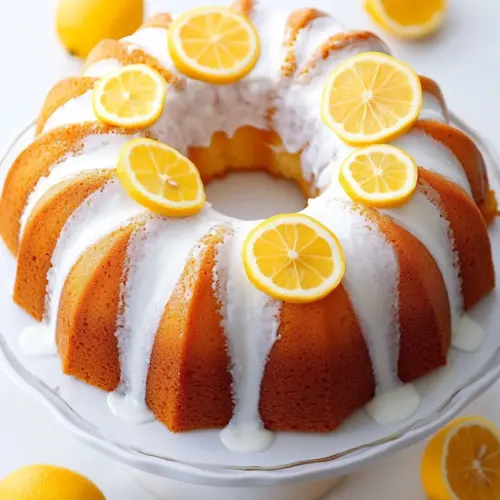
My Big Fat Greek Yogurt Meyer Lemon Bundt Cake
My Big Fat Greek Yogurt Meyer Lemon Bundt Cake is a tender, creamy, citrus forward dessert with a moist crumb and glossy lemon glaze. The combination of Greek yogurt and Meyer lemon delivers bright tang and lasting moisture, ideal for weekend brunches or casual gatherings. Easy enough for everyday baking, it still impresses when you want a pretty, flavorful centerpiece.
Equipment
- Bundt Pan
- Stand mixer or mixing bowl with paddle
- Wire Rack
- Measuring Cups and Spoons
- Microwave safe bowl or glass measuring cup
Ingredients
- 1 1/2 cup s (6 1/4 ounces) all-purpose flour Provide structure and bulk to the cake batter while contributing gluten for a tender crumb; sift or whisk to remove lumps and ensure even incorporation with wet ingredients for consistent texture.
- 1 1/2 cup s (6 ounces) cake flour Lighten the cake's texture and produce a softer, silkier crumb than all-purpose flour; gently fold in to avoid overworking the batter and achieve delicate rise and crumb.
- 2 teaspoon s baking powder Leaven the cake by producing carbon dioxide when combined with moisture and heat; ensure even distribution in the dry mix to help the bundt rise uniformly.
- 3/4 teaspoon kosher salt Enhance overall flavor balance by cutting sweetness and strengthening gluten development subtly; dissolve or whisk into dry ingredients for even seasoning.
- 1 cup unsalted butter, softened Provide fat for richness, moisture, and a smooth mouthfeel while aiding in leavening when creamed with sugar; soften to room temperature for optimal creaming and aeration.
- 2 1/2 cup s granulated sugar Sweeten the cake and aid in creaming with butter to trap air for lift; measure accurately and cream well to contribute to browning and tenderness.
- 3 large eggs, room temperature Incorporate structure, moisture, and richness while helping to bind ingredients; bring to room temperature for smoother blending and better emulsification.
- 3/4 cup whole milk Greek yogurt Add moistness, tangy flavor, and tenderness while contributing to leavening through acidity interacting with baking powder; use full-fat Greek yogurt for creaminess.
- 1/3 cup whole milk Adjust batter consistency and add a touch of dairy richness without overpowering flavor; temper if needed to avoid curdling when mixed with warm ingredients.
- 1/4 cup Meyer lemon juice (from 2-3 lemons) Provide bright acidic citrus flavor and freshness, balancing sweetness and enhancing leavening reactions when combined with dairy; juice fresh Meyer lemons for best aroma and flavor.
- 1 teaspoon Meyer lemon zest (from 1 lemon) Concentrate aromatic citrus oils for an intense Meyer lemon fragrance; finely grate zest and incorporate into batter to distribute bright flavor.
- 1 teaspoon vanilla extract Introduce warm sweet-vanilla aromatics to round and complement citrus notes; add at mixing to infuse the whole cake with subtle depth.
- 1 1/2 cup s powdered sugar Form the base of the glaze, providing sweetness and a silky finish that sets over the cake; sift powdered sugar to prevent lumps and whisk until smooth.
- 2 tablespoon s Meyer lemon juice Thin and flavor the glaze with citrus acidity to brighten the frosting and create a glossy finish; whisk in gradually until desired pourable consistency is reached.
- 1 teaspoon Meyer lemon zest Concentrate more intense lemon aroma in the glaze for an extra burst of citrus that complements the cake; finely grate and stir into the glaze for fragrance.
- 1/2 tablespoon unsalted butter Enrich and slightly loosen the glaze while adding a soft buttery sheen; melt or soften and whisk in to create a glossy finish for the bundt.
- pinch fine sea salt (omit if using salted butter) Enhance and balance the glaze by sharpening flavors and cutting sweetness slightly; sprinkle in a small pinch to heighten overall taste, omitting if using salted butter.
Instructions
- Preheat oven to 350 degrees F. Grease (shortening works better than butter in this case) and flour a standard 12-cup capacity bundt pan or spray with baking spray.: When you open the oven and feel that even warmth, you know the environment is right, and you will notice a subtle warmth on your face as the oven preheats. The reason for using shortening or a well greased pan is that it creates a thin fat layer between the batter and the metal, encouraging the cake to release cleanly, preventing tearing when you invert. A common mistake is not prepping the pan thoroughly, which leads to stuck edges and a broken presentation. If your pan is not well coated, use a pastry brush to get into crevices and dust with flour, tapping out the excess to ensure an even nonstick barrier.
- In a bowl, sift together flour, cake flour, baking powder, and salt and set aside.: As you sift, the dry mixture will take on a light, airy appearance and you might hear a faint whisper of sifted powder falling back into the bowl. Sifting removes lumps and helps evenly distribute the baking powder and salt , which is critical for uniform rise and balanced seasoning. If you skip sifting, you risk pockets of leavening or dense spots, which can create uneven texture. Use a whisk to combine if you do not have a sifter, making sure the ingredients look homogeneous.
- In a large mixing bowl or the bowl of a stand mixer fitted with the paddle attachment, beat butter and sugar on medium-high speed until light and fluffy, 2 to 3 minutes. Add eggs, one at a time, mixing well after each addition. Scrape down the sides of the bowl.: The sound changes from a soft thump to a higher pitch as air is incorporated, and the mixture lightens to a pale, billowy texture. This creaming step is essential because the trapped air helps the cake rise, and adding the eggs one at a time ensures the emulsion stays stable. If you add eggs too quickly, the batter can split, becoming curdled and less able to hold air. If you notice separation, reduce speed and scrape, then continue once it looks cohesive.
- In a separate small bowl, whisk together Greek yogurt, milk, lemon juice, lemon zest, and vanilla until smooth and incorporated.: You will see the glossy texture of the Greek yogurt loosen with the milk , and the lemon oil released by the zest will scent the mixture. Combining these wet ingredients separately prevents overmixing later and ensures each addition introduces consistent moisture and flavor. A common error is adding cold dairy directly to the creamed batter which can curdle the mixture; using room temperature ingredients avoids that issue.
- Add 1/3 of dry ingredients to mixing bowl and mix on low speed until almost incorporated. Add half of yogurt mixture and mix to combine. Repeat with another 1/3 of dry ingredients, remaining yogurt mixture, and ending with remaining dry ingredients, scraping down the sides of the bowl as needed, until just incorporated (do not overmix).: The batter will thicken and change from glossy to a more satiny texture, and you should watch for streaks to disappear rather than achieving a perfectly smooth pour. Alternating dry and wet ingredients prevents gluten overdevelopment, preserving tenderness. Overmixing at this stage creates a tougher crumb, so stop when you see the last streaks vanish. If you notice resistance and heavy batter, fold gently by hand once or twice to finish without overworking.
- Pour batter into prepared baking pan and bake for 60 to 70 minutes or until a toothpick inserted in the thickest part of the cake comes out clean.: As the cake bakes you will smell a gentle lemon aroma rising, and the exterior will deepen to a warm golden brown. The oven's steady heat sets the crumb and encourages rise; opening the oven too often can cause the center to sink. A reliable check is inserting a toothpick into the deepest section; if it comes out with a few moist crumbs, the cake is done. If it jiggles in the middle, continue baking and check every 5 minutes to avoid drying out.
- Remove from oven and let cool on a wire rack for 15 minutes, then invert onto a plate or serving platter and let cool upside-down for another 10 minutes. The cake should release itself, and you should be able to pull the pan off cleanly at this point. Let cool to room temperature before glazing.: The first cooling period allows the crumb to set, and the slight contraction helps the cake separate from the pan. When you invert, the warm steam escapes and the cake settles; this is why timing the inversion is crucial, too early and the cake can break, too late and it may stick. If the cake clings, tap the pan's edges gently or run a thin knife around the rim before trying again. Allowing the cake to reach room temperature before glazing prevents the glaze from melting into the crumb.
- To make glaze, in a microwave-safe bowl or 4-cup capacity glass measuring cup, whisk together powdered sugar and lemon juice. Add lemon zest, butter, and salt and microwave for 15 to 20 seconds until butter is just melted. Stir until smooth. If you prefer a thinner glaze use it immediately, otherwise let it cool for 10 to 15 minutes or until slightly thickened. Drizzle over top of cooled bundt cake, then slice and serve. Cake is best served the day it is made, but will keep in an airtight container for up to 3 days.: The glaze will go from a snowy dry texture to a glossy ribbon as you whisk, releasing the citrus fragrance. Warming the butter just enough integrates it smoothly; overheating can separate the glaze. Use the glaze right away for a thin coat that settles into crevices, or let it thicken slightly for a more decorative drape. A common pitfall is adding too much juice which can make the glaze runny; if so, add a touch more powdered sugar to reach desired consistency.
Notes
- Room temperature ingredients: Always let butter, eggs, and Greek yogurt sit at room temperature for 30 to 60 minutes before mixing. This helps ingredients combine smoothly and prevents the batter from curdling, which can lead to an uneven crumb. If you are short on time, place eggs in warm water for 10 minutes.
- Pan preparation: For a clean release, grease the bundt pan thoroughly with shortening or a baking spray formulated for bundt pans, then dust lightly with flour, tapping out the excess. Pay special attention to the pan's grooves, using a pastry brush to coat them if needed, so the cake unmolds without tearing.
- Check for doneness carefully: Start checking at 60 minutes with a toothpick in the deepest part. If it comes out with moist crumbs, remove the cake. If you rely solely on color, you might overbake. Ovens vary, so these sensory checks prevent dryness.
- Glaze consistency: If your glaze is too thin, add a tablespoon or two of sifted powdered sugar to thicken it. If it is too thick, whisk in a small splash of Meyer lemon juice to loosen it, but add slowly to avoid overshooting the consistency you want.
- Storage: Store the cake in an airtight container at room temperature for up to 3 days. If you live in a warm climate, a cool room or brief refrigeration can help maintain the glaze without drying the cake, but bring it back to room temperature before serving for best flavor.