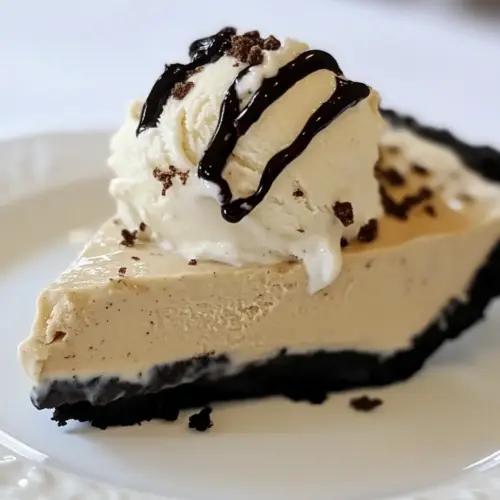
Mud Pie with Homemade Decaf Coffee Ice Cream
Mud Pie with Homemade Decaf Coffee Ice Cream is a creamy, chocolatey dessert with a crunchy almond and cookie crust and a smooth decaf coffee custard center. This easy make ahead treat blends roasted coffee flavor with silky ice cream for a comforting finish to any meal. Perfect for relaxed dinners or special occasions, it’s a crowd pleasing dessert worth making.
Equipment
- Medium Saucepan
- Ice bath bowls
- Mesh strainer
- Metal mixing bowl
- Food Processor
- Ice Cream Maker
- 9" pie dish
Ingredients
- 1 1/2 cups whole milk Provide whole milk to create a rich, creamy base that contributes smooth texture and body to the decaf coffee ice cream; its fat content helps carry flavors and improves mouthfeel. Gently heat and combine with other dairy and sweeteners to ensure a custard-like consistency before churning. Use fresh milk for best flavor and stability in frozen desserts.
- 1/4 cup almonds, finely ground, 6 oz. chocolate wafer or oreo cookies, 3 tablespoons butter, melted Form a crunchy, flavorful crust by combining finely ground almonds with crushed chocolate wafer or Oreo cookies and melted butter; the nuts add a toasty complexity while the cookies supply chocolate intensity and structure. Press the mixture firmly into a pie dish and chill or bake briefly to set the crust so it holds up beneath the ice cream layer. Adjust proportions slightly to achieve desired firmness and nut-to-cookie balance.
- Chocolate sauce, Sliced almonds, lightly toasted, Whipped cream Finish the pie by drizzling chocolate sauce for glossy sweetness, sprinkling sliced toasted almonds for crunch and aroma, and topping with whipped cream for light, creamy contrast. Use the sauce to enhance chocolate notes and the whipped cream to balance richness, while the toasted almonds provide texture and depth. Assemble just before serving to preserve crunch and visual appeal.
Instructions
- To prepare ice cream, heat the milk, sugar, whole coffee beans, salt, and 1/2 cup of the cream in a medium saucepan until it is quite warm and steamy, but not boiling. Once the mixture is warm, cover, remove from the heat, and let steep at room temperature for 1 hour.: The aroma will bloom as the mixture warms, a rich, roasted perfume that makes the kitchen feel cozy. You should see steam rising steadily without any rapid bubbling, which means the mixture is hot enough to extract flavor but not so hot that it will curdle on contact with egg yolks later. Stir occasionally to keep the sugar dissolving and to ensure even heat, and avoid letting the mixture reach a boil, because boiling drives off delicate coffee aromas and can create a cooked dairy flavor. If you accidentally let it simmer, remove from heat immediately and let it cool slightly before proceeding; overcooked milk will taste flat. A common mistake is rushing the warming and not allowing the beans to steep long enough, which weakens the coffee character.
- Pour the remaining 1 cup of cream into a medium size metal bowl, set on ice over a larger bowl. Set a mesh strainer on top of the bowls. Set aside.: During this rest the coffee beans continue infusing, deepening the flavor without added heat. You will notice the scent intensify and the liquid take on a more defined roast tone. Covering traps the aroma and prevents skin from forming on the milk surface. Don’t skip this step, because quick infusions yield thin flavor. If you forget it, you can extend steeping a bit, but be mindful of food safety; keep the kitchen cool. A typical pitfall is skimping on steep time which results in muted coffee notes.
- Reheat the milk and coffee mixture, on medium heat, until again hot and steamy (not boiling!). In a separate bowl, whisk the egg yolks together. Slowly pour the heated milk and coffee mixture into the egg yolks, whisking constantly so that the egg yolks are tempered by the warm milk, but not cooked by it. Scrape the warmed egg yolks back into the saucepan.: Chilling the cream creates a cold environment to receive the hot custard, helping it cool quickly and preventing bacterial growth. The clinking of the metal bowl against ice is a small satisfaction, and you will see the cream remain visibly cool. This technique preserves a silky texture. If you use a plastic bowl, cooling is slower, so opt for metal when possible. Avoid pouring directly into room temperature dishes or you will lengthen chilling time and risk a grainier finish.
- Stir the mixture constantly over medium heat with a heatproof, flat-bottomed spatula, scraping the bottom as you stir, until the mixture thickens and coats the spatula so that you can run your finger across the coating and have the coating not run, about 10 minutes.: Keeping a strainer ready means you can quickly remove solids and capture the concentrated liquid as you finish the custard. This prevents any grounds or cooked bits from making the ice cream gritty. The visual cue to watch for is a clear, smooth flow through the strainer. If the strainer clogs, gently press small amounts at a time rather than forcing everything through; forcing can push through fine particles.
- Pour the custard through the strainer and stir it into the cream. Press on the coffee beans in the strainer to extract as much of the coffee flavor as possible. Then discard the beans. Mix in the vanilla and finely ground coffee, and stir until cool.: Reawakening the infusion is important to marry flavors and to temper the eggs properly. You will smell a heightened coffee aroma, and the surface will shimmer with heat. Keep the temperature controlled to avoid scalding. If the mixture begins to bubble, pull it off heat and let it cool slightly before proceeding; overheated milk can scramble eggs during tempering.
- Chill the mixture overnight in the refrigerator, then freeze it in your ice cream maker according to the manufacturer’s instructions.: The yolks add richness and structure to the custard, producing that luscious mouthfeel in the final ice cream. Whisk until smooth and slightly pale, which aerates them and helps with even incorporation. If they look grainy, keep whisking to a uniform texture. A common error is adding hot liquid too quickly, which cooks the eggs into flakes; temper slowly for a glossy custard.
- While ice cream is churning, prepare the crust. Combine almonds and cookies in a food processor, and pulse until finely ground. Add melted butter and stir until combined. Mixture should be the consistency of wet sand. Dump into a 9″ pie dish and firmly press into bottom and sides.: As you drizzle, you should feel the mixture warm in the bowl without forming lumps. The constant whisking creates a harmonious emulsion. If you pour too quickly you will end up with ribbons of cooked egg, so patience here preserves creaminess. If curdling happens, strain thoroughly and cool quickly, and consider starting over if the texture is irreparably lumpy.
- As soon as your ice cream is the consistency of soft serve, remove from ice cream maker and spread into crust. Cover and freeze until firm (at least 4 hours).: Returning the tempered mixture to the pan lets you thicken it gently with direct heat. You will hear a light simmer and see the liquid become more viscous as proteins and starches align. Keep the heat moderate and stir continuously to avoid hot spots that can lead to curdling. A telltale sign the process is going well is when the mixture begins to coat the spatula evenly.
- When ready to serve, run a knife under hot water for 30 seconds (it’ll make cutting much easier) before cutting. Drizzle with fudge sauce, and top with a dollop of whipped cream and sliced almonds.: Texture is the goal here, you want a custard that clings, not a watery one. The sound is a gentle simmer and the visual cue is a thicker coat on the spatula. Scraping prevents scorching and ensures even thickening. If the custard overheats and becomes grainy, remove from heat and strain immediately; it may recover with steady stirring and cooling. Many cooks rush and undercook, leaving a loose mixture that will freeze icier.
- Pour the custard through the strainer and stir it into the cream: Straining removes any tiny cooked bits and solids, resulting in an ultra smooth base. As you pour, the custard will flow more slowly, and you will notice a glossy sheen. Stirring it into the cold cream mellows the temperature and balances richness. Press gently on the coffee beans in the strainer to extract every drop of flavor before discarding them. If you skip straining, the ice cream may feel grainy.
- Press on the coffee beans in the strainer to extract as much of the coffee flavor as possible: This little push releases concentrated aroma into the custard, giving that pronounced coffee character. You will see a darker tint where the pressed liquid joins the mixture. Avoid overpressing solid bits through the mesh. If you lack whole beans, ground coffee can overextract and become bitter, so use whole beans for a cleaner infusion.
- Then discard the beans: Removing the solids prevents them from creating a bitter chew in the finished ice cream. The mixture should be smooth and evenly colored once they are gone. Dispose of used beans promptly because they can become a source of off smells if left in the kitchen. A mistake is leaving them in and finding unexpected gritty bits in frozen slices.
- Mix in the vanilla and finely ground coffee, and stir until cool: These final flavor nudges round out the profile, with vanilla adding warmth and a pinch of ground coffee reinforcing the roast note. Stirring until cool reduces the chance of condensation or ice crystals forming during freezing. If you add these while hot, volatile notes may dissipate, so moderate temperature is important.
- Chill the mixture overnight in the refrigerator, then freeze it in your ice cream maker according to the manufacturer’s instructions: Overnight chilling allows the flavors to meld and the texture to firm up, producing a creamier churn. You will notice the mixture takes on a thicker feel after refrigeration. When using the ice cream maker, follow the machine guidelines for best texture. A common misstep is skipping the chill step, which often results in slower freezing and a grainy texture.
- While ice cream is churning, prepare the crust. Combine almonds and cookies in a food processor, and pulse until finely ground: The mechanical sound of the processor is satisfying, and you want a texture like coarse sand so the crust holds together but still has bite. Pulse in short bursts to avoid turning nuts oily. If you overprocess, the crumbs can become paste like, which will change the crust’s mouthfeel.
- Add melted butter and stir until combined: The melted butter binds the crumbs, giving you a moldable mixture that will crisp when chilled. Stir until the wet sand consistency is uniform, and test by pinching a bit to see if it holds. If it’s too dry, add a touch more butter, but not so much that it becomes greasy. Too much liquid will make the crust soggy once frozen.
- Mixture should be the consistency of wet sand. Dump into a 9" pie dish and firmly press into bottom and sides: Pressing firmly ensures the crust stays intact when you slice the pie. You should feel resistance under your fingers as you compact it. Use the back of a spoon or a flat-bottomed measuring cup for even pressure. If you press too lightly the crust will crumble when serving, and if you press too hard it may become too dense.
- As soon as your ice cream is the consistency of soft serve, remove from ice cream maker and spread into crust: Soft serve stage is ideal because it is pliable and will meld with the crust surface. You’ll see a smooth top and feel slightly yielding texture. Smooth with a spatula for even coverage. If you wait until it is rock hard, it becomes difficult to spread evenly without damaging the crust.
- Cover and freeze until firm (at least 4 hours): This resting time lets the ice cream set fully and the flavors settle. The pie will firm into a sliceable consistency and the crust will chill into a crisp base. Avoid opening the freezer often, as temperature fluctuations encourage ice crystal growth. If you are short on time, a longer freeze on a lower shelf helps, but aim for the minimum four hours.
- When ready to serve, run a knife under hot water for 30 seconds before cutting: Heating the knife makes slicing clean and tidy, reducing crumbles and preserving the pie’s silhouette. Wipe the blade between cuts for the best presentation. If the knife is cold you will tear the filling and the slices will look ragged.
- Drizzle with fudge sauce, and top with a dollop of whipped cream and sliced almonds: The warm fudge sauce brings a glossy finish and a contrast in temperature that sings against the cold ice cream, while whipped cream and toasted sliced almonds add visual flair and a range of textures. Serve immediately and enjoy the interplay of warm and cold, creamy and crunchy. A common serving error is applying sauce too early so it soaks into the crust; drizzle just before plating.
Notes
- Swap the cookie type: Use different chocolate wafers or sandwich cookies to shift the crust flavor profile, which changes the dessert from intensely chocolate forward to a subtler cocoa note.
- Increase almond presence: Grind more almonds into the crust for extra nuttiness and a sturdier texture that pairs beautifully with the coffee ice cream.
- Adjust sweetness: Reduce sugar in the custard for a less sweet finish, especially if your cookies are already sugary, keeping the coffee note prominent.
- Use toasted nuts as garnish: Toasted sliced almonds add aroma and a satisfying crunch, and toasting deepens their flavor, complementing chocolate and coffee.
- Serve with warm chocolate sauce: A slightly warmed fudge sauce poured over each slice creates a lovely temperature contrast and a glossy presentation.