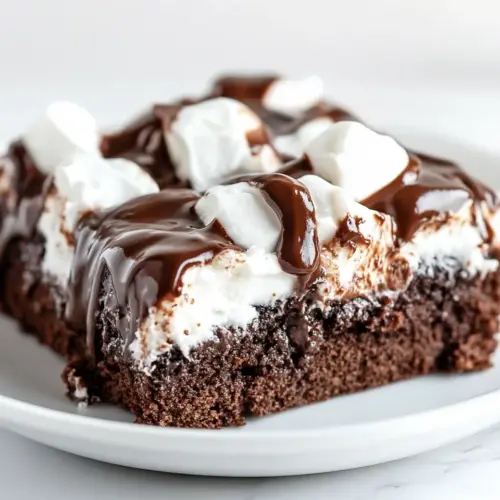
Mississippi Mud Cake
Mississippi Mud Cake is a fudgy, nostalgic chocolate sheet cake with toasted marshmallows and a glossy powdered sugar frosting. This easy to make dessert combines creamy frosting, gooey marshmallows, and optional crunchy pecans for an indulgent treat perfect for parties or cozy nights in. It’s rich, comforting, and reliably crowd pleasing, making it a must make when you want simple ingredients and big chocolate impact.
Equipment
- half sheet pan
- Medium Saucepan
- Large Bowl
- Whisk
- Rubber spatula
Ingredients
- 2 cups all-purpose flour Provide structure and bulk to the cake batter, creating crumb and absorbing liquids for proper texture; sift before measuring to avoid lumps and ensure even rise when combined with leavening.
- 2 cups granulated sugar Add sweetness and tenderize the crumb by interacting with fats and liquids; creaming with butter helps incorporate air for a lighter cake texture.
- 1 teaspoon baking soda Leaven the batter by producing carbon dioxide when reacting with acidic components, helping the cake rise; measure accurately for balanced lift.
- 3/4 teaspoon fine sea salt or table salt Enhance overall flavor depth and control yeast-like reactions; dissolve evenly into dry ingredients to ensure consistent seasoning throughout the cake.
- 1 cups salted butter, sliced Contribute rich flavor and moisture while adding fat for tender crumb and mouthfeel; slice for even melting when combined with hot liquid.
- 1 cup water Provide the liquid component to hydrate dry ingredients and dissolve cocoa and sugar, helping to create a smooth batter consistency.
- 1/4 cup unsweetened cocoa powder Impart chocolate flavor and deepen color while absorbing liquid to intensify cocoa taste; sift to prevent clumps and ensure even distribution.
- 2/3 cups sour cream Add moisture and slight tang that balances sweetness, tenderizes the crumb, and reacts with baking soda to aid in leavening and flavor complexity.
- 2 large eggs, whisked Bind ingredients, add moisture, and contribute to structure and richness; whisking eggs ensures even incorporation and helps trap air for lift.
- 1 tablespoon vanilla extract Contribute aromatic flavor and enhance sweetness perception; stir in toward the end to preserve its delicate scent.
- 1/2 cups salted butter, sliced Add additional fat for richness in the topping, helping to melt smoothly and create a glossy finish; slice to melt uniformly when heated.
- 1/3 cup unsweetened cocoa powder Provide more intense chocolate flavor for the frosting or glaze and help darken the topping while mixing smoothly with warm butter.
- 1/3 cup milk Thin the frosting or glaze to a spreadable consistency and add creaminess, helping to dissolve powdered sugar and create a smooth finish.
- 1 1/2 teaspoon vanilla extract Enhance and concentrate the aromatic profile of the frosting, providing a sweet, warming note that complements chocolate and marshmallows.
- 3 cups sifted powdered sugar, more if needed Sweeten and thicken the frosting while providing a silky smooth texture when sifted; adjust quantity to reach desired consistency and sweetness.
- 1/4 teaspoons salt Balance sweetness and enhance other flavors in the frosting or glaze while preventing it from being cloying, used sparingly for taste control.
- 10 ounces mini marshmallows Create a soft, chewy topping that melts slightly into warm glaze, adding texture and classic marshmallow sweetness to the finished cake.
- 1/2 cup finely chopped pecans, can omit if preferred Add crunchy texture and a toasty, nutty flavor contrast to the gooey topping while offering optional savory balance to the dessert.
Instructions
- Preheat the oven to 350°F. Butter a half sheet pan (18×13 inches) and set aside.: You will notice the warm oven scent as it comes up to temperature, and properly buttering the pan helps the cake release cleanly after baking. The sound of the butter gliding across the metal and the smooth sheen it leaves are good visual checks. Doing this step first ensures your batter goes into a fully heated environment which promotes even rise and edges that set nicely. A common mistake is waiting until the batter is ready to heat the oven, which can lead to uneven bake times. If your oven runs hot, consider reducing the temperature by 10 degrees to avoid overly brown edges.
- In a large bowl combine 2 cups flour, 2 cups sugar, 1 teaspoon baking soda and 3/4 teaspoon salt. Set aside.: The dry mixture should look uniform and pale, with no clumps of baking soda or pockets of sugar, which can cause uneven flavor. I like to whisk these ingredients so the baking soda distributes evenly, helping the cake rise consistently. You should feel the fine texture of the flour and see the grains of sugar settle into the flour bed. Avoid skipping this mixing, because uneven distribution can result in odd salty or bitter bites.
- Heat 1 cup butter, 1 cup water and 1/4 cup cocoa in a medium saucepan over medium heat. Bring to a light boil and then remove from heat and let sit 2 minutes. Then pour into the flour mixture. Stir until combined.: As the butter melts and the cocoa blooms, the kitchen will fill with deep chocolate aroma and a thin sheen will form on the surface of the pan. Letting it rest for two minutes tempers the mixture so it does not cook the eggs when added later. Pouring into the dry ingredients creates a warm batter that helps dissolve sugar and bind the mixture. A frequent misstep is overheating, which can scorch cocoa and create a bitter note, so keep the heat moderate and stir constantly while heating.
- Stir in 2/3 cup sour cream, 1 tablespoon vanilla and 2 eggs. Pour mixture into prepared pan.: When you add the sour cream and eggs, the batter will transform, thickening and becoming glossy. The sour cream brings a slight tang that keeps the cake from tasting cloying, and the eggs help structure the crumb. Mix just until incorporated to avoid developing gluten which would toughen the cake. If you overmix, you may notice the batter becomes elastic, which leads to a firmer texture after baking.
- Bake for 18-20 minutes, or until a toothpick comes clean. Around 15 minutes in, start making the icing.: During baking, you should see the edges set and the center appear set but still moist, with a faint crackling surface. The oven will emit a warm, chocolatey aroma. Starting the icing while the cake finishes ensures it will be warm when you pour the glaze, which is critical for proper adhesion. Avoid overbaking, which dries out the cake, and check with a toothpick near the center to confirm readiness.
- Once the cake is done sprinkle the marshmallows over the top of cake and broil for 1 minute.: The marshmallows should puff and develop light golden tips quickly under the broiler, releasing a sweet, toasted scent. Watch closely because marshmallows can go from lightly toasted to burned in seconds. The broil adds a soft, caramelized layer that contrasts with the glossy icing. A typical error is leaving the rack too close to the broiler source, which leads to charring rather than even toasting.
- Melt 1/2 cup butter in a medium saucepan over low heat. Stir in 1/3 cup cocoa powder. Once the mixture has melted and comes to a light simmer, remove from heat and slowly whisk in 1/3 cup milk, 1 1/2 teaspoon vanilla and a 1/4 teaspoon of salt.: This step produces a shiny, aromatic frosting base as the butter and cocoa marry, and the gradual addition of milk ensures smoothness instead of lumps. You will hear a gentle simmer and smell the intensified chocolate as flavors deepen. Removing from heat before whisking in the milk prevents scorching and gives you control over consistency. A common problem is adding cold milk too quickly, which can cause the mixture to seize and become grainy.
- Slowly stir in 3 cups sifted powdered sugar. Add an additional 1/4 cup powdered sugar or thin with 2-3 tablespoons more milk if needed for desired consistency. Fold in nuts if using.: As you add the powdered sugar, the frosting will thicken and become glossy, with a velvety mouthfeel. Sifting the sugar first avoids lumps and gives a silkier finish. If the icing feels too thick, add milk sparingly until it pours; if too thin, add more sifted sugar. Folding in the pecans introduces crunch and toasty aroma, but omit if you prefer the pure chocolate profile. Over thinning is a frequent mistake that prevents the frosting from setting properly.
- Evenly pour the icing over the cake with marshmallows immediately when after the cake comes out of the oven. Move quickly to gently spread out evenly with a rubber spatula. The icing will begin to harden.: Pouring the warm frosting over the hot cake helps it spread and settle into nooks, creating a glossy coating that firms as it cools. The sound of the warm glaze settling is subtle, and visually you will see it level and gloss over the marshmallows. Work swiftly because as the frosting cools, it becomes less pliable. A common pitfall is waiting too long to spread, resulting in uneven coverage and a patchy appearance.
- Allow to cool and then cut into squares.: Cooling lets the frosting set, and the cake firms so you can slice clean squares. The aroma will mellow into a comforting chocolate fragrance, and the marshmallow layer will keep a slight chew. For clean edges, use a sharp knife and wipe between cuts. Cutting while too warm can cause the frosting to smear and the squares to lose shape.
Notes
- Scale easily: Halve the recipe to bake in a 9×13 inch pan for fewer squares, watching bake time around 18 minutes, as a smaller volume often needs a slightly shorter bake.
- Nut swap: If you prefer a different crunch, substitute the pecans with toasted walnuts or omit entirely for a nut free version, keeping texture intact.
- Frosting texture control: Adjust the glaze by adding milk slowly for a pourable consistency or extra sifted powdered sugar for a stiffer set, tasting as you go to maintain balance.
- Make ahead: Bake and cool the cake completely, then wrap tightly and freeze for up to three months, thawing in the refrigerator before finishing with fresh frosting and marshmallows.
- Presentation boost: For a polished look, trim the edges for uniform squares and lightly dust with sifted cocoa or powdered sugar just before serving to highlight the glossy top.
- Temperature tip: Pour the icing while the cake is still warm to ensure it spreads and adheres properly, creating the signature smooth finish.
- Storage advice: Store leftover squares in a covered container at room temperature for up to three days, which preserves texture and flavor without refrigeration.