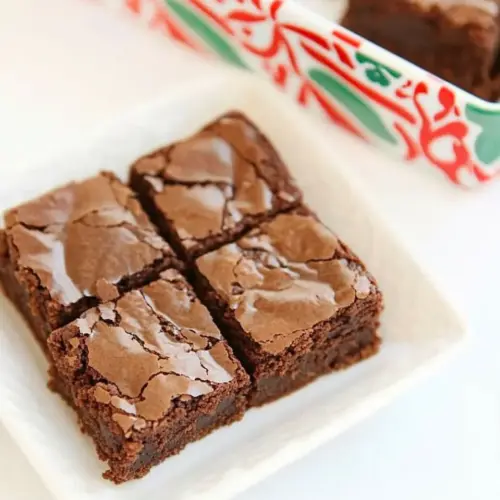
Milk Chocolate Truffle Brownies
Milk Chocolate Truffle Brownies deliver a creamy, fudgy chocolate experience with molten truffle pockets and a shiny crackled top. This easy treat blends milk chocolate and unsweetened chocolate for depth, while truffle squares add a luxurious surprise, making it ideal for gatherings or an easy weeknight dessert. Make it when you want an impressive, effortless bake.
Equipment
- 9 x 9 inch baking pan
- Foil
- Medium Saucepan
- Wooden Spoon
- Wire Rack
Ingredients
- 1/2 cup (1 Stick) butter Melted and rich, provides the primary fat that creates tender, fudgy brownies and helps dissolve sugar for a smooth batter. Adds a glossy finish and contributes to the overall mouthfeel and structure during baking. Helps carry flavor and balances the chocolate’s intensity.
- 1/2 cup milk chocolate pieces (or chips) Sweet and creamy, contributes milky chocolate flavor and additional cocoa butter for a softer chocolate profile in the batter. Melts into the warm butter to create a homogeneous chocolate base, enhancing flavor depth. Adds sweetness and a pleasant, mellow chocolate note to the brownies.
- 3 ounces unsweetened chocolate, chopped Bitter and intense, supplies concentrated chocolate flavor and deep cocoa notes that anchor the dessert’s chocolate character. Melts with butter to form a dense, flavorful matrix that yields rich, fudgy texture. Balances the milk chocolate’s sweetness and intensifies overall depth.
- 1 cup granulated white sugar Sweet and crystalline, provides bulk sweetness and helps create a tender crumb by interacting with fats and eggs. Aids in moisture retention and contributes to browning during baking, producing a pleasant crust. Balances bitterness from unsweetened chocolate and enriches flavor.
- 1 1/2 teaspoon vanilla extract Aromatic and sweet, imparts warm vanilla tones that enhance the chocolate flavors and round out the overall taste profile. Small quantity elevates perceived sweetness and complexity without adding extra sugar. Blends seamlessly into the batter for a uniform flavor boost.
- 3 large eggs Binding and leavening agent, adds structure, moisture, and richness while helping the brownies set as they bake. Whisked into the melted chocolate mixture, eggs create emulsion and contribute to a fudgy yet slightly cake-like texture. Provide stability and help trap steam for lightness.
- 2/3 cup all purpose flour Dry and structural, supplies the necessary starch and gluten to create body and hold the brownies together. Incorporated sparingly to maintain a fudgy texture while preventing collapse and excessive density. Works with baking powder to achieve the desired crumb.
- 1/2 teaspoon baking powder Leavening and lift-enhancing, produces gentle rise to prevent overly dense brownies while maintaining a fudgy center. Reacts with wet ingredients to create small air pockets and improve texture uniformity. Used in small amount to balance tenderness and structure.
- 1/2 teaspoon salt Salty and flavor-enhancing, elevates chocolate flavors and balances sweetness to prevent cloying notes. Strengthens gluten slightly and helps control fermentation of egg proteins during baking. A pinch enhances overall flavor clarity and depth.
- One 4.63 ounce package (10 Squares) truffle filled chocolate squares Filled and decadent, provides concentrated truffle centers that melt during baking to create pockets of gooey, indulgent chocolate within the brownies. Adds contrast in texture and flavor, with creamy centers complementing the fudgy cake. Serves as a luxurious finishing element that elevates the treat.
Instructions
- Preheat the oven to 325 degrees F. Line a 9 x 9 inch baking pan with foil, extending the foil over the edges of the pan. Coat the foil with nonstick cooking spray; set the pan aside.: As the oven comes up to temperature you should notice a faint warm scent in the kitchen, and the properly prepared pan will let you lift the entire slab out once cooled. This setup prevents sticking and ensures even heat transfer, which is critical for consistent brownies. A common mistake is skipping the foil overhang, which makes removing the bars messy and increases the chance of breaking them when slicing. Take a moment to smooth the foil so the batter spreads evenly, and double check that the oven reaches temperature for an even bake.
- In a medium saucepan heat and stir the butter, milk chocolate and unsweetened chocolate over low heat until melted and smooth; cool slightly. Stir in the sugar and vanilla until combined. Add the eggs, one at a time, beating with a wooden spoon after each addition.: The moment the chocolate and butter melt, the kitchen fills with a warm, enveloping cocoa aroma, and the mixture will become glossy and thick, which is the visual cue you want before cooling. Cooling slightly protects the eggs from cooking when they are added. Stirring the sugar and vanilla in integrates sweetness and aroma so they bloom across the batter. Adding the eggs one at a time creates a stable, smooth emulsion that helps the brownies set with the right fudgy texture. A frequent error at this stage is adding eggs while the chocolate is still too hot, which can scramble them; to avoid that, let the mixture sit for a few minutes until it is warm rather than hot, and whisk vigorously between additions to maintain a silky texture.
- In a small bowl, stir together the flour, baking powder and salt. Add the flour mixture to the chocolate mixture; stir just until combined. Pour the batter into the prepared baking pan, spreading evenly.: When you blend the dry mix in, you will see the batter go from glossy to slightly thicker and velvety. Stirring just until combined preserves the tender crumb while preventing overdevelopment of gluten, which keeps the brownies from becoming cakey. Spreading the batter evenly in the pan leads to uniform baking and consistent rise, so use a spatula to level the surface. Overmixing is the main pitfall here, which can produce a tougher texture; stop as soon as the flour streaks disappear, and trust that residual mixing from spreading will finish the job.
- Bake for 25 minutes. Break the truffle squares into irregular-shaped pieces. Sprinkle over warm brownies. Cool in pan on a wire rack.: You'll notice the top take on a slight sheen and the edges begin to pull away from the foil, both signs that the bake is near done. The crumb should be set but still dense and moist in the middle, not runny. Placing broken truffle pieces on the warm surface lets them soften and nestle into pockets without fully melting away, creating contrast when cooled. A typical mistake is overbaking, which dries out the center; check at around 20 to 25 minutes and remove when a toothpick shows moist crumbs rather than raw batter. Cooling on a wire rack prevents steam buildup under the pan and preserves texture.
- Using the edges of the foil, lift uncut brownies out of pan. Cut into bars.: As you lift the foil, you should feel the brownie slab release cleanly from the pan, and the aroma intensifies as it cools. Waiting until they reach near room temperature makes slicing neater, since warm brownies can smear and cold brownies can be firm but cut cleanly. Use a sharp knife and wipe it between cuts for tidy bars. The usual error is attempting to cut too soon; give them enough time to set, about 20 to 30 minutes, and you will have clean squares with visible truffle pockets.
Notes
- Swap chocolates thoughtfully: Use a higher percentage milk chocolate if you prefer less sweetness, but keep the unsweetened chocolate to maintain depth.
- Truffle placement: Break the truffle squares into different sized pieces to create varied molten pockets, some that melt fully and others that remain as creamy centers.
- Presentation tip: Dust the cooled bars lightly with cocoa powder or sifted confectioners sugar for a bakery look, applied just before serving.
- Baking time tweak: For a more gooey center, check the brownies at 20 minutes and remove when the center registers slightly underdone, remembering carryover will finish the bake.
- Storage guidance: Keep the brownies in an airtight container at room temperature for up to three days, or refrigerate for longer storage, bringing to room temperature before serving for best texture.