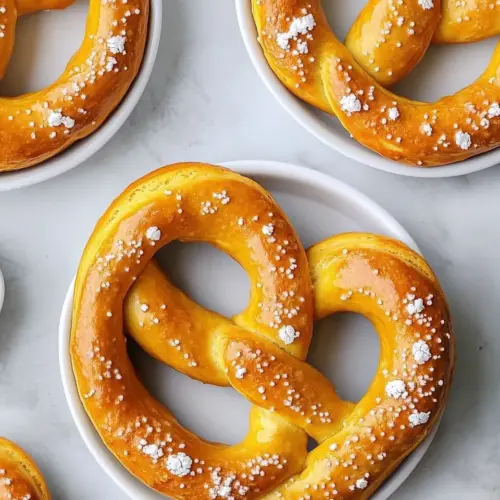
Mickey Pretzels
Mickey Pretzels are soft, slightly chewy, and brushed with butter for a glossy finish. These easy, family friendly snacks deliver a warm, salty bite with a playful shape, perfect for gatherings or a fun weekend baking project. Make them for movie night or parties and enjoy the comforting aroma and satisfying texture that will have everyone reaching for seconds.
Equipment
- Stand mixer
- Dough Hook
- Baking Sheets
- Parchment Paper
- Medium sized bowl
Ingredients
- 1 cup Warm Water Provide warmth to activate yeast and create the liquid base for the dough, helping dissolve sugar and salt so ingredients blend uniformly. Measure temperature between 100–110°F to avoid killing yeast and ensure proper fermentation.
- 2 1/2 teaspoons Active Dry Yeast Leaven dough by producing carbon dioxide gas during fermentation, creating lightness and airy texture in the pretzels. Sprinkle into warm water, allow to bloom until foamy, and mix thoroughly for consistent rise.
- 1/2 cup Granulated Sugar Sweeten the dough slightly to feed the yeast and aid browning during baking, contributing subtle caramelized flavor to the crust. Dissolve completely in the warm water to ensure yeast has immediate access to sugars for fermentation.
- 1 teaspoon salt Enhance overall flavor and balance sweetness while strengthening gluten structure for improved dough texture and chew. Dissolve into the dough mixture and adjust for desired savory profile without overpowering other flavors.
- 1 tablespoon Unsalted Butter Melted Enrich dough with fat for tenderness and richer taste while improving shelf life and mouthfeel, with melted form incorporating evenly into wet ingredients. Add at mixing stage to ensure uniform distribution and a softer crumb.
- 3 cups All-Purpose Flour Provide bulk and structure through gluten development, forming the backbone of the pretzel dough that traps gas produced by yeast. Measure and add gradually while mixing to achieve the proper hydration and elastic consistency.
- 1 tablespoon Oil Prevent sticking and add a light coating to mixing bowl or surface, helping with handling and shaping the dough while contributing very subtle richness. Apply sparingly to avoid greasiness that could inhibit gluten formation.
- 2 cups Hot Water Create a hot alkaline bath when combined with baking soda to set the pretzel crust and produce characteristic chew and deep brown color during baking. Use at high temperature and dip shaped dough briefly for optimal surface reaction.
- 1/4 cup Baking Soda Act as an alkaline agent when dissolved in the hot water bath to raise pH and encourage Maillard reactions, producing the classic pretzel flavor and dark brown exterior. Carefully dissolve and monitor bath concentration to ensure even coating.
- 1 -2 tablespoons Salted Butter Melted Brush melted butter over baked pretzels to add sheen, richness, and a toasted flavor while helping toppings adhere; salted version adds additional savory seasoning. Apply immediately after baking for best absorption and glossy finish.
- Coarse Salt for Topping Provide crunchy, saline bursts on the surface that contrast with the soft interior, enhancing traditional pretzel appearance and flavor. Sprinkle onto the buttered surface while warm so the crystals adhere without melting completely.
- Cheese Dip Offer a warm, creamy accompaniment that complements the savory pretzel, typically made from melted cheese and seasonings to enhance dipping experience. Serve alongside pretzels to provide a contrasting texture and rich, savory flavor.
Instructions
- In a stand mixer add the warm water and yeast. Allow the yeast to bloom and become bubbly about 5 minutes.: The air fills the kitchen with a faint, sweet scent as the yeast begins to wake, tiny bubbles forming on the surface within minutes; this frothy bloom signals that the yeast is alive and ready, which is essential for the dough to rise properly, so never skip checking for that bubbly activity, and a common mistake is using water that is too hot or cold which prevents proper activation.
- With the dough hook attachment, add the sugar, salt, melted butter, and the flour 1 cup at a time. If the dough is too dry, add 1 more tablespoon of water.: As the mixer turns, the mixture transforms from sticky to elastic, the sugar feeding the yeast and the butter smoothing the texture; I like to watch the dough pull away from the bowl, a visual cue the gluten is developing, and be mindful not to overflour which makes the final pretzels dry, one frequent error is adding all the flour at once instead of gradual incorporation.
- Remove the dough from the bowl and knead it into a ball. Place the dough into a large bowl and add the oil on top. Cover and let rise until doubled in size, about an hour.: The dough should feel slightly tacky yet cohesive under your palms, a soft resistance when you press with your thumb is perfect, and kneading by hand for a few minutes creates a silkier surface, this step matters because it aligns gluten strands for that chewiness, common missteps include not kneading long enough so the crumb ends up dense.
- Preheat the oven to 450°F and line two baking sheets with parchment paper. Divide the dough into 6 equal pieces. Roll each piece into a long rope, pinching and rolling the two ends together to make a circle from the dough. Twist the dough into a Mickey Mouse head with the two ears and head.: Gliding the dough in a light coat of oil prevents a crust from forming while it rests, and covering the bowl traps warm air so the dough can rise; when it doubles in size you will notice a gentle doming and a soft, pillowy texture that indicates readiness, avoid placing it in a cold spot which slows fermentation.
- Add the hot water and baking soda in a medium sized bowl and whisk to dissolve the baking soda. Dip each pretzel into the bowl and place on the prepared baking sheets. You may need to reshape them a little.: Waiting pays off here, the room will start to smell faintly yeasty and you may even see small bubbles under the surface, this rise builds flavor and structure, and skipping or underproofing often results in tight, gummy pretzels instead of tender ones.
- Brush the pretzels with melted butter and sprinkle with coarse salt.: A very hot oven encourages quick oven spring and browning, you will hear no sound at first but once the pretzels hit the heat they begin to color, ensuring the sheets are ready keeps the workflow smooth, a typical mistake is baking at a lower temperature which produces pale, less crisp crusts.
- Bake for 8-10 minutes, until the tops are golden brown. Serve with cheese dip.: Each portion should feel light and even, dividing uniformly ensures consistent baking so all pretzels finish at the same time, I weigh them when precision matters, and uneven pieces will bake unevenly which can lead to some being overdone while others are underbaked.
- Roll each piece into a long rope, pinching and rolling the two ends together to make a circle from the dough: Rolling transforms the texture, you will feel the dough thin and smooth under your palms, pinching secures the join so shapes keep during boiling and baking; take your time here to avoid weak joins which can unravel in the next steps.
- Twist the dough into a Mickey Mouse head with the two ears and head: This shaping step is playful, press the ears gently so they stay connected, and watch how the form holds when placed on the sheet; shaping well means the pretzel retains its charming silhouette, a common pitfall is making the ears too small which can make them disappear in the boil.
- Add the hot water and baking soda in a medium sized bowl and whisk to dissolve the baking soda: The mixture will steam slightly and release a faint alkaline aroma, dissolving baking soda ensures even coverage and prevents grainy spots on the crust, this bath chemically alters the surface to help brown and form the classic pretzel crust so a shallow or weak solution can yield a pale finish.
- Dip each pretzel into the bowl and place on the prepared baking sheets: As you lower the dough, listen for a soft whisper as it hits the water, then place it back on parchment where it will regain shape; the bath tightens the surface and sets the crust; reshaping gently after dipping helps preserve the silhouette, avoid leaving them in the bath too long which can over soften the dough.
- Brush the pretzels with melted butter and sprinkle with coarse salt: The glossy sheen appears as you brush, and the coarse grains contrast the soft crumb; this finishing touch adds flavor and visual appeal, applying butter while warm helps the salt stick, but resist adding too much which can make them greasy.
- Bake for 8 to 10 minutes, until the tops are golden brown: The oven fills with a rich, toasty scent as the crust firms and colors, watch for an even golden tone across the tops which indicates doneness, overbaking dries the interior, while underbaking leaves it doughy, so check visually and rely on that golden cue.
- Serve with cheese dip: Warm cheese dip creates an inviting contrast, the creamy texture and savory notes pair beautifully with the salty, chewy pretzel, serve immediately for the best combination of warm interior and glossy crust, a common mistake is letting them sit too long which softens the exterior.
Notes
- Make Mini Pretzel Bites by cutting each rope into small pieces before shaping; they bake faster and are perfect for dipping but watch the oven closely to avoid overbrowning.
- Try a Garlic Butter Finish by mixing a little minced garlic into the melted butter for brushing; it adds savory depth, though be cautious with raw garlic intensity if serving to children.
- Serve with Mustard Dip as an alternative to cheese; a tangy mustard cut contrasts the buttery pretzel, and it is a lighter option for those preferring less richness.
- Make Ahead and Freeze by shaping and freezing the pretzels before the baking soda bath; when ready, thaw, dip, and bake, which is handy for planning, but ensure complete thaw so they bake evenly.
- Experiment with Coarse Toppings such as sesame or poppy seeds in place of coarse salt for a different texture; press them gently so they adhere during baking.