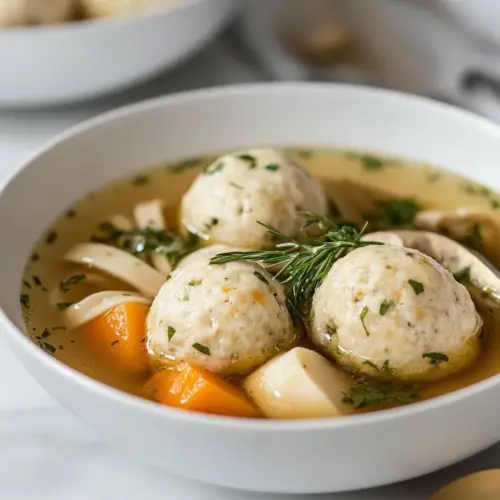
Matzo Ball Soup
Matzo Ball Soup offers a warm, savory broth with tender, pillowy matzo dumplings and shredded chicken, creating a creamy yet light bowl ideal for cozy dinners. This easy weeknight soup balances comforting texture and bright herb notes, making it a reliable family favorite. Make it for cold evenings or when someone needs a soulful, nourishing meal.
Equipment
- Large Pot
- Dutch Oven
- Cheesecloth
- Slotted Spoon
- Cutting Board
Ingredients
- 2 tablespoons vegetable oil or chicken fat (schmaltz, see note 1) Use to render and add richness; heats to coat the matzo mixture and enhances savory flavor when combined with schmaltz for authenticity. Helps achieve a tender texture in the matzo balls while contributing a subtle mouthfeel to the broth.
- 2 eggs Beat to bind the matzo meal and provide structure; whisked eggs incorporate air to lighten the matzo ball mixture. Cooked in simmering broth they help the dumplings hold together and create a tender interior.
- 1/2 cup matzo meal (one packet, see note 2) Absorbent binder that forms the base of the matzo balls; hydrates with eggs and fat to create the dumpling dough. Provides the characteristic crumb and slightly grainy texture that defines traditional matzo balls.
- 1 tablespoon vegetable oil Sauté to soften aromatics and add another layer of flavor; used at the beginning to sweat the onion, carrots and celery. Adds a glossy finish and helps release fragrant compounds into the soup base.
- 1 small onion peeled and chopped Sauté until translucent to add sweetness and depth; chopped onion forms part of the mirepoix that flavors the broth. Releases natural sugars and browning compounds that enrich the overall savory profile.
- 2 large carrots peeled and chopped Peel and chop to contribute sweetness, body and color; simmered in the broth to impart gentle carrot flavor. Also provides texture if served in the finished soup and balances savory notes with natural sugars.
- 4 ribs celery chopped Chop and simmer to add aromatic vegetal backbone; celery contributes subtle bitterness and savory depth to the stock. Works with carrots and onion to build a classic base for clear chicken soup.
- 3 cloves garlic peeled and minced Mince and sauté briefly to add pungent warmth and aromatic complexity; garlic brightens and complements the mirepoix. Releases essential oils that infuse the broth with a savory, slightly spicy edge.
- 6 cups chicken broth (see note 3) Simmer to form the flavorful liquid base; quality chicken broth provides salt, collagen and concentrated savory essence. Acts as the cooking medium for the chicken and matzo balls, carrying all flavors throughout the soup.
- 1 1/2 pounds boneless, skinless, chicken breasts or thighs Poach in the broth to supply protein, flavor and body; boneless chicken releases juices and enriches the stock. Shredded or sliced, cooked chicken becomes part of the soup’s texture and substance.
- 4 to 6 parsley stems Add as aromatic herb stems to infuse gentle herbaceous notes; parsley stems simmer in the broth to release fresh, green flavor. Removed before serving, they brighten the stock without adding leafy texture.
- 1 teaspoon whole black peppercorns Toast whole to impart a clean peppery heat; simmering peppercorns slowly release volatile oils that season the broth. Provide subtle complexity and warmth without overpowering delicate flavors.
- 2 bay leaves Add whole to the simmering broth for a subtle herbal bitterness and depth; bay leaves release essential oils that enhance savory notes. Typically removed before serving but crucial for layered flavor.
- Salt and freshly ground black pepper Season to taste and enhance all flavors; salt and freshly ground black pepper adjust the overall balance and seasoning of the soup. Used both during cooking and at the end to ensure the broth and matzo balls are properly seasoned.
- fresh dill for garnish Garnish to finish with fresh herbal brightness and fragrant lift; dill adds a grassy, slightly anise-like note that complements chicken soup. Sprinkled just before serving to preserve its delicate flavor and color.
Instructions
- In a small bowl, whisk together the vegetable oil and eggs. Add matzo meal and stir to combine. Refrigerate the matzo at least 15 minutes or overnight. With wet hands, shape the matzo into 1-inch balls.: The aroma of the beaten eggs mingling with the oil is faint but reassuring, and whisking creates a smooth base so the matzo meal hydrates evenly. This step matters because it ensures the dumplings bind without becoming gluey; if you skip proper whisking you may end up with lumps. A common mistake here is adding matzo meal too soon before the mixture is uniform, which can leave dry pockets.
- In a large pot over medium-high heat, bring 10 to 12 cups of water to a boil. Add matzo balls and reduce to a simmer. Cover well and simmer until fully cooked, 20 minutes.: You will feel the mixture thicken as the matzo meal absorbs moisture, a tactile cue that the dough is coming together. Let it rest in the refrigerator to firm so shaping is easier, and chilling also helps the fat solidify slightly for a lighter texture. If you try to form balls while the mix is too soft, they will flatten in the pot, so resist impatience.
- Meanwhile, in a large pot or Dutch oven, heat olive oil over medium-high heat until shimmering. Add onion, carrots, celery, and garlic and cook until softened, about 5 minutes. Stir in the broth.: The cool dough tightens and becomes easier to handle, and this pause allows flavors to meld. Overnight chilling deepens texture, yielding pillowy dumplings. Do not skip this if your mix seems loose, otherwise the matzo balls can disintegrate during cooking.
- Place the parsley stems, peppercorns, and bay leaves in the center of the square of cheesecloth. Gather the corners together to make a small pouch, tying it tightly with twine. Keep one length of the twine long enough to tie to one of the pot handles, for easy removal. Add to pot.: The sensation of wet palms prevents sticking and helps shape smooth, even spheres that hold together in simmering liquid. Aim for uniform size so they cook evenly, and remember a gentle squeeze without compacting keeps them tender. Pressing too firmly will make dense, heavy dumplings.
- Add the chicken to the pot and continue to cook until vegetables are tender and the chicken registers 165 degrees when pierced at the thickest part, about 20 minutes, depending on the thickness of the chicken.: The rolling boil creates vigorous movement so the matzo balls can set quickly on initial contact; listen for the loud bubbling and watch for steam. Reducing to a simmer prevents violent agitation that could break the dumplings apart. A frequent misstep is leaving the pot at a hard boil, which can shred the matzo balls.
- Remove to a cutting board and cool slightly. Slice, chop, or shred as desired (I prefer shredded). Return chicken to pot. Remove sachet and discard. Season soup to taste with salt and freshly ground black pepper.: As the balls hit the hot water you will hear a gentle settling sound, and within minutes their surface firms. Simmering rather than boiling keeps the exterior intact while allowing moisture to cook through. Too vigorous boiling causes cracking, so lower the heat after adding them.
- Remove matzo balls from simmering water using a slotted spoon. Divide matzo balls between 4 bowls. Ladle soup over matzo and garnish with dill.: Steam trapped by the lid cooks the matzo balls evenly; you should see slight swelling and a tender interior when pierced. This timing yields springy, cooked centers, but thickness can vary, so test one to be sure. Cutting them open too soon can leave an underdone center.
- Meanwhile, in a large pot or Dutch oven, heat olive oil over medium high heat until shimmering: The shimmering oil signals readiness; add the vegetables and you will hear a soft sizzle and smell sweet aromatics as they begin to soften. This step unlocks natural sugars that enrich the broth. If the oil smokes, the pan is too hot and will impart bitter notes.
- Add onion, carrots, celery, and garlic and cook until softened, about 5 minutes: The vegetables will release a fragrant steam and the onion should become translucent while carrots and celery begin to yield. This forms the aromatic base that gives the broth body and balance. Avoid browning; you want softened, not caramelized, aromatics here.
- Stir in the broth: Pouring in the chicken broth deglazes the pot and collects all the savory bits from the vegetables, creating a clear yet flavorful liquid. The sound shifts to a steady simmer and the scent grows deeper. Adding cold broth straight from the fridge can temporarily lower the pot temperature, so expect a brief return to a gentle simmer.
- Place the parsley stems, peppercorns, and bay leaves in the center of the square of cheesecloth: Crafting this sachet concentrates fresh herb notes without loose debris, and when it simmers the aromatics infuse cleanly. Tie it securely so the contents do not escape into the soup, and leave a long twine tail for easy removal. Forgetting to secure it can scatter stems and peppercorns through the broth.
- Gather the corners together to make a small pouch, tying it tightly with twine: The tactile step of forming a sachet ensures you can fish out the aromatics later, keeping the broth clear. I always leave a tail to anchor the bundle for retrieval. Loose tying risks herbs escaping and creating texture issues.
- Keep one length of the twine long enough to tie to one of the pot handles, for easy removal: This practical trick saves fishing around in hot liquid, and the gentle tug removes the sachet cleanly when the broth is ready. It also prevents accidental spills when spooning. Not securing the twine can lead to awkward hot-hand maneuvers.
- Add to pot: As the sachet slips into the simmering broth, the aroma will brighten, and you will see subtle movement as the flavors begin to marry. This is where the broth starts to gain complexity. If you overcrowd the pot at this stage, the liquid may not circulate well and flavors will not extract evenly.
- Add the chicken to the pot and continue to cook until vegetables are tender and the chicken registers 165 degrees when pierced at the thickest part: The chicken cooks and flavors the broth simultaneously; as it poaches you will notice the surface soften and the meat turn opaque. Cooking to the correct temperature ensures safety and tenderness. Overcooking will dry lean pieces, so watch closely and use a thermometer where possible.
- about 20 minutes, depending on the thickness of the chicken: Time varies with thickness, and during cooking the broth will develop a gentle shimmer and a fuller mouthfeel. Test the thickest piece rather than rely solely on time to avoid undercooking. A common mistake is assuming all pieces cook at the same rate; remove thicker pieces earlier for slicing.
- Remove to a cutting board and cool slightly: Resting the chicken allows juices to settle, and you will notice it becomes easier to shred or slice without tearing. This step preserves texture and yields tidier pieces for the soup. Cutting too early can cause flaking and loss of moisture.
- Slice, chop, or shred as desired (I prefer shredded): Shredding exposes more surface area to the broth, letting the meat soak up flavor and distribute evenly in bowls. The act of shredding yields tender strands that nestle around the matzo balls. Chunking is fine, but very large pieces may make the bowl feel unbalanced.
- Return chicken to pot: Reuniting the meat with the broth allows the flavors to integrate; you will see the soup come together visually as pieces float and the surface glistens. This final simmer melds textures. Adding cold chicken can cool the pot, so return gently and bring back to a warm simmer.
- Remove sachet and discard: Pulling out the spice bundle leaves a clear, debris free broth while preserving the infused notes. The scent will remain but without loose stems or peppercorns. Forgetting to remove it can leave bitter bits if simmered too long.
- Season soup to taste with salt and freshly ground black pepper: Taste is the ultimate arbiter; add salt and freshly ground black pepper in small increments and re taste often. Seasoning at the end lets you correct for concentration changes from simmering. Over seasoning is easy; if that happens, dilute with a little hot water or unsalted broth.
- Remove matzo balls from simmering water using a slotted spoon: The balls will feel tender and slightly buoyant when ready; a slotted spoon lifts them cleanly while leaving excess water behind. Transfer them carefully to avoid tearing. Do not stir them aggressively in the pot, as that can break their exterior.
- Divide matzo balls between 4 bowls: Placing the matzo balls first creates a pleasing composition and allows each eater to receive equal portions. The visual of plump dumplings in the bowl is satisfying and sets up the final presentation. Crowding too many per bowl makes serving awkward.
- Ladle soup over matzo and garnish with dill: The final pour should be warm and fragrant, coating the matzo balls without drowning them, and a sprinkle of fresh dill adds a bright finish. Serve immediately while the broth is hot and the matzo balls retain their texture. Letting it sit can soften the dumplings excessively.
Notes
- Use schmaltz for richer flavor when you want true traditional depth; warm it gently before mixing with the eggs so it blends smoothly into the matzo meal.
- Chill longer for firmer balls if you plan to make the matzo mixture ahead; overnight resting tightens the dough and makes shaping effortless.
- Keep the sachet accessible by securing the twine to the pot handle, the easiest way to extract herbs without scalding your fingers.
- Test one matzo ball first before cooking the whole batch to confirm texture and adjust chilling or egg ratio if it falls apart.
- Prefer shredded chicken for even distribution in the bowls, it soaks up the broth and offers a homier mouthfeel.
- Reserve a little warm broth to thin the soup if it concentrates too much after cooling or if you over salt by accident.
- Garnish at the end with fresh dill to preserve its bright aroma and avoid cooking away delicate herbal notes.