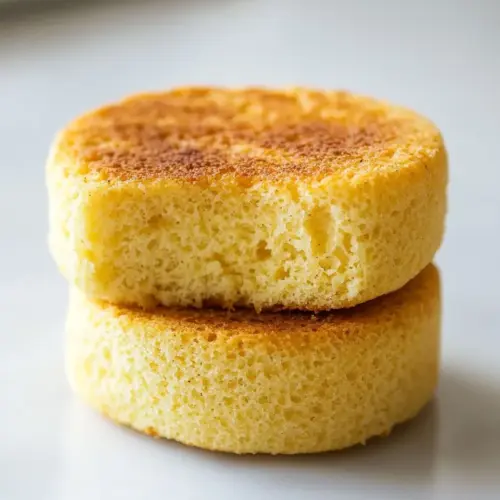
Magic Mug Low Carb Bread
Magic Mug Low Carb Bread is a quick, low carb single serving loaf that delivers a tender, slightly nutty crumb in minutes. This easy microwave mug bread uses simple pantry staples like almond flour and eggs to create a satisfying slice for breakfast or a snack. Perfect for busy mornings and low carb diets, it is an approachable recipe worth trying for fast homemade bread without fuss.
Equipment
- Microwave
- Tall straight mug
- Fork
- Serrated Knife
Ingredients
- 1/2 teaspoon oil any variety Adds lubrication and prevents sticking while contributing a slight richness and tender crumb; suitable oils include neutral or flavorful varieties depending on preference.
- 2 large eggs or liquid vegan egg substitute Provides structure, moisture, and leavening through coagulation when heated; can be substituted with a liquid vegan egg replacer for a plant-based option.
- 1/2 cup fine ground almond flour (I used Bob’s Red Mill) Supplies bulk, low-carb texture, and a mildly nutty flavor while absorbing moisture to create the bread matrix; fine grind ensures a smoother, less crumbly result.
- 1/2 teaspoon grain-free baking powder Lightens the batter by introducing trapped air and promotes rise without grains; grain-free formulation keeps the recipe suitable for gluten-free diets.
- 1/4 teaspoons ea salt Balances flavor by enhancing savory notes and suppressing bitterness; small amounts also support yeast-free chemical leavening reactions and overall seasoning.
Instructions
- Drizzle the oil into a tall straight mug, about 3.5 inches wide and 5 inches tall. Brush the oil around the edges to grease the mug.: As you add the oil , you will notice it bead and coat the ceramic surface, creating a thin shiny layer that ensures the loaf releases cleanly when inverted. Brushing it around guarantees the edge will not stick, which helps maintain the loaf's shape and prevents tearing when you remove it. If the mug is not oiled evenly, parts of the loaf will cling and might tear, so take a moment to cover the base and sides. A common mistake is using a mug that is too shallow or flared, which can cause the loaf to overflow as it rises slightly; stick to a tall straight mug for best results.
- Place the eggs, almond flour, baking powder, and salt in the mug. Whisk with a fork until very smooth. Tap the mug on the counter to remove air pockets.: When you crack the eggs into the mug and add the dry ingredients, start whisking slowly so the almond flour absorbs the liquid evenly. You should aim for a homogenous batter without lumps, and the surface will look satiny and slightly glossy. Tapping the mug helps settle the batter and forces out large air pockets that could create uneven holes in the crumb. The batter will smell faintly nutty from the almond flour , and the texture should be viscous but not soupy. If you see visible streaks of dry flour, whisk longer and scrape down the sides. Overwhisking to a froth is unnecessary and can create larger air bubbles that collapse, so stop once smooth.
- Microwave on high heat for 3 minutes. Shake the bread loaf out of the mug. Slice with a serrated knife and serve.: Once the batter is smooth, place the mug in the microwave. As it heats, you will see the batter rise and the surface set; the aroma will shift to toasted nuts. The high heat rapidly firms the proteins in the eggs , creating structure, while the interior cooks through. Cooking time can vary by microwave wattage, so if your appliance is less powerful you may need an extra 15 to 30 seconds, and if it is extremely powerful reduce by 10 to 20 seconds to avoid rubbery texture. A common pitfall is overcooking, which yields dry, dense bread, so watch the mug, and when the center is set but still slightly springy, remove it from the microwave.
- Wrap well and store in the refrigerator.: After microwaving, let the mug sit for a short moment to cool slightly and finish setting; the loaf will contract a touch from the mug’s sides. To remove it, run a small spatula or butter knife around the edge if needed, then invert the mug over a plate and give it a gentle shake. The crust will feel lightly firm, and the interior should be soft and tender with a fine crumb. Slice with a serrated knife for clean cuts, and you will notice a faint toasted scent and a nutty flavor. If the loaf sticks, it likely needs more oil next time or the mug’s shape was not optimal. Avoid sawing aggressively, which can compress the crumb.
- Wrap well and store in the refrigerator: If you have leftovers, wrap the loaf tightly in plastic wrap or place it in an airtight container. Chilling helps it hold shape and slows spoilage. In the fridge, the loaf will firm up and the texture will tighten slightly, which is normal; to refresh, warm briefly in the microwave for a few seconds or toast slices lightly. A common error is leaving the bread uncovered at room temperature for too long, which can dry it out, so always seal it properly. Proper storage keeps the flavor bright and maintains the ideal mouthfeel for up to a few days.
Notes
- Make multiple loaves at once: If you want to batch this recipe, whisk a triple or quadruple amount in a bowl, then pour into several oiled mugs. Microwave them one at a time, and add roughly one minute of cook time for each additional mug you cook back to back. Keep an eye on each mug since slight differences in batter distribution can change timing.
- Switch to a liquid vegan egg substitute: Use a commercial liquid substitute measured to equal two large eggs to keep structure while making the loaf vegan. Texture will be slightly different, often a touch denser, so ensure a smooth batter and consider an extra 10 to 20 seconds of cook time depending on your product.
- Adjust oil for softer crust: If you prefer a softer exterior, reduce the amount of oil very slightly or wipe the mug with oil instead of drizzling. For a crisper exterior, leave the full measurement and let the mug sit a minute before inverting to encourage slight cooling and surface firming.
- Use very fine almond flour: For the best, tender crumb, choose blanched, fine ground almond flour. Coarser meals can create a toothier texture, so sift if you suspect larger pieces. This single choice makes a big difference in mouthfeel.
- Store properly for maximum freshness: Wrap the loaf tightly in plastic wrap or in an airtight container and refrigerate. For short term counter storage, wrap very tightly and consume within a day to avoid drying. Reheat gently to restore the fresh just baked quality.