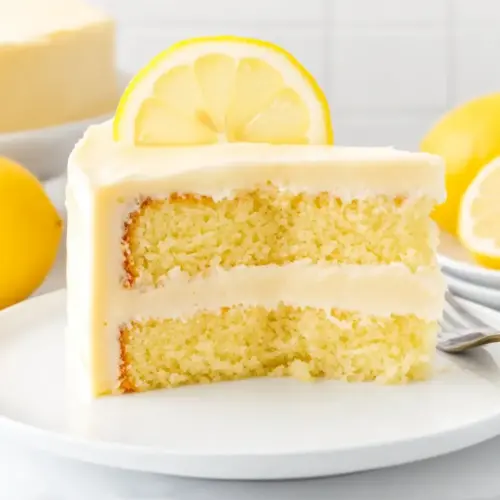
Lemon Velvet Cake
Lemon Velvet Cake is a soft, creamy, and bright celebration cake with a tender crumb and tangy cream cheese frosting. The fresh lemon juice and zest give a lively citrus note while the silky frosting balances sweetness, making it a perfect easy dessert for gatherings, brunch, or elegant tea. Make it to enjoy a moist, flavorful cake that feels both comforting and special.
Equipment
- 9-inch Round Cake Pans
- Electric Mixer
- Mixing Bowls
- Wire Rack
- Spatula
- Serrated Knife
Ingredients
- 2 1/2 cups all-purpose flour Provide structure and bulk to the cake batter, supplying gluten that creates a tender crumb when combined with fats and liquids; measure accurately and sift if lumpy to ensure even distribution; incorporate gradually to avoid overmixing and maintain a velvety texture.
- 2 cups granulated sugar Add sweetness and aid in browning during baking while helping to tenderize the crumb; cream with butter to trap air for lift and dissolve fully to prevent grittiness; adjust level for desired sweetness but preserve balance with lemon acidity.
- 1 teaspoon baking powder Leaven the batter by releasing carbon dioxide when heated, contributing to a light, airy texture; combine with other dry ingredients to ensure even rising; use fresh leavening for consistent results.
- 1/2 teaspoon baking soda Provide additional chemical leavening and tenderization, reacting with acidic components like buttermilk and lemon juice to produce lift; measure precisely as excess can alter texture and flavor; mix into dry ingredients for even activation.
- 1/4 teaspoons salt Enhance flavor and balance sweetness by amplifying lemon brightness while also controlling gluten development slightly; dissolve with wet ingredients to evenly season the batter; use the stated small amount to avoid noticeable saltiness.
- 3/4 cup unsalted butter (softened) Contribute richness, flavor, and moisture while helping to create a fine, tender crumb when creamed with sugar; bring to room temperature for proper incorporation and aeration; adjust creaming time to achieve desired batter volume.
- 1 large egg Provide structure, moisture, and richness while aiding in emulsification to bind ingredients; beat gently into batter to avoid overmixing and ensure even distribution; use at room temperature for optimal blending.
- 3 large egg whites (room temperature) Lighten the batter and increase volume without adding fat, improving lift and creating a delicate crumb when whipped; ensure egg whites are at room temperature for better volume and stability; fold in carefully to retain airiness.
- 1 cup buttermilk (room temperature) Introduce acidity and moisture while contributing to tenderizing proteins and activating baking soda for leavening; use room temperature to prevent batter temperature drops and ensure smooth mixing; imparts subtle tang that complements lemon.
- 1/4 cup fresh lemon juice Deliver concentrated lemon flavor and acidity to brighten the cake, help activate leavening, and balance sweetness; strain if necessary to remove seeds and ensure smooth batter; use fresh juice for best aromatic quality.
- 2 tablespoons fresh lemon juice Provide additional lemon flavor for intensified citrus notes, useful in both batter and icing adjustments; add gradually and taste to maintain balance; fresh juice ensures a natural, vibrant lemon character.
- 1 teaspoon vanilla extract Impart warm, sweet aromatic notes that round out citrus flavors and enhance overall aroma; add with wet ingredients to distribute evenly; quality pure extract yields cleaner, more natural flavor than artificial variants.
- 24 ounces cream cheese (softened (3 blocks)) Provide creaminess, tang, and richness to the frosting while serving as the primary base for cream cheese frosting; soften to room temperature for smooth whipping and avoid lumps; use full-fat blocks for best texture and stability.
- 2 teaspoons vanilla extract Enhance the frosting with a secondary vanilla depth, balancing the tang of cream cheese and lemon while contributing pleasant aroma; add incrementally and taste to ensure the right vanilla presence without overpowering citrus.
- 1 tablespoon fresh lemon juice Add concentrated lemon brightness to the frosting, balancing sweetness and enhancing freshness; incorporate gradually and whisk until fully combined for a smooth, tangy icing; fresh juice yields best flavor clarity.
- 1 cup unsalted butter (softened) Contribute richness and stability to the frosting, creating a silky mouthfeel and helping the icing hold shape for spreading or piping; soften to room temperature for smooth incorporation and beat until fully emulsified.
- 8 cups powdered sugar Sweeten and stabilize the frosting while providing structure for piping and smoothing; sift to remove lumps and add slowly to achieve desired consistency without over-drying; powdered sugar also helps the frosting set.
- fresh lemon zest (optional garnish) Provide optional aromatic garnish and a burst of fresh citrus oil when zested over the finished cake; use sparingly to avoid bitterness and add immediately before serving for maximum fragrance and visual appeal.
Instructions
- Preheat your oven to 350°F. Grease and flour two 9-inch round cake pans. You can also line the bottoms with parchment paper for easy removal.: As the oven warms, you should sense a faint, dry heat if you open it briefly, and the rack will be at a stable, even temperature that ensures consistent rise. An oven that is not properly preheated can cause uneven baking, where edges set before the center is done. One common mistake is placing pans in before heat is stable, which leads to a lopsided rise. Greasing and flouring or lining pans with parchment prevents sticking and helps the layers release cleanly, preserving a smooth side and bottom.
- In a large mixing bowl, whisk together the flour, sugar, baking powder, baking soda, and salt until well combined.: You should hear the soft rustle of dry ingredients and see an even, pale mixture with no streaks of sugar or clumps of leavening. Properly combined dry ingredients ensure even rise and flavor distribution. If leavening is uneven, you may find tunnels or dense patches in the crumb. Avoid throwing everything together at the last second, because that can cause uneven pockets of baking soda or powder.
- Add the softened butter to the dry ingredients, and using an electric mixer on low speed, mix until the mixture resembles coarse crumbs.: The texture will change under the beaters, taking on a coarse, sandy appearance with pea sized bits of butter. This step coats flour with fat so the resulting crumb is tender. If you overmix, the mixture will become homogeneous and the cake may be dense. Stop when you still see small bits of butter for the best texture.
- Whisk together the egg, egg whites, buttermilk, lemon juice, lemon zest, and vanilla extract in a separate bowl.: The wet mixture should look glossy and slightly frothy, the lemon adding a bright scent that cuts through the dairy aroma. Properly mixed wet ingredients emulsify into the batter, promoting a consistent crumb. If the eggs are cold, they can cause small lumps when mixed into warm ingredients, so room temperature is ideal. Whisk until uniform but not overbeaten to preserve tenderness.
- Gradually add the wet ingredients to the dry mixture, mixing on medium speed until the batter is well combined.: You will notice the batter transform into a smooth, pourable mixture with a pale, even color and the scent of lemon rising gently. This gradual incorporation helps avoid lumps and overdevelopment of gluten. Overmixing at this stage will make the cake tough and chewy. Mix just until combined, scraping the bowl so no pockets of flour remain.
- Divide the batter evenly between the prepared cake pans.: When you spoon or pour batter, it should be ribbony and smooth, and you can use a scale or eyeball it for even layers. Even division ensures consistent bake time and level layers. If one pan has significantly more batter, you will get uneven baking and one layer may dome more. Smooth the tops lightly to avoid a large dome forming during bake.
- Bake in the preheated oven for 25-30 minutes or until a toothpick inserted into the center comes out clean.: As it bakes you will see the edges pull back a touch from the pan and the top turn a pale golden hue, while a fragrant lemon aroma fills the kitchen. The toothpick test confirms the center is set without overbaking. Opening the oven repeatedly will drop temperature and can lead to uneven rise, so check only near the end of the time window. If the tops are browning too quickly, lower the temperature slightly.
- Remove the cakes from the oven and let them cool in the pans for 10 minutes. Then, carefully transfer them to a wire rack to cool completely.: You will notice steam lift from the pans, and the cake will relax as it finishes setting. This short rest helps the cake firm up enough to be safely transferred, preventing breakage. A common error is leaving them too long, which can cause sticking; invert onto a rack after the brief rest for clean release. Gentle tapping along the pan edge can help loosen the cake if needed.
- In a large mixing bowl, beat the softened cream cheese, vanilla extract, fresh lemon juice, and butter together with an electric mixer until smooth and creamy.: The mixture should look glossy and silky, with a faint tang in the aroma from the cream cheese . Properly creamed, the frosting will incorporate air and become smooth. If ingredients are too cold, you will get lumps; too warm leads to a loose frosting. Beat until uniform and smooth for the best spreadable texture.
- Gradually add the powdered sugar, mixing on low speed after each addition until fully incorporated.: The frosting will thicken gradually and take on a satiny, pipeable consistency that holds peaks but still spreads easily. Adding sugar slowly prevents a gritty texture and keeps the frosting smooth. Dumping it in all at once can create a cloud of sugar and uneven incorporation. If the frosting becomes too stiff, a teaspoon of cream cheese or lemon juice can soften it, but add sparingly.
- After the cake layers have cooled completely, place one cake layer on a flat surface, such as a cutting board or cake turntable.: You should feel the layer cool to the touch and smell a faint baked lemon note that has mellowed. Working with cool layers keeps the frosting from melting and sliding. If layers are even slightly warm, the frosting will soften and become messy. Always wait until fully cool to assemble for clean layers.
- Using a long knife, carefully slice off any dome-shaped top from the cake layer. Hold the knife parallel to the surface of the cake and make a gentle sawing motion to level it. You can also rotate the cake while cutting to ensure an even level.: As you saw, you will hear a soft drag and see an even, level surface emerge when done correctly. Leveling prevents a lopsided cake and ensures uniform stacks. One frequent mistake is pressing too hard, which compresses the crumb. Use gentle sawing motions and rotate the cake for an even trim.
- Repeat the same process with the second cake layer so both layers have flat tops.: Both tops should look level and reveal a uniform interior texture when trimmed. Matching layer heights prevents sliding and makes frosting look professional. If you skip leveling, the final cake can lean or separate when sliced. Keep the trimmed crumbs for snacking rather than wasting them.
- You can use the excess cake trimmings for snacking or save them to make cake pops or a trifle dessert.: You will see how this protects the surface and allows for a clean presentation once parchment is removed. The small rustle of paper and the neat workspace help with tidy assembly. Forgetting parchment can lead to frosting on the serving dish, which detracts from presentation. This trick keeps edges clean for a polished finish.
- Now, you have two even and flat cake layers ready to be assembled with the cream cheese frosting.: You will notice the base sits evenly and is ready to receive frosting, the crumb appearing even and inviting. Ensuring a steady base prevents the cake from shifting as you apply frosting. If the base is uneven, you might have to support it while frosting to prevent slippage. Use a turntable or steady surface for control.
- Place two pieces of parchment paper overlapping each other in the center of a serving plate or cake stand. This will help keep the serving platter or cake stand clean, and they will slide out easily after decorating the cake.: As you spread, the frosting should glide smoothly and leave an even sheen, emitting a creamy, lemon kissed aroma. Generous but even layers give great mouthfeel without overwhelming the cake. One common pitfall is applying too thick a layer that squeezes out and ruins the sides, so maintain balance while spreading.
- Place one cake on top of the parchment paper.: You will feel a gentle settling and see the layers align; that satisfying click signals success. Aligning centers ensures a straight cake and neat slices. If the top is off center, the cake will lean and display uneven slices. Adjust carefully before the frosting sets.
- Spread a generous layer of cream cheese frosting over the top of the first cake layer.: As you work, the cake transforms from a simple stack into a cohesive dessert, with the frosting smoothing over seams and adding a glossy finish. Use broad strokes for an even look or a spatula for decorative texture. If frosting becomes too soft, chill for 20 to 30 minutes to firm it up. Overworking can create crumbs in the frosting, so do one clean pass for best results.
- Carefully place the second cake layer on top.: The zest adds a burst of citrus aroma and a visual pop of color, and you should notice that fresh, sharp lemon scent immediately. This final flourish lifts the presentation and adds a hint of freshness to each bite. Avoid zesting too much, which introduces bitterness from the pith. Light, even coverage is best.
- Frost the entire cake with the remaining cream cheese frosting. You can decorate the cake with lemon zest on top for an extra touch.: As the paper slides away you will reveal a clean base and tidy presentation, with no frosting smeared on the plate. This step keeps the serving stand pristine for display. Rushing this can tear the frosting edges or displace the cake slightly, so take your time with a slow pull.
- Remove the parchment paper carefully by sliding them out slowly.: The chilled frosting firms and keeps the cake fresh, a cool environment that extends shelf life and preserves the frosting shape. When chilled, the cream cheese frosting maintains structure and slices without smearing. If you leave it at room temperature too long for a cream cheese frosting, it may soften excessively and lose definition. Keep covered to prevent drying out and to avoid absorbing fridge odors.
Notes
- Swap citrus accents — Add extra fresh lemon zest to the frosting for a brighter aroma, or reserve some zest to sprinkle over each slice before serving for an aromatic hit.
- Adjust frosting tang — Increase the fresh lemon juice in the frosting by small amounts to amplify the tang, but add gradually to avoid thinning the texture.
- Chill for neater slices — Refrigerate the whole cake for at least 30 minutes before cutting to ensure clean, tidy slices and avoid frosting smudges.
- Use parchment for presentation — Keep the trick of parchment under the cake while frosting, then slide it out for a clean serving surface with minimal cleanup.
- Reserved trimmings — Save cake trimmings for snacks or to make a layered trifle using leftover frosting and berries for a second dessert option.