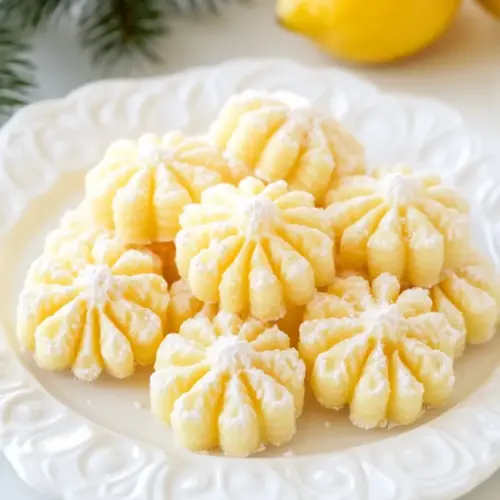
Lemon Spritz Cookies
Lemon Spritz Cookies are buttery, tender piped cookies with a bright lemon lift and a creamy cream cheese filling, perfect for easy gatherings and spring cookie swaps. The texture is crisp at the ridges and soft inside, making each sandwich cookie feel light yet satisfying. Make a batch for an easy weeknight baking project or a crowd pleasing treat that looks special with minimal fuss.
Equipment
- Electric Mixer
- Cookie press
- Mixing Bowls
- Baking Sheets
- Piping Bag
Ingredients
- 3/4 cup unsalted butter softened Creamy and softened to room temperature to ensure even creaming with sugar; provides rich fat that creates tender, melt-in-the-mouth texture and helps cookies spread properly during baking.
- 1/3 cup granulated sugar Granulated and added to incorporate air when creamed with butter; contributes sweetness and helps achieve a slight crisp edge while balancing the lemon flavor.
- 1/4 teaspoons salt Fine and measured precisely to control flavor balance and enhance the overall taste; helps strengthen dough structure and slightly moderates sweetness.
- 1 large egg Beaten lightly to add moisture and structure; contributes richness and helps bind ingredients while supporting leavening for a tender crumb.
- 1/2 teaspoon vanilla extract Fragrant and measured to add subtle depth without overpowering citrus notes; enhances the cookie aroma and complements the lemon curd.
- 2 tablespoons lemon curd Tangy and concentrated to provide bright lemon flavor and moisture; imparts a glossy, citrusy note that intensifies the cookie’s lemon profile.
- Zest of 1 lemon Finely grated to release essential oils and bright citrus aroma; adds fresh lemon scent and flecks of flavor that elevate the overall taste.
- 2 cup all-purpose flour All-purpose and measured to build the dough’s structure; provides the necessary gluten and bulk to form a pipeable spritz consistency.
- 2 -3 drops yellow food coloring optional Vibrant and used sparingly to tint dough for visual appeal; optional drops create a cheerful color without affecting flavor when used minimally.
- Yellow decorating sugar optional Sparkling and applied for garnish and texture contrast; optional sugar adds visual sparkle and a subtle crunch after baking.
- 4 ounces cream cheese Smooth and softened to blend into a lemony frosting; provides tangy creaminess that balances sweetness and yields a silky finish.
- 1 cup powdered sugar Powdered and sifted to create a smooth, lump-free frosting base; adds sweetness while dissolving easily into the cream cheese for a silky texture.
- 3 tablespoons lemon curd Concentrated and measured to flavor the cream cheese glaze; delivers bright citrus intensity and helps thin the frosting to a spreadable consistency.
Instructions
- Preheat the oven to 400 degrees F. Using an electric mixer, cream the butter and sugar together until light and fluffy, 3-5 minutes. Then beat in the salt, egg, vanilla, lemon curd, lemon zest and food coloring. Scrape the bowl and beat again to combine. Slowly add the flour until just combined.: The initial burst of high heat promotes quick setting of the piped edges, which helps preserve the delicate ridges of the shapes. When you slide the tray into a hot oven you might hear a faint settling sound as moisture evaporates from the surface, and the edges begin to take on a pale golden tint within minutes. This step matters because if the oven is cool the cookies will spread and lose definition. A common mistake is placing sheets in a not fully preheated oven, so always wait until the oven reaches a steady 400 degrees F before baking.
- Scoop the dough into a cookie press gun. Press the cookies onto ungreased baking sheets (no parchment paper.) Bake for 8-10 minutes. If using decorating sugar, sprinkle it on the cookies immediately as they come out of the oven. Cool for 2-3 minutes on the cookie sheets before moving.: As you beat unsalted butter and granulated sugar , the mixture will lighten in color and look aerated, almost mousse like, which traps tiny air pockets that lead to a tender crumb. You will hear a soft whir from the mixer and see the texture change from glossy to cloud like. This technique is crucial because it creates the structure that helps the piped dough hold its shape. Avoid under beating, which gives dense cookies, and over beating, which can overheat the butter and make the dough greasy.
- Using a clean bowl, beat the cream cheese, powdered sugar and lemon curd together for the frosting. Place it in a piping bag (or use a zip bag and snip off the corner).: At this stage the bowl fills with fragrance as the egg emulsifies the mixture and the lemon aroma intensifies from the curd and zest. The dough will look more cohesive and slightly glossy. Mixing these wet flavors in one go ensures even distribution so every bite carries bright citrus and a hint of vanilla. A pitfall to avoid is adding an egg straight from the refrigerator without tempering, which can chill the butter and cause separation.
- Then flip half the cookies over and pipe a dollop of frosting on the bottoms. Top each frosting dollop with a second cookie and press gently. Store the cookies in an airtight container until ready to serve. Makes 60 cookies, 30 sandwich cookies.: Scraping ensures no pockets of unmixed butter, and gives a uniform texture and color. You will notice any remaining streaks of butter disappear, and the dough will become silky and evenly flavored. This small pause prevents uneven pockets that could make some cookies bake differently. Skipping this leads to inconsistent cookies, so take a moment to thoroughly combine.
- Slowly add the flour until just combined: When you add all purpose flour gradually, the dough thickens and becomes pipeable, with a soft, slightly stiff consistency. You should stop mixing the instant the flour is incorporated to avoid developing gluten, which would toughen the cookies. The sound shifts to a heavier thud from the paddle, and the dough pulls away from the sides. A common error is over mixing here, which results in dense cookies that do not press cleanly from the gun.
- Scoop the dough into a cookie press gun: Loading the dough into the press is surprisingly tactile, you will feel the weight of the container as you fill it and notice how the dough compresses into the chamber. The dough should be smooth and pliable enough to extrude without tearing. This matters because a jammy or overly stiff dough either clogs the die or produces ragged shapes. If your press struggles, check dough temperature and consistency, warming slightly if needed.
- Press the cookies onto ungreased baking sheets (no parchment paper.): As you press, the dough forms defined ridges and holds the chosen pattern on the sheet. The contact with the ungreased metal promotes the right amount of spread and crisping at the base. You will see glossy edges that matte as they bake. Avoid parchment here, as the dough grips the metal differently and yields sharper edges. A mistake is pressing too close together, which will make the cookies merge while baking.
- Bake for 8-10 minutes: While baking, the kitchen fills with a warm lemon and butter scent, and the edges will begin to take on a light golden hue. Watch for the tops to look set and for the base to be slightly firm; overbaking dries them out. This timing is important to retain tenderness inside while giving a delicate crisp along the ridges. A frequent slip up is leaving them in too long, which turns a crisp edge into a brittle texture.
- If using decorating sugar, sprinkle it on the cookies immediately as they come out of the oven: The residual heat helps the yellow decorating sugar adhere, and the crystals will glint while cooling. This step enhances presentation and adds a faint crunch contrast. Do it right away, while the cookies are still warm, otherwise the sugar won't stick and the look will be dull. Dropping the sugar on cooled cookies often results in poor adhesion.
- Cool for 2-3 minutes on the cookie sheets before moving: The cookies need a brief rest so they set enough to transfer without deforming. During these minutes you might notice steam lifting from the bottom, and the cookies will firm slightly. This pause prevents the cookies from breaking when you move them to a rack. The common problem is moving them too soon, which ruins the shapes and flattens the ridges.
- Using a clean bowl, beat the cream cheese, powdered sugar and lemon curd together for the frosting: The frosting transforms into a smooth, tangy spread as you whip cream cheese , powdered sugar and lemon curd . It will become glossy and pipeable, with a gentle lemon perfume. This step balances sweetness and acidity so the filling does not taste cloying. Overmixing can introduce too much air, making the frosting too light and prone to separation, so stop once smooth.
- Place it in a piping bag (or use a zip bag and snip off the corner): Filling a bag is practical and gives controlled dollops when assembling. The feel of the bag in your hand helps judge pressure for consistent portions. If the frosting is too stiff to pipe, it may need a touch more lemon curd or a brief warm up. Avoid forcing thick frosting through a tiny opening as it can burst the bag.
- Then flip half the cookies over and pipe a dollop of frosting on the bottoms: Turning the bottoms up reveals the firm base, perfect for receiving the filling. As you pipe, watch the mound hold its shape and show a glossy sheen, which signals the right consistency. This step ensures even sandwiches and prevents the filling from oozing out when pressed. A common problem is piping too much, which makes the sandwiches messy.
- Top each frosting dollop with a second cookie and press gently: Pressing brings the cookies together and spreads the filling to the edges without squeezing it out. You will feel a gentle give as the two cookies join, and the sandwich should look tidy. Gentle pressure keeps the filling evenly distributed, and heavy pressing will cause it to spill and flatten the cookies.
- Store the cookies in an airtight container until ready to serve: Proper storage preserves texture and keeps the filling fresh. Layer cookies with parchment if stacking to avoid sticking, and keep the container at cool room temperature. This step is key for make ahead plans and gifting. A typical mistake is leaving them uncovered, which dries the cookies and dulls the flavor.
Notes
- Room temperature ingredients: Bring unsalted butter and egg to room temperature so they blend smoothly and enable proper creaming, which yields a lighter cookie.
- Dough consistency: The dough should be soft but not sticky, making it easy to load into a cookie press; if it is too soft refrigerate briefly for firmer extrusion.
- Cookie press care: Clean the press thoroughly between shapes to prevent clogging, and choose a die that complements the cookie size for even baking.
- Even baking: Rotate the baking sheet halfway through baking if your oven has hot spots to ensure uniform color and texture across all cookies.
- Frosting texture: Beat cream cheese until fully smooth before adding powdered sugar and lemon curd so the filling pipes neatly without lumps.
- Make ahead and storage: Store finished sandwiches in an airtight container for up to seven days, or freeze for up to three months for convenient gifting and entertaining.