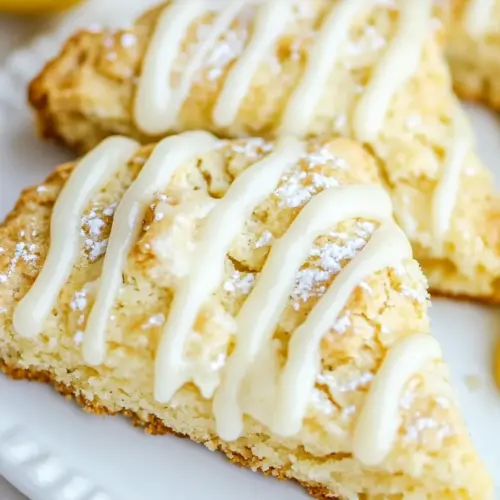
Lemon Scones
Lemon Scones are bright, buttery, and easy to pull together for a quick breakfast or brunch. The tender crumb and crisp edges pair with a silky lemon glaze for a perfect balance of sweet and tart, ideal for an easy weekend baking session or a casual gathering. Make them for their aroma and simple elegance.
Equipment
- Oven
- Baking Sheet
- Parchment Paper
- Large Bowl
- Box grater
- Sharp Knife
- Small Bowl
Ingredients
- 2 cups all purpose flour Provide structure and bulk to the scones by forming the dry matrix that holds other ingredients together. Combine with fat and liquid to create a tender crumb while determining final texture and rise. Sift or whisk to ensure even distribution of leavening and sugar for consistent results.
- 1/2 cup granulated sugar Add sweetness and tenderize the crumb by dissolving into the batter and interacting with fats and liquids. Help with browning during baking to create a pleasant crust and slightly caramelized flavor. Measure accurately to avoid an overly sweet or dense scone.
- 2 teaspoons baking powder Lighten the scone texture by producing bubbles that expand during baking, contributing lift and a delicate crumb. Distribute evenly through the dry ingredients to prevent uneven rising or dense spots. Use fresh baking powder for reliable leavening performance.
- 1/2 teaspoons salt Enhance overall flavor and balance sweetness by providing a savory contrast that brightens other elements. Strengthen gluten slightly and can enhance browning when combined with sugar. Dissolve fully into the dry mixture for consistent seasoning.
- 3 tablespoons lemon zest Concentrate lemon flavor and aromatic oils to infuse the dough with bright citrus notes and fresh fragrance. Intensify the lemon profile without adding extra liquid, contributing both flavor and texture. Use finely grated zest to avoid bitter pith and ensure even distribution.
- 1/2 cup unsalted butter chilled Create flakiness and richness by cutting cold butter into the flour so small pieces remain to steam during baking. Contribute to tender layers and buttery flavor while controlling spread and texture. Keep chilled to maximize lift and flaky pockets in the finished scones.
- 1/2 cup heavy cream chilled Provide fat and moisture to enrich the dough while promoting tenderness and a soft crumb. Help bind ingredients together and add silkiness to the finished scone when used chilled for better texture. Adjust slightly to control dough consistency and final richness.
- 1 large egg Bind ingredients and add structure through protein that sets during baking, contributing to a tender yet cohesive crumb. Add moisture and slight richness while aiding in browning and color on the surface. Beat lightly and incorporate evenly to avoid overworking the dough.
- 1 teaspoon vanilla extract Add subtle aromatic sweetness that complements lemon and enhances overall flavor complexity. Provide a rounded background note that lifts the profile without overpowering citrus. Combine with the wet ingredients for uniform distribution.
- coarse sugar for topping Provide a sparkling, crunchy finish that enhances texture and visual appeal after baking. Contrast the scone's soft interior with a pleasant, sweet crunch on top. Sprinkle sparingly to retain a balanced sweetness and attractive presentation.
- 1 cup powdered sugar Form the base of a glossy lemon glaze by providing sweetness and body when mixed with lemon juice and cream. Dissolve to create a smooth, spreadable icing that adheres to cooled scones and adds decorative sweetness. Sift before mixing to avoid lumps for a silky finish.
- 2 tablespoons lemon juice Deliver concentrated lemon flavor and acidity to the glaze, cutting sweetness and adding bright citrus tang. Balance the powdered sugar to create a flavorful, pourable icing that sets with a shiny finish. Adjust amount to achieve desired tartness and consistency.
- 1 tablespoon heavy cream Thin the glaze slightly and add richness for a smoother, glossier finish that coats scones evenly. Help achieve desired drizzle consistency while contributing a hint of dairy flavor to tame sharp citrus. Add gradually until the glaze reaches the preferred thickness.
Instructions
- Preheat the oven to 375° and line a baking sheet with parchment paper. Set aside.: You will notice the oven warm and the kitchen air become dry, which helps the scones brown evenly. Preheating ensures the baking starts immediately, giving lift and the signature exterior crust. If you skip preheating the rise will be uneven and the scones may spread more than they should. A common mistake is placing cold dough into a not fully heated oven, which reduces oven spring and yields denser scones.
- In a large bowl, whisk the flour, sugar, baking powder, salt, and lemon zest together.: As you whisk, you will smell the citrus oils release from the lemon zest , infusing the dry mix. This step distributes the leavening and aromatics so each bite is consistent. If ingredients are not evenly mixed, pockets of salt or baking powder can create odd flavor spots or uneven texture. Avoid heavy stirring which can activate gluten and toughen the dough.
- Use a box grater to grate the cold butter into the dry ingredients. Use your hands to lightly toss the butter into the flour.: The grated cold unsalted butter will feel cool and crumbly, and you might see little lumps coated in flour. Tossing quickly keeps the butter cold and helps coat the pieces so they hold shape in the oven, creating flaky layers. If the butter warms, it will blend too thoroughly and you will lose flakiness. A frequent error is over working the butter in, turning the mixture into a uniform paste rather than small coated bits.
- In a medium bowl, combine the cream, egg, and vanilla extract. Pour over the butter and dry ingredients and stir to combine. Trying to work the dough as little as possible, turn out onto a lightly floured surface and work into a ball. Flatten into an 8-9 inch disc. Use a sharp knife to cut into 6-8 equal pieces.: At this stage the wet mixture should shimmer slightly and smell faintly of vanilla while the dough stays shaggy. Turning the dough out, you will feel pockets of butter under your palms, and the tactile sensation lets you judge how much handling is happening. Working it too much develops gluten making the scones dense, so be gentle and purposeful. If the dough feels crumbly, a teaspoon or two more heavy cream will help, added cautiously.
- Arrange the pieces on the prepared baking sheet, leaving about 2 inches between each one. Bake for 22-25 minutes, or until nice and golden brown. If you find the scones are browning too quickly, lay a sheet of foil over the top of them to prevent them from burning while they finish baking. Allow them to cool for at least 5-10 minutes before drizzling the icing over the top.: As the scones bake, you will hear a quiet settling and see edges take on a deep golden color, with steam faintly escaping from the centers. That golden tone signals the Maillard reaction, giving toasty notes and a pleasant crunch on the outside. Tent with foil if the tops are darkening too quickly to allow the centers to finish baking. A frequent oversight is removing scones immediately from the pan; letting them rest allows interior crumb to set so they do not crumble when glazed.
- In a small bowl whisk together the powdered sugar, lemon juice and heavy cream. If needed, thin with more lemon juice 1 teaspoon at a time.: The glaze will smell bright from the lemon juice and feel smooth as you whisk. Aim for a pourable ribbon that coats the back of a spoon, which indicates the right thickness for drizzling. If the glaze is too thick it will clump and not spread; if too thin it will run off the scones. Adjust in tiny increments so you control the final sheen and flavor, and always taste to balance sweetness and tartness.
Notes
- Chill everything: Make sure your unsalted butter and heavy cream are very cold to create steam pockets that yield a flaky crumb.
- Use fresh baking powder: Fresh baking powder gives consistent rise; test one teaspoon in warm water to ensure it fizzes if you are unsure.
- Zest before juicing: Zest the lemons first to capture the aromatic oils, then use the juice for the glaze for maximum brightness.
- Measure flour correctly: Spoon flour into the measuring cup and level it off to avoid packing too much, which can make scones dry.
- Give them space: Arrange the scones with about 2 inches between each so air circulates and edges brown evenly.
- Sift the glaze: Sift powdered sugar if lumpy to ensure a smooth, glossy finish and a clean drizzle across the tops.