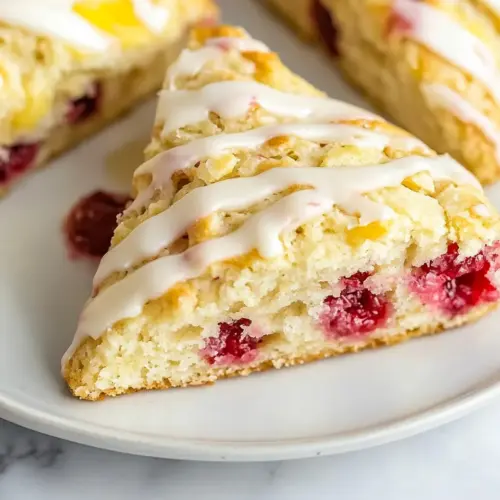
Lemon Raspberry Scones
Lemon Raspberry Scones are tender, flaky pastries brightened with zesty lemon and pockets of juicy fresh raspberries. This easy treat yields crisp edges, a soft crumb, and a glossy lemon glaze that sets beautifully. Perfect for spring brunches or an indulgent snack, these scones are simple to make and impressive to serve, a reason to bake them now.
Equipment
- Nordic Ware Aluminum Half Sheet Pans
- Pre-Cut Parchment Paper Baking Sheets
- Mixing bowl set
Ingredients
- 1/3 cup granulated sugar Adds sweetness and helps tenderize the dough while balancing tart lemon flavor; granulated sugar also aids in browning during baking and contributes to the crumb structure when creamed with butter or incorporated into the dry mix.
- zest of two medium lemons Provides bright citrus aroma and concentrated lemon oil that intensifies overall lemon flavor; zest disperses evenly in batter delivering fresh, natural acidity without additional liquid and complements the glaze and yogurt notes.
- 2 cups all-purpose flour Creates the structural base of the scone by providing gluten and starch; all-purpose flour absorbs liquids and fats, giving the scones their tender yet sturdy crumb and allowing leavening agents to work effectively.
- 1 1/2 teaspoons baking powder Leavens the dough by releasing carbon dioxide when activated, helping the scones rise and become light; baking powder also contributes to a tender texture and balanced lift throughout baking.
- 1/2 teaspoon salt Enhances overall flavor by balancing sweetness and highlighting other ingredients; salt strengthens gluten slightly and improves the perception of other flavors, making the scones taste more rounded.
- 8 tablespoons unsalted butter frozen Incorporates cold fat to create flaky layers and tender crumb; frozen unsalted butter when cut into the flour yields distinct pockets that melt during baking, producing a desirable flaky scone texture.
- 1/2 cup + 2 tablespoons lemon-flavored Greek Yogurt I recommend whole milk yogurt, or sour cream Adds moisture, tang, and richness while contributing to tender crumb; lemon-flavored Greek yogurt provides acidity that reacts with leavening and imparts a creamy lemon character when combined with other wet ingredients.
- 1 large egg Binds the ingredients together, adds richness and structure, and contributes to browning; a large egg also helps emulsify fats and liquids for a cohesive dough and slightly richer texture.
- 1 teaspoon pure vanilla extract Contributes mellow sweet vanilla notes that enhance other flavors; pure vanilla extract rounds the taste profile and complements both the lemon and raspberry elements in the scones.
- 2/3 cups fresh raspberries Delivers bursts of bright, fruity flavor and soft texture; fresh raspberries add natural sweetness, tartness, and visual appeal, so they should be gently folded in to avoid crushing and color bleed.
- 3 tablespoons unsalted butter melted Brushes the scone tops to promote even browning and help glazes adhere; melted unsalted butter adds flavor and a glossy finish while contributing a hint of richness to the crust.
- 1 cup confectioners’ sugar sifted Provides a sweet, smooth glaze that adds shine and extra sweetness; confectioners’ sugar dissolves easily into liquid to create a silky icing for drizzling over cooled scones.
- 1/2 teaspoon pure vanilla extract Adds warm, aromatic vanilla undertone to the glaze, deepening flavor; pure vanilla extract pairs with lemon to balance tartness and enhance the confectioners’ sugar glaze.
- 2 tablespoons freshly squeezed lemon juice Imparts bright acidity and concentrated lemon flavor to the glaze, balancing sweetness; freshly squeezed lemon juice thins the icing to desired consistency and accentuates the scones’ citrus profile.
Instructions
- Preheat oven to 400°F. Line a baking sheet with parchment paper.: As the oven warms, you should notice a faint electrical hum and a gentle rise in the kitchen heat, creating the ideal environment for a rapid oven spring. Preheating ensures the scones begin to set immediately on contact, producing crisp edges. A common mistake is not preheating long enough, which leads to flat, dense scones, so wait until the oven reaches a steady temperature before baking.
- In a medium bowl, combine sugar and lemon zest; mix with your fingertips until the sugar is moistened and fragrant. Add in the flour, baking powder and salt and mix until combined.: Rubbing the lemon zest into the sugar releases citrus oils, and you should smell a bright, tangy perfume as you work. When the dry ingredients are mixed, the flour will look homogenous and slightly grainy, ready to accept the butter. Avoid overmilling the zest into tiny pieces that could create bitter bits, and don’t overwork the flour mixture which can develop gluten and yield tougher scones.
- Grate butter into flour mixture on the large holes of a box grater; use a fork or pastry blender to work in the butter until the mixture resembles coarse meal.: As you grate frozen unsalted butter , you’ll hear a soft scraping and see small flakes scattered through the flour, like snow. Working the butter until the mixture looks like coarse cornmeal is key for pockets of flakiness after baking. If the butter starts to warm and smear, chill the bowl briefly because warm butter will coat the flour and prevent proper aeration, producing dense texture.
- In a small bowl, whisk the yogurt (or sour cream), egg and vanilla until smooth.: Whisking brings a sheen to the mixture, with the egg stretching the liquid into a glossy emulsion. The blend should be homogenous, with no streaks of white or yolk visible. If the yogurt is too cold and clumpy, let it sit a minute to loosen, because uneven liquid can cause pockets of dryness in the dough.
- Using a fork, stir sour cream mixture into flour mixture until a dough starts to form. Gently fold in raspberries. The raspberries may break up a little, no worries because they’ll bake up beautifully. Gently use your hands to press the dough against the bowl into a ball. The dough will be quite sticky at first, but it will come together.: When you begin stirring, listen for soft scraping as the wet and dry components meet, and watch the dough take on a slightly glossy sheen. Folding in the fresh raspberries should be done delicately to avoid complete disintegration; a little color streaking is okay. If you press too hard or overmix, the raspberries will release too much moisture, making the dough soggy, so use gentle strokes until you have a cohesive mass.
- Place the dough on a lightly floured surface and pat into a 7-inch circle about 3/4-inch thick. Use a knife to cut into 8 triangles; place on prepared baking sheet, about 1 inch apart. Bake until golden, about 15 to 17 minutes. Cool for 10 minutes and prepare the glaze.: As you pat the dough, the surface should feel tacky but manageable, and the circle will hold its shape. The triangles will brown at the edges and develop a warm, golden color in the oven, offering a visual cue that interior crumb is set. Overbaking will dry them out, so check a few minutes before the lower end of the time range to avoid overly firm centers. Allowing a 10 minute cool period stops carryover cooking and gives the scones a chance to settle, preventing the glaze from slipping off.
- In a medium bowl, prepare the glaze by mixing together the melted butter, confectioners’ sugar, vanilla and lemon juice. Whisk until smooth. Dip the top of the scones into the glaze and allow the glaze to harden. If you would like to drizzle the glaze onto your scones instead of dipping them, you can thicken the glaze a bit with additional confectioners’ sugar.: The glaze should be glossy and pourable, with the scent of lemon and vanilla rising as you whisk. Dipping creates a uniform sheen and a satisfying crack when the glaze hardens; drizzling gives a more rustic look. If the glaze is too thin it will run off and pool on the tray, so add more sifted sugar to thicken if needed. Let the glaze set in a cool spot, and resist the urge to stack scones until the coating is fully firm.
Notes
- Use whole milk yogurt: Swapping to full fat Greek yogurt deepens the richness and yields a creamier crumb that still supports the fresh raspberries.
- Chill the dough briefly: If your kitchen is warm, pop the formed dough in the fridge for 10 minutes to firm up, which makes cutting neater and helps maintain flakiness.
- Make a thicker glaze for dipping: Add extra sifted confectioners’ sugar to achieve a coating that hardens quickly and gives a glossy bakery finish.
- Drizzle for a rustic look: If you prefer a lighter glazing, thin the icing slightly and use a spoon to create a decorative drizzle rather than a full dip.
- Brush with melted butter right out of the oven: For an extra golden surface, lightly brush warm scones before glazing to enrich the crust and enhance aroma.