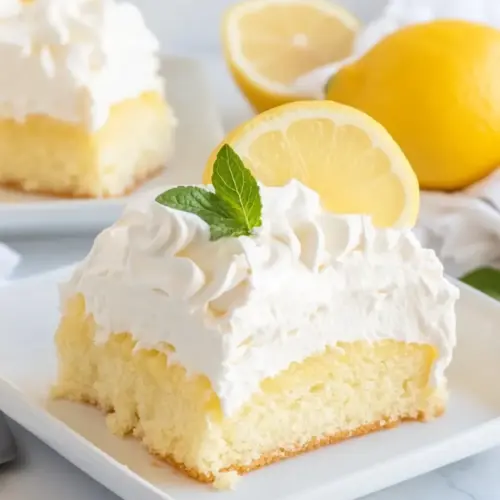
Lemon Poke Cake
Lemon Poke Cake is a bright and creamy dessert that combines a tender cake base with a glossy lemon curd and airy whipped topping. This easy to make treat offers tangy citrus notes, soft custardy pockets, and a light finish, making it perfect for gatherings or a simple weeknight dessert. Make it ahead for stress free serving and a reliably crowd pleasing result.
Equipment
- Nordic Ware Metal 9×13 Covered Cake Pan
- KitchenAid 9-Speed Digital Hand Mixer
Ingredients
- 1 package lemon cake mix 15.25 ounces Provides a light, tangy cake base and structure when combined with wet ingredients; contains flour, sugar, leaveners, and lemon flavoring to give the dessert its characteristic taste and texture. Helps the cake rise and hold moisture while contributing to the overall lemon profile.
- 1 package instant lemon pudding mix 3.4 ounces Adds concentrated lemon flavor and helps set a moist, pudding-like crumb within the cake; instant pudding mix thickens quickly when mixed and enhances richness. Works with the cake mix to intensify citrus notes and improve overall tenderness.
- 3/4 cup sour cream Contributes creaminess and slight tang that tenderizes the batter and balances sweetness; sour cream adds moisture and a subtle acid that improves crumb texture. Enhances richness and keeps the cake soft after baking.
- 3/4 cup vegetable oil Provides fat that tenderizes the cake, adds moistness, and helps create a tender crumb; vegetable oil yields a consistent, soft texture and keeps the cake moist over time. Blends easily into the batter for uniform richness.
- 3 large eggs slightly beaten Incorporates structure and stability through beaten eggs while adding richness and emulsification; using large eggs at room temperature promotes even mixing and better rise. Slight beating distributes yolk and white for improved texture.
- 2 teaspoons pure vanilla extract Contributes aromatic depth and rounds out citrus notes; pure vanilla extract enhances sweetness perception and complements lemon flavors. Adds subtle complexity to the cake batter.
- 1/2 cup warm water Loosens the batter and activates the instant pudding for a smooth consistency; warm water dissolves dry components and helps create a pourable batter. Assists in hydrating cake mix ingredients evenly.
- 2/3 cup granulated sugar Creates a simple lemon syrup when combined with juice or zest and adds shine and extra sweetness when poured over the baked cake. Helps make the poke holes absorbent to increase moistness and flavor throughout.
- 2 large eggs Adds richness, structure, and additional moisture to the filling or topping; extra eggs help thicken a custard-like layer and bind ingredients together. Contributes to a firmer set for the lemon-infused filling.
- Zest of 2 lemons Provides concentrated citrus oils and aroma that brighten the cake and syrup; zest offers intense lemon flavor without added acidity. Sprinkling zest into batter or topping elevates the cake's fresh lemon character.
- 2/3 cup freshly squeezed lemon juice Delivers fresh acidity and vibrant lemon flavor to the syrup or filling; freshly squeezed juice balances sweetness and infuses the cake with bright citrus notes. Helps dissolve sugar and meld flavors for a pronounced lemon profile.
- 5 1/3 tablespoons unsalted butter melted (1/3 cup) Adds buttery flavor and helps the syrup or lemon mixture meld smoothly into the cake; melted unsalted butter contributes richness without extra salt. Promotes a silky mouthfeel and enhances overall flavor depth.
- 8 ounces frozen whipped topping thawed (Truwhip or Cool Whip) Supplies a light, airy topping with sweet creaminess that complements the tart lemon layers; thawed frozen whipped topping provides stability and easy spreading on the cooled cake. Creates a smooth, fluffy finish that contrasts the dense cake.
- lemon zest or slices for garnish optional Offers a final decorative and aromatic touch that enhances visual appeal and lemon fragrance when serving; lemon zest or slices can be used sparingly as garnish. Adds a fresh, inviting look while reinforcing citrus flavor.
Instructions
- Preheat oven to 350°F and line a 9×13-inch pan with parchment paper or spray with non-stick cooking spray.: When you open the oven and feel the warmth, that steady oven hum signals readiness, and lining the pan prevents sticking and makes removal easier, which preserves the cake edges. A common mistake is placing the pan in too soon and losing oven heat, so wait until the oven reaches the full temperature. The even heat ensures a uniform rise and a tender crumb.
- In the bowl of a stand mixer, fitted with the paddle attachment, or with a hand mixer in a large bowl, beat together the cake mix, pudding mix, sour cream, oil, eggs, vanilla, and water on medium speed until well combined, about 2 minutes. Be sure to scrape the bottom of your bowl as needed.: You will notice the batter become glossy and homogenous, with no streaks of dry mix. The sound changes from splashing to a steady, smooth whir when it is properly combined. This mixing step develops structure from the eggs and loosens the batter for easy spreading. Avoid over mixing which can make the crumb tight and tough.
- Spoon batter into the prepared pan and use an offset spatula or spoon to spread the batter into an even layer.: Gentle taps on the counter settle the batter and remove pockets of air, producing an even surface that bakes consistently. Visually, the batter should level out without ridges, and you should see a uniform sheen across the top. Pressing too hard or dragging aggressively can create dense areas, so spread with light, even strokes.
- Bake in preheated oven for 35-40 minutes, or until golden brown and the top of the cake springs back when lightly touched.: The kitchen will fill with a warm citrus kissed aroma and the edges will pull slightly from the pan. The spring back test is key, indicating the center is set but still tender. A mistake is removing it too early which leaves a gummy center, so rely on the spring back and a toothpick if unsure, noting any wet batter on the tester means it needs more time.
- While the cake is baking, make the filling: In a large microwave-safe bowl, whisk together the sugar and eggs until smooth and light in color. Whisk in the lemon zest, lemon juice, and melted butter until well combined.: Whisking introduces air and helps the sugar dissolve, yielding a smoother curd. You will see the mixture lighten and thicken slightly, with a pale, satiny appearance. If you skip thorough whisking you risk uneven cooking and tiny cooked egg bits, so take time to beat until uniform before heating.
- Microwave on high in 1-minute increments for 4-5 minutes total, whisking after each minute, until the curd has thickened and coats the back of a spoon. Towards the end, you may want to microwave in 30-second intervals, depending on your microwave.: At this point the bowl will smell intensely of fresh citrus and the butter will smooth the liquid into a glossy, cohesive mixture. This fat anchors the acid and creates a balanced mouthfeel. Avoid pouring hot melted butter directly into cold eggs without tempering as it can scramble them, so ensure the butter is warm, not scalding.
- Use a spatula to push the curd through a fine mesh strainer into a bowl or measuring cup. Set aside.: You will observe the mixture transforming from runny to custard like thickness, and the aroma will become more concentrated. Stirring between intervals prevents pockets of overheated curd and ensures even set. A common trap is overheating which causes grainy texture, so watch closely and switch to 30 second bursts near the end if your microwave runs hot.
- When the cake is finished baking, allow to cool for 10 minutes. Using a smoothie straw or the handle of a wooden spoon, poke holes across the cake, spaced every inch or so, halfway into the cake.: Straining removes zested bits and any small cooked egg fragments for a silky curd. The resulting liquid should be smooth and glossy, with a thick ribbon like consistency when drizzled from your spatula. If you skip straining you may end with a slightly gritty curd, which affects mouthfeel.
- Pour the lemon curd evenly over the cake, smoothing it with a spatula and making sure it gets into the holes. Allow cake to cool completely.: The warm cake will yield slightly under your touch, and the holes should be deep enough to allow the curd to sink in without cutting through to the bottom. You will hear a soft give as you poke, and the surface will look dotted. Avoid poking too deep or too few holes which leads to uneven soaking; consistent spacing ensures every bite is infused.
- Evenly spread the whipped topping onto the cake. Cover and chill for at least 4 hours. If desired, top with lemon zest or lemon slices before serving.: As the curd flows, it will gleam and settle into the cake, and you should notice glossy pools filling the punctures. That sink in is what creates the custardy interior. If you pour while the cake is too hot you risk thinning the curd and losing thickness, so cool slightly to aid absorption without cooking the curd further.
- Evenly spread the whipped topping onto the cake Cover and chill for at least 4 hours If desired top with lemon zest or lemon slices before serving: Spreading the whipped topping creates a cloud like cap over the tart curd, and chilling lets flavors meld and the texture firm just enough for clean slices. In the fridge you will notice the curd settle and the topping regain a slightly denser texture. A common error is serving too soon, which results in a runny cake, so allow adequate chill time for best slices and presentation.
Notes
- Boxed cake base works great Use the lemon cake mix as written for consistent results, it gives a reliable structure and saves time when you want a dessert that performs every time.
- Instant pudding boosts lemon Adding the instant lemon pudding to the batter intensifies the citrus character and helps the crumb remain moist, which is especially useful if you need the cake to stay fresh for a day.
- Microwave curd is efficient The microwave method for curd is quick and effective, but whisking between bursts is essential to avoid overcooked bits and ensure a silky finish.
- Chill for clean slices Refrigerating the finished cake for at least four hours firm ups the curd and topping, making it possible to slice neat pieces for gatherings and transport.
- Garnish simply A little fresh lemon zest or thin lemon slices brightens the presentation without overpowering the cake, and it signals the main flavor at a glance.