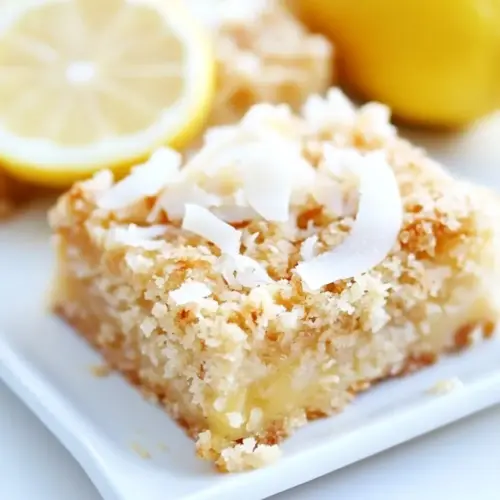
Lemon Coconut Crumb Bars
Lemon Coconut Crumb Bars are bright, tangy, and satisfyingly textured, combining a tender crumb with glossy lemon curd and toasted coconut. This easy hand-pressed dessert offers a crisp top and chewy coconut notes, perfect for gatherings or a sunny snack. Make them for a quick crowd pleaser you will return to again and again.
Equipment
- Stand mixer
- 8-inch Square Baking Dish
- Mixing Bowls
- Whisk
Ingredients
- 1 1/2 cups white whole wheat flour or all purpose flour Provide a tender, slightly nutty base for the crumb bars and help bind the dough; sift or whisk to ensure even texture and avoid lumps for a uniform crumb.
- 1/4 teaspoons salt Enhance the overall flavor balance by bringing out sweetness and reducing bitterness; dissolve evenly into the dough to help control gluten development and improve texture.
- 1/4 teaspoon baking powder Lighten the crumb structure by producing small bubbles during baking; combine thoroughly with dry ingredients to ensure consistent leavening throughout the bars.
- 1/2 cup coconut oil at room temperature Contribute richness and a subtle coconut flavor to the crumb, while helping create a tender, flaky texture; use at room temperature so it blends smoothly with sugars and egg.
- 1/2 cup packed light brown sugar Add deep, caramel-like sweetness and moisture to the crumb mixture while contributing to color and chew; pack firmly for accurate measurement to maintain recipe balance.
- 1/4 cup granulated sugar Provide bright sweetness and help activate the coconut and lemon flavors without weighing down the crumb; distribute evenly with the brown sugar for consistent sweetness.
- 1 large egg Bind the dough together, add structure, and contribute moisture and richness; beat until combined to create a cohesive crumb that holds together when baked and cut.
- 1/2 teaspoon vanilla extract Impart warm, familiar sweetness and aromatic depth to the filling and crumb; mix with the egg and sugars to help unify flavors and improve overall aroma.
- 1/2 teaspoon coconut extract Reinforce the coconut aroma and complement the lemon curd with a concentrated tropical note; add sparingly to avoid overpowering the citrus component.
- 3/4 cup flaked coconut plus 2 tablespoons, divided Introduce chewy texture and pronounced coconut flavor to both the base and topping; divide as instructed so some toasts during baking for contrast while preserving coconut presence inside.
- 3/4 cup lemon curd Provide the tangy, bright filling layer that balances the sweet crumb and coconut; spread evenly to ensure each bar has a consistent lemon flavor and moisture level.
Instructions
- Preheat oven to 350 degrees F. Grease an 8-inch square baking dish with cooking spray. Set aside.: When you walk into the kitchen and set the oven to 350 degrees F , you will notice the faint mechanical hum of the oven warming. That warm-up smell is subtle but reassuring, and prepping the pan now means you can work without pausing. Lightly greasing the 8-inch square baking dish ensures the bars release cleanly later. A common mistake is under greasing, which makes removal messy, so take a moment to coat the corners. Visually, the pan should have an even sheen, not pools of oil. If your cooking spray collects droplets, wipe them with a paper towel so the dough does not slide during pressing. Doing this step first keeps your flow steady and prevents last minute scrambling.
- In a medium bowl, whisk together flour, salt, and baking powder. Set aside.: As you whisk the flour , salt , and baking powder , you will hear a soft rustle and see the pale mixture become uniformly combined, which helps distribute the leavening. This blending matters because it prevents pockets of baking powder that could create odd bumps. I like to tilt the bowl and whisk in circles, watching for a consistent color and fine texture. One trouble to avoid is adding wet ingredients to unevenly mixed flour, which can yield uneven texture in the crumb. If your whisking reveals small clumps, break them up with the back of a spoon so the dry mix feels smooth and even.
- In the bowl of a stand mixer, cream coconut oil and sugars on high speed until light and fluffy, about 2-3 minutes. Add the egg, vanilla extract, and coconut extract. Mix well. With the mixer on low, slowly add in the flour mixture. Mix until combined, the dough will be crumbly. Stir in the 3/4 cup coconut.: When creaming coconut oil with the sugars, you will see the mixture lighten in color and become airy, and you will hear the mixer change tone as it aerates the fat. That aeration is key for a tender crumb. After adding the egg and extracts, the bowl will smell warmly sweet, with coconut and vanilla notes surfacing. Lowering the mixer and gradually adding the dry mix prevents flour clouds and keeps the texture even. The dough will be crumbly, which is expected, and stirring in the 3/4 cup flaked coconut adds visible flecks and a slightly grainy chew. A common slip up here is overmixing, which toughens the dough, so stop as soon as the dry parts are incorporated. If the mixture seems too wet, add just a teaspoon of flour at a time to maintain a crumbly, cohesive feel.
- Stir the lemon curd to loosen it up. Gently press half of dough into bottom of prepared baking dish. Evenly spread the lemon curd over dough. Sprinkle remaining dough over the top, making sure you cover the entire bars. Press gently to form the top layer. Sprinkle the additional coconut over the bars.: When you stir the lemon curd , it should move glossy and smooth, with a silky sheen that promises bright flavor. Pressing half the dough into the pan will create a uniform base, and you should feel a slight resistance as you compact it, leaving a surface that is even to the eye. Spreading the curd across that base yields a vivid, lemon yellow layer, and it should be thick enough to provide a distinct burst of flavor without seeping through. Crumbling the remaining dough over the curd will look rustic, and pressing just enough to form a top seals it in. The extra coconut sprinkled on top will toast and brown during baking. Avoid pressing so hard that you mash the curd out to the edges, which can make a soggy rim. Visually, aim for a covered but airy top, not a perfect seal.
- Bake for 25 to 30 minutes or until the top is golden brown. Cool completely and cut into squares.: As the bars bake for 25 to 30 minutes , your kitchen will fill with a toasty, coconut forward aroma and the bright whisper of citrus. Keep an eye on color, watching for an even golden brown, especially at the edges. The sound is mostly quiet, but you'll notice a gentle settling as moisture evaporates and the crumb sets. Letting the pan cool completely is crucial because the lemon curd firms as it chills, allowing clean slices. Cutting too soon leads to smudged bars, so be patient. A typical pitfall is slicing hot bars, which creates sticky, uneven pieces, so wait until the bars are room temperature or even slightly chilled for neat squares.
Notes
- Measure flour correctly, spoon it into your measuring cup and level it off rather than scooping, which prevents dense, dry bars.
- Use room temperature ingredients for smooth mixing. Cold coconut oil or egg can lead to uneven texture and lumps in the dough.
- Spooning the lemon curd across the base helps prevent air pockets. If your curd is thick, loosen it slightly by stirring or warming for a few seconds to make spreading easier.
- Distribute the crumb evenly for consistent baking. Patchy coverage can create burnt spots and undercooked areas.
- Let bars cool fully before slicing for clean cuts. I sometimes chill them briefly to speed up setting for neater pieces.