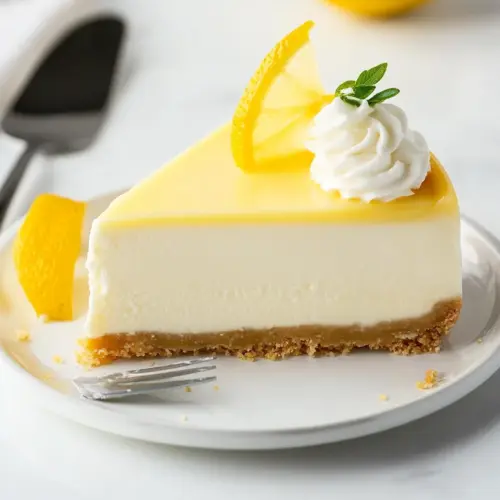
Lemon Cheesecake
The ultimate dessert for lemon lovers! This Lemon Cheesecake combines creamy cream cheese with zesty lemons, creating a delightful balance of sweet and tangy. With a buttery crust and a smooth filling, it's an easy dessert that will impress your guests and leave them craving more!
Equipment
- KitchenAid 9-Speed Digital Hand Mixer
Ingredients
- 1.5 cups Graham cracker crumbs
- 0.5 cups Bob’s Red Mill® Super-Fine Natural Almond Flour
- 3 tablespoons Sugar
- 6 tablespoons Butter (melted)
- 1 cup Granulated sugar
- Zest of 2 lemons Lemons
- 32 ounces Cream cheese (room temperature, 4 [8-ounce] packages)
- 4 large eggs Eggs (room temperature)
- 2 teaspoons Pure vanilla extract
- 0.25 cups Freshly squeezed lemon juice
- 0.333 cups Heavy cream
- 1 cup Lemon curd
- Whipped cream (optional)
- Lemon slices (optional)
Instructions
- Preheat your oven to 350°F (175°C). This is crucial for ensuring your cheesecake bakes evenly. While the oven is heating, take a 9-inch springform pan and separate it into two pieces. I find it helpful to line the bottom of the pan with foil, which prevents leaks. After lining, you can fasten the side piece back on and spray the inside with nonstick cooking spray.
- Tightly wrap the bottom and sides of the springform pan with two layers of heavy-duty foil. This step is essential for using a water bath during baking, which helps prevent the cheesecake from cracking. To add an extra layer of protection, you could place the foil-wrapped springform pan inside an oven bag – but this is completely optional.
- In a medium bowl, combine the crust ingredients: graham cracker crumbs, almond flour, sugar, and melted butter. Stir until the mixture is evenly distributed and resembles wet sand.
- Next, spoon the crumb mixture into the prepared pan. Press it evenly across the bottom and up the sides to form a nice crust layer. This layer will provide a flavorful base for your cheesecake. Bake the crust in the preheated oven for 10 minutes, then remove it to a cooling rack to cool.
- While the crust cools, bring a kettle of water to boil for the water bath. This step helps maintain moisture in the oven, resulting in a creamier cheesecake.
- In a medium bowl, use your fingertips to combine the granulated sugar and lemon zest. This will release the oils from the zest, enhancing the flavor of the sugar. The fragrant mixture is key to achieving a well-flavored filling.
- In the bowl of a stand mixer fitted with a paddle attachment, or in a large bowl using an electric mixer, beat the cream cheese with the lemon-sugar mixture for about 2 minutes. Scrape down the sides of the bowl and continue mixing for an additional 30 seconds until smooth and creamy.
- Add in the eggs, one at a time, mixing well after each addition. It’s important to scrape down the sides of the bowl after adding the second and fourth eggs to ensure everything is well-combined.
- Once all the eggs are incorporated, mix for another 30 seconds until the filling is smooth. Next, gently blend in the vanilla, lemon juice, and heavy cream. This creamy mixture should be rich and velvety.
- Pour the cheesecake filling over the cooled crust, smoothing it out with a spatula. Now, place the springform pan into a larger pan (I usually use a roasting pan). Carefully pour the boiling water into the larger pan until it reaches halfway up the sides of the cheesecake pan. This water bath technique is key for a smooth texture.
- Cover the cheesecake pan loosely with a piece of foil, allowing air to circulate while it bakes. Bake for 55 to 65 minutes. The edges should appear set, but the center should still jiggle slightly. When the time is up, turn off the oven and leave the door cracked. This helps the cheesecake cool gradually.
- After one hour, carefully remove the cheesecake from the water bath and place it on a cooling rack to cool completely. Once it has cooled, transfer it to the refrigerator for at least 8 hours, or overnight if possible. This chilling time allows the flavors to meld and the texture to firm up.
- Before serving, top your cheesecake with lemon curd, whipped cream, and lemon slices for a stunning presentation. Enjoy this delightful homemade Lemon Cheesecake with friends and family!
Notes
- Tip 1: After making your Lemon Cheesecake, store leftovers in the refrigerator, covered tightly with plastic wrap or in an airtight container. It’s best enjoyed within 3 to 4 days.
- Tip 2: You can freeze the cheesecake before adding any toppings. Wrap it securely in plastic wrap and then in aluminum foil. It can last up to 2 months in the freezer. When you're ready to enjoy it, thaw it in the refrigerator overnight.
- Tip 3: Serve your cheesecake with fresh fruits like strawberries or blueberries for a pop of color and flavor. They complement the tartness of the lemon beautifully.
- Tip 4: Feel free to play around with flavors! You can substitute with other citrus fruits like lime or orange for a different twist on this classic recipe.
- Tip 5: Allow the cheesecake to sit at room temperature for about 15 minutes before serving to enhance its creaminess.