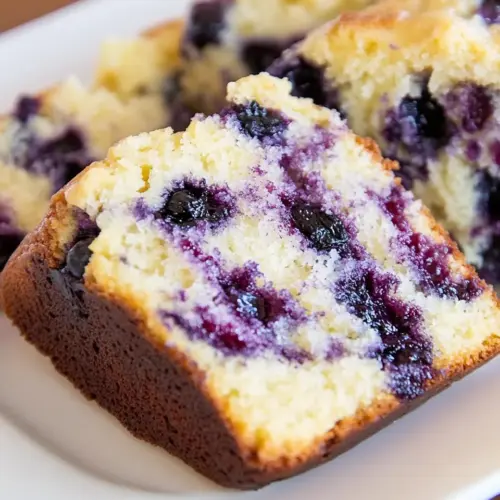
Lemon Blueberry Bread
Lemon Blueberry Bread is a tender, moist loaf bursting with fresh citrus and pockets of juicy blueberries. The bright lemon zest and a glossy lemon glaze make each slice shine, while sour cream keeps the crumb soft and rich. This easy, crowd pleasing loaf is perfect for brunch or gifting, delivering bakery flavor with simple pantry ingredients.
Equipment
- Loaf Pan
- Stand mixer
- Mixing Bowls
- Wire Rack
Ingredients
- 1 2/3 cup (235 g) all-purpose flour (scoop and level to measure) Measure accurately and provide the structural base and bulk for the loaf; contributes to the crumb, texture, and gluten formation when mixed with liquids, producing a tender but stable bread.
- 1 1/2 tsp baking powder Leaven gently to create lift and aeration in the batter; helps the bread rise by releasing carbon dioxide when heated, yielding a light, fluffy crumb.
- 1/2 tsp salt Season sparingly to enhance overall flavor balance; slightly strengthens gluten and controls sweetness while bringing out the brightness of citrus and berries.
- 1 1/4 cup (180 g) fresh blueberries Fold gently to distribute fruit and provide bursts of fresh, juicy flavor throughout; adds moisture and a pleasant fruity contrast to the sweet, lemony loaf.
- 1 cup (200 g) granulated sugar Sweeten evenly to balance tartness and provide bulk and moisture retention; contributes to tenderness, browning, and overall flavor depth in the bread.
- 1 tbsp lemon zest Zest finely to release concentrated citrus oils and aroma; adds bright, fragrant lemon flavor that complements blueberries and lifts the overall profile.
- 1/2 cup (113 g) unsalted butter, softened Cream thoroughly to incorporate fat and air for richness and tenderness; adds flavor, helps with leavening when beaten with sugar, and contributes to a moist crumb.
- 3 large eggs Bind firmly to provide structure and richness; eggs add moisture, fat, and protein that coagulate during baking to set the loaf and improve texture.
- 1/2 tsp vanilla extract Flavor subtly to add depth and enhance sweetness; contributes a warm, aromatic note that rounds out the citrus and berry flavors.
- 1/2 cup (118 g) sour cream Mix smoothly to add moisture, richness, and slight tang; sour cream tenderizes the crumb, improves mouthfeel, and helps keep the bread moist longer.
- 2 tbsp fresh lemon juice Juice freshly to add bright acidity and citrus flavor; balances sweetness, activates baking powder slightly, and enhances the lemon character of the loaf.
- 3/4 cup (90 g) powdered sugar Dust lightly to make a glaze or finishing sweetener; powdered sugar dissolves easily to form a smooth, sweet glaze or dusting for presentation.
- 1 1/2 tbsp fresh lemon juice Add sparingly to finish with concentrated lemon flavor and acidity; combined with powdered sugar, it creates a glossy, tart-sweet glaze that enhances appearance and taste.
Instructions
- Preheat oven to 350 degrees F. Grease an 8 1/2 by 4 1/2-inch or 9 by 5-inch loaf pan then dust with flour, shake out excess and set aside.: As the oven warms you will smell a faint dry heat and the kitchen will begin to feel cozy, which mentally prepares you for baking. Greasing and flouring the pan gives the loaf a reliable release and an even outer crust, you want a thin, even coating so the bread does not stick. A frequent issue is over greasing which can create a greasy edge, or under greasing which causes tearing when you invert; make sure to tap out the excess flour evenly. Visually, the pan should have a soft sheen with no clumps of oil, and the flour dust should be uniform. Using the right pan size matters, as an undersized pan will cause overflow, and an oversized pan will make a flatter loaf.
- In a medium mixing bowl whisk together flour, baking powder and salt.: When you whisk these dry ingredients together you are integrating leavening agents so the lift is even throughout the loaf. The sound is a soft swish, and the visual cue is a uniform pale mixture with no streaks of baking powder or salt. This blending keeps pockets from forming that can create odd dense areas. A common misstep is failing to sift or whisk which can lead to clumps in the batter, so be thorough until the mixture looks homogeneous. Properly combining ensures predictable rise and texture.
- Rinse blueberries and drain very well, transfer to a medium bowl and add 1 tbsp of the flour mixture and toss to coat, set aside.: The berries should be cool and dry, not dripping, because excess moisture will change batter consistency and baking time. Tossing them in that tablespoon of flour prevents sinking by giving them a light coating, which helps them suspend in the batter during baking. The gentle clinking of berries in a bowl is a small, satisfying sound; visually you will see a faint dusting of flour on each berry. Avoid over rinsing or leaving them wet, or their juices will bleed into the batter and color it. If your berries are particularly small or delicate, handle them with a light touch to prevent crushing.
- In the bowl of an electric stand mixer fitted with the paddle attachment, whip together sugar, lemon zest and butter until mixture is pale and fluffy.: As you beat the unsalted butter and sugar, you will notice it lighten in color and texture, becoming airy and slightly glossy; this trapped air contributes to lift. The citrus oils from the zest will perfume the mixture, giving an immediate lemony aroma that wakes the senses. If your butter is too cold it will not cream properly and the mixture will remain lumpy, while too soft or melted butter will produce a loose batter. The correct texture looks fluffy and holds gentle peaks when lifted, and if it seems greasy, chill briefly and rebeat to incorporate air.
- Mix in eggs one at a time and blend in vanilla.: Adding eggs slowly helps maintain an emulsion and prevents the batter from splitting. After each addition you should see the mixture smooth and slightly glossy, with a satisfying hum from the mixer. Room temperature eggs integrate more easily; cold eggs can cause the batter to look curdled for a moment, but gentle mixing will bring it back together. If the batter looks separated after all eggs are added, pause and scrape down the bowl, then beat at low speed until smooth. The aroma will deepen into a richer cake like scent as the eggs incorporate.
- Add 1/3 of the flour mixture and mix just until combined then mix in 1/2 the sour cream and lemon juice and mix just until combined. Repeat process once more.: This alternating method keeps the batter tender by limiting gluten development, you will notice the batter becoming thicker then loosening again when you add the sour cream and lemon juice . Work gently and stop mixing as soon as the streaks disappear, because overmixing creates toughness. The texture should be smooth and slightly thick, not rubbery; the scent will be a balanced citrus dairy note. A typical mistake is dumping all the flour in at once and overworking it, which yields a denser crumb, so slow and steady is key.
- Mix in last 1/3 of the flour mixture then remove bowl from stand mixer and gently fold in blueberries.: After the final flour addition the batter should be cohesive and hold a ribbon when lifted. Removing the bowl and folding by hand preserves the airy texture and prevents the berries from breaking up. You want to fold with wide, gentle strokes so the blueberries stay intact and evenly dispersed; visually you should see small pockets of berry throughout without streaks of purple. A common error is vigorous stirring which can crush berries and color the batter, or overfolding which knocks out too much air, making the loaf heavy.
- Pour batter into prepared loaf pan, spread even and bake until toothpick inserted into center comes out with a moist crumb or two, about 50 - 60 minutes.: As the batter hits the oven heat the aroma will intensify and a thin crust will form on top, often a pale golden hue. The correct doneness is a toothpick with a few moist crumbs clinging, not raw batter; you want that tender interior. Ovens vary, so start checking at 50 minutes and rotate the pan if your oven has hot spots. A mistake to watch for is opening the oven too often early on which causes the loaf to deflate, so resist peeking until close to the finish. Visual cues include a domed top and even golden color at the edges.
- Let cool for about 5 minutes, run knife around edges to ensure loaf has loosened then invert onto a wire rack. Cool on rack about 30 minutes then finish cooling in an airtight container.: The initial rest lets the loaf settle and firms it slightly so it unmolds cleanly, you will notice a gentle steam release as you invert. Cooling on a rack prevents a soggy bottom by allowing air circulation, and an airtight container after cooling keeps the loaf moist. Avoid slicing too early or the crumb will be gummy and may tear; patience pays off. The loaf will continue to set as it cools, and the aroma will mellow into a comforting, stable scent.
- Once cool, in a small mixing bowl whisk together powdered sugar and lemon juice (if you want it thicker add a little more powdered sugar), spoon over loaf.: The glaze should be silky and glossy, and when spooned on it settles into the loaf’s crevices adding a bright, sweet finish. Start with the listed ratio and adjust for thickness; the sound of the spoon lightly tapping the loaf is oddly satisfying. If the loaf is still warm the glaze may sink in rather than set on top, so ensure it is cool to the touch. A mistake is making the glaze too runny, which will pool at the base instead of creating that pretty sheen.
- Let glaze set then cut into slices. Store in an airtight container.: Allow the glaze to firm so you get clean slices that look neat on a plate. When cutting, use a serrated knife with gentle sawing motions to preserve crumb and glaze. Stored properly, the loaf retains its texture for several days and the aroma will remain inviting. A common error is storing while slightly warm which traps steam and softens the crust; always cool completely before sealing.
Notes
- Swap sour cream sparingly: Use the recipe quantity of sour cream as written for the ideal tender crumb; substitutions like Greek yogurt may affect rise and texture significantly, so proceed with caution.
- Adjust lemon intensity: Add an extra teaspoon of lemon zest if you want a stronger citrus aroma, which will amplify the bright top notes without changing the batter’s hydration.
- Glaze thickness control: Start with the listed ratio of powdered sugar and lemon juice, then add more sugar for a thicker glaze or a splash more juice for a thinner drizzle to achieve the desired finish.
- Berry presentation: Press a few whole blueberries gently into the top of the batter before baking for a pretty dotted crust and little bursts of color in each slice.
- Make mini loaves: Divide the batter into smaller pans and shorten baking time accordingly for portable portions perfect for gifts or picnics, watching internal doneness closely.
- Bake in a different pan size: If you use a 9 by 5 inch pan instead of an 8 1/2 by 4 1/2 inch pan, keep an eye on oven time as a slightly shallower loaf may bake a bit faster at the edges.