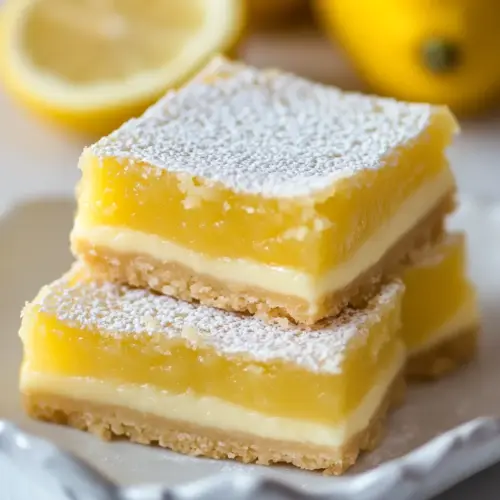
Lemon Bars Recipe
Lemon Bars Recipe combines a buttery, tender crust with a bright, silky lemon filling that is tangy and balanced. This easy, crowd pleasing dessert yields crisp edges and neat slices, making it perfect for picnics or special occasions. Fresh lemon juice and zest create lively citrus flavor, and chilling ensures clean cuts for beautiful presentation, a must make for anyone who loves classic bakery style bars.
Equipment
- 9×13 baking pan
- Parchment Paper
- Mixing Bowls
- Wire Rack
- Whisk
- Measuring Cups and Spoons
- Fork
Ingredients
- 1 cup unsalted butter melted Melted to provide a rich, tender base for the crust and help bind dry ingredients together; contributes buttery flavor and a soft, crumbly texture when cooled. Incorporate while warm enough to mix smoothly with sugars and flour so the dough forms evenly and presses into the pan without cracking.
- 1/2 cup caster sugar Dissolved to sweeten the crust and balance the tart lemon filling; helps with slight caramelization at edges during baking for added depth. Cream briefly with melted butter to distribute sweetness evenly throughout the shortbread-like base.
- 1 teaspoon pure vanilla extract Added to impart a subtle floral warmth that complements the lemon; enhances overall aroma and rounds out the sweetness. Stir into the crust or filling as directed to ensure even flavor distribution without overpowering citrus notes.
- 1/2 teaspoons salt Sprinkled to enhance overall flavor balance and reduce sweetness, allowing lemon and butter flavors to shine; also stabilizes dough structure slightly. Mix into dry ingredients so salt disperses uniformly throughout the crust and filling.
- 1 tablespoon lemon zest Zested finely to deliver concentrated citrus oils that amplify lemon aroma and flavor without additional acidity; brightens the filling and pairs naturally with sugar. Add zest early in the mixing process to release essential oils and ensure even citrus presence.
- 2 1/4 cups all-purpose flour Combined as the main structure of the crust, providing firmness and body when mixed with butter and sugar; creates the shortbread base texture needed for lemon bars. Measure accurately and sift if desired to avoid lumps and achieve a smooth dough.
- 2 cups caster sugar Used to sweeten the lemon filling and balance acidity from the lemon juice; helps set the custard-like texture when baked with eggs. Whisk thoroughly with eggs and flour to dissolve crystals and produce a glossy, uniform filling.
- 8 tablespoons all-purpose flour Added in small quantity to help thicken and stabilize the lemon curd filling; contributes to a firmer set by absorbing moisture and supporting egg proteins. Whisk with eggs and sugar to prevent lumps and ensure a silky, set topping.
- 8 large eggs Whisked to create structure, richness, and a custardy texture in the lemon filling; eggs coagulate during baking to set the bars. Beat until well combined with sugar and flour to create a smooth mixture that will bake to a firm, sliceable consistency.
- 1 teaspoon vanilla extract Incorporated to enhance the delicate sweetness and add a hint of warm flavor that complements lemon; provides aromatic complexity in the filling. Use sparingly and mix into the egg-sugar mixture so flavor integrates without dominating citrus notes.
- 1 1/4 cup lemon juice about 4-5 lemons Squeezed for bright, tangy acidity that defines lemon bars, providing the primary citrus flavor and balancing sweetness; also contributes liquid volume to the curd. Strain if desired to remove seeds and pulp for a smooth, clean-textured filling.
- Confectioners' sugar Dusting to finish the bars with a delicate sweetness and attractive presentation; softens the tartness on each bite and visually signals dessert readiness. Sprinkle evenly over cooled bars just before serving to avoid melting into the warm filling.
- Lemon slices Garnish to add a fresh citrus accent and decorative appeal, enhancing visual presentation and hinting at the primary flavor; can be candied or fresh depending on preference. Place sparingly on each serving to provide a bright, zesty contrast to the sugary topping.
Instructions
- Preheat the oven to 325°F.: The oven should smell warm and even, not hot and harsh, ensuring the crust bakes gently to golden edges without burning. Accurate oven temperature helps the crust set while the filling cooks evenly later on. A hot oven can brown the crust too fast, leaving the center underbaked, so use an oven thermometer if your oven runs hot. Watch for a faint butter aroma and slight warmth from the oven when you open it to verify temperature.
- Line the bottom and sides of a 9×13 baking pan with parchment paper, leaving an overhang on the sides, this will help to lift the bars out of the pan. Set aside.: The parchment makes removal effortless and prevents sticking, while the overhang gives you leverage to lift the whole slab. Press the paper into corners to avoid air pockets that create uneven crust thickness. If you skip the overhang, cutting and transferring pieces becomes messy, and edges may crumble. Ensure the paper lies flat so the crust presses evenly.
- In a medium bowl combine the melted butter with sugar, vanilla extract, and salt.: As you stir, notice the butter sheen turn into a cohesive glossy mixture, the sugar beginning to dissolve into it. This fat sugar emulsion is what binds with the flour to create a shortbread like dough, contributing to a tender, melt in the mouth crust. Overmixing is not necessary, excessive stirring can develop gluten once flour is added, so stop as soon as ingredients are combined. If the butter feels too warm and thin, let it cool slightly so it does not make the dough greasy.
- Add the flour and stir to fully combine. The dough will be thick.: When the flour disappears into the butter mixture, the dough will become dense and slightly crumbly, but packable. You should be able to press it together with your fingers without it falling apart. If the dough is sandy, it is fine that it looks coarse because pressing will unify it; however if it is oily, you likely used butter that was too warm. Avoid overworking which can make the crust tough.
- Press the dough firmly into the prepared pan, in an even layer.: The action of pressing compacts crumbs into a cohesive base that bakes with an even texture. Use the back of a measuring cup to smooth and level the surface; the crust should be uniform in thickness. Uneven pressing leads to thin spots that overbrown or thick spots that remain underbaked. Apply steady pressure for a consistent foundation that supports the filling.
- Bake for 20-23 minutes or until the edges are just lightly browned.: You want to see a faint golden rim and a dry surface, which signals the crust is set but not overbaked. The smell will change from raw flour to a mild, toasty butter aroma. Pulling it too early leaves a doughy base, while overbaking yields a dry, hard crust. Rotate the pan halfway through if your oven has hot spots to encourage even coloring.
- Remove from the oven and use a fork to poke holes all over the warm crust, but not all the way through the crust.: Poking creates tiny vents that help the filling adhere to the crust and release trapped steam, preventing bubbles. The sound is a soft poking, and the crust should hold its shape between holes. Avoid piercing through to the pan or making deep slices, which could let the filling seep under and prevent an even layer. If you see large cracks, gently press them back together.
- Sift the sugar and flour together in a large bowl.: The dusting motion of sifting aerates the sugar and flour , removing lumps and ensuring the dry mix disperses uniformly into the eggs and juice. This helps the filling reach a smooth, lump free consistency. If you skip sifting you may find grainy pockets; a quick sift saves texture troubleshooting later. Use a fine mesh to catch any stubborn lumps.
- Add the eggs, vanilla, and lemon juice and whisk until fully combined.: As you whisk, the mixture will go from pale and glossy to a uniform, slightly frothy batter, releasing a bright citrus aroma. The eggs emulsify with the liquids to create a custard base, and vigorous whisking dissolves sugar and integrates air for lightness. Stop once homogenous; overwhipping can incorporate too much air, leading to bubbles or cracking during baking. If you notice unmixed pockets, scrape the bowl sides and whisk again briefly.
- Pour lemon filling over the warm crust and bake for 20-25 minutes, or until the center is relatively set and no longer jiggles.: As it bakes, you will see the filling change from glossy to matte and the edges may puff slightly. The lemon aroma intensifies into a bright, sweet scent. A subtle wobble in the center is okay because it will continue to set as it cools, but a runny center after cooling means underbaking. Avoid excessive browning, which can introduce a bitter note, and check for a gentle set rather than strict firmness.
- Remove from the oven and cool completely on a wire rack. Place in the refrigerator for 2 more hours until fully chilled.: Cooling on a rack allows air to circulate and prevents condensation under the pan while chilling firms the custard into a sliceable texture. The filling will lose most of its visible jiggle and become dense and smooth. Cutting too soon results in messy slices, so patience here yields neat squares. If you shortchange the chill time, the bars will be soft and difficult to transfer.
- Once cooled and ready to serve, lift the parchment paper out of the pan using the overhang on the sides.: The parchment should slide up smoothly, revealing clean edges and a uniform surface. The tactile ease of lifting confirms proper chilling and a solid set. If the slab sticks, run a thin knife around the edges before lifting. Avoid yanking sharply which can crack the bars.
- Dust with confectioners' sugar and cut into squares.: The powdered sugar provides a delicate visual contrast and an immediate sweet kiss on the first bite. Use a sharp knife wiped between cuts for clean edges, and aim for evenly sized squares for consistent serving. If the knife drags, chill the slab a bit longer. Too much sifting of sugar can obscure the bright lemon color.
- Optionally garnish with lemon slices before serving.: Thin lemon slices add a pretty finishing touch and reinforce the citrus theme, offering a zesty aroma at serving time. Place slices sparingly to avoid overwhelming the bars and turning them soggy. Avoid thick slices that overpower the delicate squares.
Notes
- Room temperature eggs help the filling blend smoothly. Cold eggs can cause the mixture to clump or resist emulsifying, so leave them out briefly before whisking for a silkier texture.
- Measure flour properly to avoid a tough crust. Spoon the all purpose flour into the measuring cup and level it off rather than scooping, which packs extra flour into the cup and makes the crust dense.
- Cool the crust slightly before pouring the filling. A warm but not hot crust helps the filling spread evenly and adhere without melting into the base, preventing a soggy bottom.
- Use a sharp knife and wipe it between cuts for neat squares. Running a clean blade through each cut prevents dragging and keeps the edges crisp and presentable.
- Refrigerate for at least two hours for best slicing. Chilling firms the custard and improves texture, turning a fragile bar into a sliceable dessert perfect for plating.