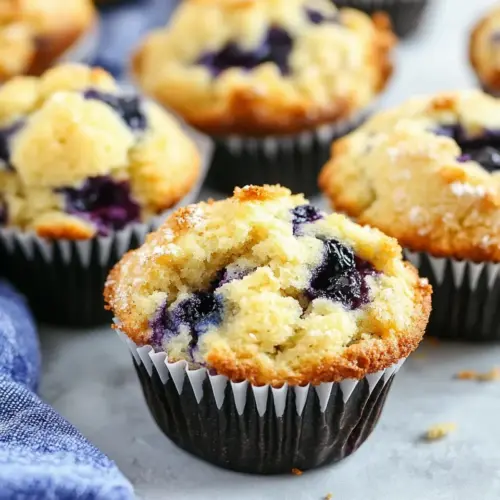
Lemon and Blueberry Jumbo Muffins
Lemon and Blueberry Jumbo Muffins deliver a bright citrus aroma and juicy bursts of blueberries in a tender, bakery style crumb. These jumbo muffins are moist, lightly sweet, and topped with a crunchy coarse sugar crown, making them perfect for brunch or sharing. They are easy to make and reliably forgiving, a great bake to try when you want something impressive yet simple.
Equipment
- Jumbo muffin pan
Ingredients
- 3 cups all-purpose flour Provide structure and bulk to the muffins, creating the crumb when combined with liquids and leaveners. Use spoon-and-level measuring to avoid dense results and ensure even mixing for uniform texture. Prefer all-purpose flour for a balance of tenderness and strength suitable for jumbo muffins.
- 4 teaspoons baking powder Provide lift and aeration by releasing carbon dioxide during baking to help muffins rise. Whisk into the dry ingredients to distribute evenly and prevent uneven pockets of rising. Use fresh baking powder for reliable volume and tender crumb.
- 1/2 teaspoons regular salt, not coarse Season and enhance overall flavor balance while controlling gluten formation in the batter. Measure precisely since too much salt can overpower and too little can leave the muffins flat-tasting. Use regular fine salt to dissolve and integrate smoothly.
- 2 large eggs room temperature Bind ingredients and add moisture while contributing to structure and leavening from trapped air when beaten. Bring eggs to room temperature to incorporate more easily for a lighter, uniform batter. Beat briefly with sugar to help dissolve crystals and incorporate air.
- 1 cup cane sugar Sweeten the batter and contribute to moisture and tenderness while aiding browning through caramelization. Cream with the eggs and oil to distribute sweetness evenly and promote a fine crumb. Adjust amount sparingly if substituting with other sweeteners to maintain texture.
- 1/2 cup lemon-infused olive oil Add fat for moisture, tender crumb, and a subtle lemon flavor when infused, also aiding in browning and richness. Measure precisely and mix with eggs and sugar to emulsify for a smooth batter. Use lemon-infused olive oil for a light citrus note and unique mouthfeel.
- Zest of 1 large lemon Concentrate citrus aroma and bright acidity to lift the muffin flavor and complement blueberries. Zest finely to avoid bitter white pith, and fold into batter or sugar to release essential oils. Use zest from a large lemon for pronounced, fresh lemon character.
- 1/4 cup ricotta cheese whole milk OR part-skim: See NOTES Introduce creaminess and extra moisture without thinning the batter as much as liquid dairy, contributing a tender, rich texture. Use whole-milk or part-skim ricotta depending on desired richness, and gently fold to maintain airiness. Drain excess liquid if overly wet to preserve muffin structure.
- 3/4 cup buttermilk Provide tang, tenderization, and a bit of acidity to activate baking powder for a moist, soft crumb. Keep buttermilk cold and measure accurately to control batter consistency and flavor balance. Stir into wet ingredients until just combined to avoid overmixing.
- 1 teaspoon vanilla extract Enhance and round out flavor with warm, sweet aromatics, complementing lemon and blueberry notes. Add to wet ingredients and stir lightly to distribute without overmixing. Use a quality vanilla extract for the cleanest, richest background flavor.
- 1 cup fresh blueberries Contribute fresh, juicy bursts of fruit flavor and visual appeal, balancing sweetness and acidity in each bite. Gently fold into the batter to avoid crushing and discoloring the batter, and toss with a little flour if concerned about sinking. Choose fresh berries for best texture and flavor.
- Cooking spray Prevent sticking and allow muffins to release cleanly from the pan while promoting even browning on the edges. Spray lightly into jumbo muffin tins before lining or filling to ensure easy removal. Use a neutral cooking spray suitable for baking to avoid imparting flavors.
- 1/4 cup coarse sugar such as turbinado Provide a crunchy, sparkling topping that adds texture contrast and visual appeal after baking. Sprinkle coarse sugar on muffin tops before baking to create a caramelized, decorative finish. Use turbinado or similar coarse sugar for larger crystals and shine.
Instructions
- Preheat oven to 425°F.: A hot start gives the muffins an immediate oven spring, producing tall domes and a crusty top that later becomes crackled. You should smell a faint warmth in the kitchen when the oven approaches temperature, and the preheated air helps the batter set quickly. A common mistake is not preheating fully, which results in flatter tops and denser interiors, because the batter begins to bake unevenly.
- In a large bowl, whisk together the flour, baking powder and salt until blended (about 30 seconds of gently blending with a whisk or fork).: You will see the dry mix become uniform, a pale, slightly aerated field free of lumps. The whisking distributes the baking powder evenly so every muffin rises consistently. If you sift, you will notice a lighter texture, but overworking dry ingredients can incorporate too much air, causing excessive rise then collapse, so stop once blended.
- In a separate medium-sized bowl, use a fork or wooden spoon to mix the eggs with the sugar. Stir until blended. Add the oil, lemon zest, ricotta cheese, buttermilk, and vanilla, and mix until incorporated.: As you stir, the sugar dissolves into the eggs , and the mixture will become glossy and slightly thickened. When you add the oil and ricotta cheese , the aroma of lemon zest will lift and the mixture will look silky. This wet blend should be smooth and cohesive; a lumpy wet mix signals cold or unevenly mixed ingredients. A typical slip is under mixing the ricotta, leaving curds that create uneven pockets, so stir until the texture is unified but do not overmix.
- Using your hands, or a large wooden spoon, form a well in the center of the flour mixture.: The visual cue is a crater in the dry ingredients with a clear edge, ready to accept the wet mix. This technique helps contain the wet components so they can be folded in gently, preserving air within the flour. If you pour wet ingredients directly without a well, you risk overmixing and developing too much gluten, which makes the muffins tough.
- Add the egg/oil mixture and the blueberries into the well area you created in the flour mixture.: When you add the wet mix into the well, you will notice the blueberries settling into the center like little islands. The contrast between the pale batter and deep berry blues is visually pleasing. Dropping berries on top of dry flour helps protect them from bursting during folding. If you dump everything at once, the berries may get crushed and bleed color, tinting the batter and making the muffins marbled rather than spotted.
- Using the wooden spoon, fold the dry ingredients into the wet, slowly, until all pockets of flour have been incorporated. About 1 to 2 minutes. The batter will be very thick and resemble moist cookie dough.: As you fold, watch for streaks of flour disappearing and the batter pulling away from the bowl sides. The texture should be thick, not pourable, and you will hear a muffled scraping sound as the spoon moves through. Folding carefully preserves tender crumb and prevents overworking the gluten. A frequent error is to keep mixing until the batter is smooth like cake batter; stop when pockets of flour are gone to avoid tough muffins.
- Spray a large muffin pan with cooking/baking spray, including the top of the pan.: The pan should gleam with a thin coat so the batter slides out easily after baking. Pay attention to the sides of each well as well as the rim. If you skimp on spray, muffins can cling and tear when you remove them. Use a quality nonstick spray, or lightly oil and flour the wells if you prefer, to ensure clean release.
- Use a large spoon or ice cream scooper to fill each muffin holder nearly to the brim.: Hearing the batter thud into the wells is satisfying, and seeing the wells filled almost to the top clues you that the muffins will be generously sized. The batter should mound slightly above the rim, which helps create tall domes. Underfilling will produce smaller muffins, while overfilling can cause spill over in the oven, so aim for nearly full not overflowing.
- Top each muffin with a healthy pinch of sugar crystals.: When you sprinkle coarse sugar, it lands as sparkling flecks that will melt and re crystallize into a crunchy top. The visual shimmer is immediate and you will smell the sugar caramelizing during baking. Avoid using fine sugar here because it will dissolve and not provide the desired crunch.
- Bake for 6 minutes and then reduce oven temperature to 375°F and continue baking for 22 - 25 minutes, or until tops are lightly brown, and an inserted toothpick comes out clean.: The initial blast of heat gives the muffins their lift and crust. After the temperature drops, the interiors finish baking gently. You should hear a barely audible pop as the tops set and see the edges pull slightly from the pan. Insert a toothpick near the center into the thickest muffin to check doneness, it should come out with a few moist crumbs not raw batter. Overbaking dries them out, while underbaking leaves a gummy center.
- Carefully remove muffins from the tin as soon as possible. If left in the pans, the bottoms will become soggy.: The first touch should feel warm not scalding, and the muffins should release cleanly. Removing them promptly prevents steam collecting under the muffin and softening the bottoms. If you leave them, condensation will form and make the underside limp, so unmold quickly and transfer to a rack.
- Let cool for at least 10 minutes on a rack.: Cooling on a rack allows air to circulate around the muffin, preventing trapped steam and preserving texture. You will notice the tops firm slightly and the interiors set during this time. Resist the urge to slice into them hot because the centers continue to finish cooking as they cool; slicing too early can cause them to appear gummy. Ten minutes gives a good balance between warm and set.
Notes
- Room temperature matters Bring eggs and buttermilk to room temperature before mixing, this encourages smooth incorporation and a uniform batter, reducing the chance of pockets of unmixed dairy or a broken batter.
- Ricotta choice affects crumb Whole milk ricotta cheese will yield a slightly denser, richer muffin while part skim makes them lighter. Choose whole milk for a bakery feel, or part skim if you prefer a less rich bite.
- Measuring flour correctly Spoon flour into the measuring cup and level it off, do not scoop directly with the cup, or you will pack too much and risk drier, heavier muffins.
- Protect fresh blueberries Fold the blueberries gently at the end to prevent them from bursting and tinting the entire batter. If you want streaks of purple, stir more vigorously, but expect a marbled look.
- Storing and freezing Store cooled muffins in an airtight container for up to five to six days. For longer storage, wrap individually and freeze for up to two months, thawing at room temperature.