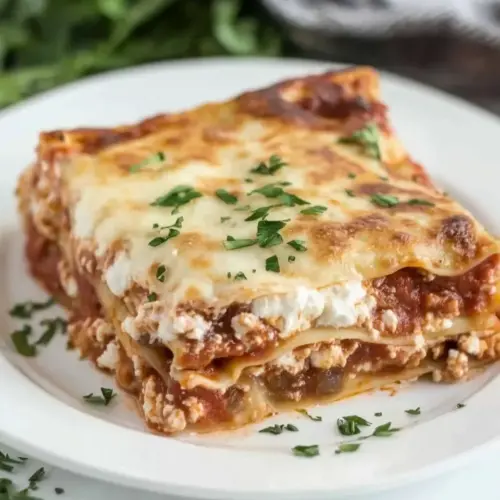
Lasagna with Ricotta Cheese
Lasagna with Ricotta Cheese is a creamy, comforting casserole layered with slow simmered tomato sauce, savory Italian sausage, and melty mozzarella, perfect for an easy weeknight dinner or a cozy family gathering. The long simmered sauce yields deep, rounded flavors while the ricotta keeps each slice tender and luxurious, making it a reliable crowd pleaser you will want to make again and again.
Equipment
- Large Pan
- Sauté Pan
- 9 x 13-inch pan
- Oven
Ingredients
- 1 cup chopped onion Sauté until translucent to build a sweet, aromatic base that softens the texture and mellows sharpness while supporting tomato flavors.
- 2 tablespoons olive oil Heat gently to provide a smooth, fruity fat that carries flavors, prevents sticking, and helps brown aromatics for depth.
- 2 cloves minced garlic Crush and cook briefly to release pungent, savory oils that enhance the sauce's aromatic profile and add a bright, garlicky bite.
- 1 28-ounce can crushed tomatoes Simmer slowly to form the bulk of the sauce with a rich tomato body, contributing natural sweetness, acidity, and texture.
- 1 16-ounce can diced tomatoes Add during simmering to introduce fresh tomato chunks for textural contrast and a layered, bright tomato flavor in the sauce.
- 1 6-ounce can tomato paste Stir in to thicken the sauce, intensify tomato concentration, and provide a deep, concentrated flavor and body.
- 1 tablespoon brown sugar Dissolve into the sauce to balance acidity with a subtle caramel sweetness and round out sharp tomato notes for harmony.
- 1 teaspoon salt Season progressively to enhance overall flavor, elevate savory and sweet elements, and help balance the sauce's acidity.
- 1 1/2 teaspoons oregano Sprinkle in to contribute warm, herbaceous, slightly bitter notes that complement tomato and Italian seasoning profiles.
- 1/4 teaspoon thyme Add sparingly to impart subtle earthy, slightly floral undertones that enhance the sauce's complexity without overwhelming it.
- 1 bay leaf Drop into the simmer to release a subtle, bay-leaf aroma that adds depth and a slightly floral, herbal backbone to the sauce.
- 1 stalk of celery, cut in half Simmer with the sauce to add vegetal, aromatic complexity and a gentle savory note that supports the tomato base.
- 2 cups water Pour in to adjust consistency, allow ingredients to meld, and provide steam for slow simmering without drying the sauce.
- 4 links Italian sausage (1 1/2-2 pounds), sliced and cooked Brown and incorporate to add savory, spiced richness and meaty texture, contributing umami and depth to the overall filling.
- 1 pound ricotta cheese Spoon and layer to introduce a creamy, tangy component that adds moisture, richness, and a soft, cheesecake-like texture between noodles.
- 1 1/2 pounds mozzarella, grated Grate and layer to provide gooey, melty stretch, a mild milky flavor, and a golden top when baked for a classic lasagna finish.
- 8 ounces lasagna noodles, soaked in warm water for about an hour or no boil lasagna noodles Soak or use no-boil to supply the structural pasta layers that absorb sauce, soften during baking, and create the lasagna's framework.
Instructions
- In a large pan, saute onion in olive oil till translucent. Add garlic and saute till fragrant.: The air will fill with sweet, savory aromas as the onion surrenders its crispness into a soft translucent state, creating a mellow base for everything that follows. You should hear a gentle, steady sizzle that quiets as moisture releases, and the pieces should feel tender when pressed with a spoon. This step matters because it softens the onion and releases natural sugars that round the sauce, if you rush it or run the heat too high the edges can brown and add bitterness, so keep the flame medium low and stir frequently.
- Add tomatoes, tomato paste, brown sugar, salt, oregano, thyme, bay leaf, celery, and water.: When you add the minced garlic , the kitchen will be scented with a toasty, aromatic hit almost immediately, so watch for the tiny flecks to become golden at the edges. Garlic cooks far faster than onion, and its delicate oils are what lift the sauce, therefore remove the pan from high heat or reduce to low if you smell rapid browning, burnt garlic turns acrid and will ruin the sauce here.
- Simmer for 2-3 hours. Remove celery and bay leaf.: As you stir in the canned crushed tomatoes and diced tomatoes , the mixture will look vivid and slightly loose, and the spoon should glide through a glossy, red river of sauce. The tomato paste will thicken and deepen the color, while the brown sugar tames sharpness. The herbs and bay leaf should float, releasing soft herbal notes, and the halved celery will add an earthy backbone. This assembly is essential, because it balances acidity and spices before long simmering. Avoid skipping salt at this stage, since it helps coax flavors out of the tomatoes and herbs.
- Soak dried lasagna noodles in warm water for about an hour. No need to boil using this method. Or use no-boil lasagna noodles.: Over a long, patient simmer the sauce will gradually reduce, the scent will deepen into a rich tomato perfume, and small bubbles will lazily break across the surface. You want a gentle simmer, not a boil, so the sauce reduces without splattering and the flavors concentrate into a cohesive whole. Periodically stir and skim any excess foam so the texture remains smooth, and remember that simmering too rapidly makes the sauce drier than intended, so lower the heat if reduction happens too quickly.
- Cook sausage in a saute pan till browned on both sides and cooked through. Add to sauce.: After simmering, take out the halved celery stalk and the bay leaf , you will notice the sauce is now deeper and thicker, and removing these items prevents fibrous bites and the sharp, leathery texture of bay leaf in the finished dish. This step matters because it leaves behind flavor without unwanted texture, and forgetting to remove the leaf can lead to unpleasant surprises when serving, so fish them out carefully with tongs or a slotted spoon.
- Preheat the oven to 350º. Grease a 9 x 13-inch pan. Put a small amount of sauce (without sausage) on the bottom of the dish.: The noodles will become pliable and silkier to the touch as they soak, losing stiffness while avoiding the overcooked, gelatinous texture that boiling can cause in layered dishes. If you use no boil noodles, you can skip this, but soaking helps ensure even hydration when baked. A common mistake is skipping the soak with dried noodles, which may result in chewy centers, so allow adequate time and check that each noodle bends without cracking before layering.
- Start layering with half the noodles, then half the sauce, half the ricotta, and half the cheese. Repeat.: As the Italian sausage hits the hot pan, you should hear firm sizzles and see golden crusts form, releasing meaty aromas that deepen the sauce when folded in. Browning develops Maillard flavors that add savory complexity, and cooking through ensures safe consumption and a pleasant texture. Do not overcrowd the pan, as that causes steaming rather than browning and reduces flavor development, so work in batches if needed.
- Cover with a greased piece of foil or non-stick foil.: When the browned Italian sausage joins the pot, the sauce will take on flecks of caramelized meat and a richer mouthfeel, and the combined aromas will feel more rounded and meaty. Folding the sausage into the sauce lets its juices mingle, creating pockets of savory intensity in every bite, which matters for balance. Avoid adding raw or undercooked sausage, as it will not integrate well and may leave an undesirable texture.
- Bake for 1 hour. May remove foil for the last 15 minutes to brown the cheese if desired.: As you heat the oven to 350º , the warmth readies the pan for even baking, and preheating ensures predictable melting and browning times for the cheeses and noodles. A properly preheated oven creates the steady environment needed for even cooking, while starting in a cold oven can yield gummy noodles or unevenly melted cheese. Ensure the oven racks are positioned so the top gets enough heat for browning without scorching.
- Cool about 15 minutes before cutting and serving.: A lightly greased 9 x 13 inch pan prevents the lasagna from sticking and helps the edges crisp attractively. The greased surface also lets the bottom layer of lasagna noodles heat through without bonding to the metal. Skip heavy greasing, as too much oil can pool and make the finished edge greasy, but do coat enough so slices release cleanly.
- Put a small amount of sauce without sausage on the bottom of the dish: Spreading a thin layer of sauce prevents the bottom noodles from drying and creates a moist barrier that helps the lasagna release after baking. I use sauce without sausage here so the first noodle layer does not shift from heavy chunks, ensuring an even foundation. Failing to do this can cause sticking and tearing when serving, so be sure to cover the base.
- Start layering with half the noodles, then half the sauce, half the ricotta, and half the cheese: The first assembled layer should feel balanced, with soft lasagna noodles providing structure while the saucy and cheesy layers cushion them. Spread the ricotta cheese gently so it remains airy, and use even mounds of grated mozzarella for uniform melting. Layer symmetry matters for clean slicing, and piling unevenly leads to collapsing slices when cutting, so compose layers with consistent thickness.
- Repeat: The repetition cements the lasagna into a tall, cohesive casserole where each layer contributes textural contrast, and you will notice the pan gains weight and a layered, mosaic appearance. Repeating also ensures each forkful includes noodles, sauce, and cheese, which is the hallmark of a well built lasagna. Overfilling can cause bubbling over in the oven, so leave a little headroom at the top.
- Cover with a greased piece of foil or non stick foil: Covering the pan traps steam for even cooking, keeping the cheeses melty while allowing the interior to set. Greasing the underside of the foil prevents cheese from sticking to it if it touches the top layer during baking. Removing foil too early can dry the top, whereas leaving it on the whole time may prevent browning, so time your uncovering to the last stage for a golden finish.
- Bake for 1 hour: During the hour the dish will shift from layered ingredients to a unified casserole, with the center setting and the cheeses melting into glossy ribbons. The oven air will produce gentle bubbling at the edges, and the top should look set and slightly domed. If you want browned cheese, remove the foil for the last 15 minutes, but be mindful that extended uncovered baking can dry the top, so monitor carefully.
- May remove foil for the last 15 minutes to brown the cheese if desired: When you uncover the lasagna the surface transforms, edges crisp and mozzarella takes on golden spots, creating an attractive finish and additional texture. Browning adds to the sensory experience, but watch closely to prevent excessive darkening, which can occur quickly under radiant heat. If the top is browning too fast, lower the rack or tent with foil to protect it.
- Cool about 15 minutes before cutting and serving: Letting the lasagna rest allows steam to redistribute and the layers to set so slices hold shape, and you will notice the edges firm while the interior remains creamy. This pause improves presentation and prevents molten cheese burns, and makes slicing easier. Cutting too soon causes sloppy portions that fall apart, so allow adequate cooling before serving.
Notes
- Swap cheese proportions: Try adjusting the ratio of ricotta cheese to mozzarella for a creamier or cheesier bite, but keep the total amount similar so the lasagna sets properly in the oven.
- Make ahead advantage: Assemble the lasagna a day before baking and refrigerate, which lets flavors meld and makes for easier weeknight timing or holiday prep.
- Control moisture: If the sauce seems very loose, simmer longer to reduce it slightly before assembling so the lasagna does not become watery while baking.
- Texture balance: For more pronounced texture, use part fresh grated mozzarella and part pre shredded, the fresh melts creamier while the pre shredded adds slight bite.
- Herb boost: Add a teaspoon more oregano or a sprinkle of fresh herbs after baking to lift the finished dish without altering the core recipe.
- Layering finesse: Spread the ricotta cheese in thin even layers so the lasagna bakes evenly and slices cleanly, uneven mounds can lead to collapsing portions.