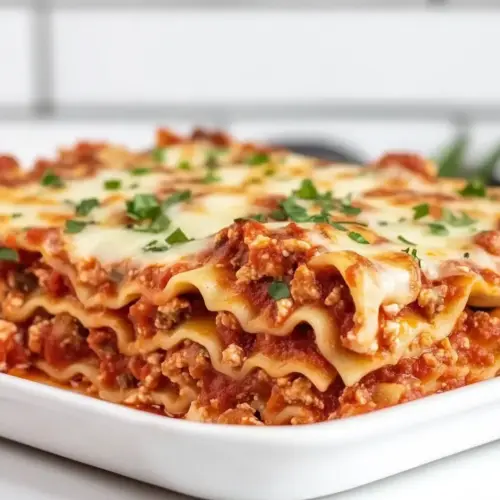
Lasagna
Lasagna is a creamy layered casserole with rich tomato sauce and melty cheeses, an easy weeknight dinner that also shines for gatherings. This classic combines savory browned beef, aromatic onion and garlic, and a blend of ricotta cheese, mozzarella cheese, and parmesan cheese for comforting texture. It bakes into golden bubbly perfection, making it a persuasive reason to make it tonight.
Equipment
- Large Skillet
- Saucepot
- 9x13 deep dish casserole pan
- Mixing Bowl
- Aluminum Foil
Ingredients
- 1 (16-ounce box) lasagna noodles Boil until al dente and layer to provide structure and distinct pasta layers that absorb sauce while maintaining bite; soak or pre-cook as package directs to prevent undercooked centers and ensure even assembly.
- 2 pounds lean ground beef Brown thoroughly and crumble to develop savory depth and Maillard flavor; drain excess fat if necessary to keep the lasagna from becoming greasy while maintaining rich meaty texture throughout the layers.
- 2 (28-ounce cans) crushed tomatoes Simmer into the meat sauce to add body, acidity, and tomato flavor; combine with seasonings and reduce slightly so it melds with meat and herbs for a balanced, saucy filling.
- 1 cup onion, small diced (1 small) Sauté until translucent to lend mild sweetness and aromatic foundation to the sauce; small dicing ensures even distribution and gentle texture within each lasagna layer.
- 1 tablespoon garlic, minced (2-3 cloves) Sauté briefly with onions to release pungent aroma and savory bite; minced garlic infuses the sauce with warm, aromatic notes without overwhelming other flavors.
- 1 tablespoon Italian seasoning blend Sprinkle into the sauce to introduce a balanced herbaceous profile with oregano, basil, and thyme notes; Italian seasoning simplifies seasoning practice while enhancing classic lasagna flavor.
- 1/2 teaspoons salt Season to enhance overall flavors and balance acidity and sweetness; add carefully and taste the sauce as it reduces to avoid over-salting the finished dish.
- 1/4 teaspoon black pepper Grind into the sauce sparingly to provide subtle heat and depth; black pepper brightens flavors and contrasts the richness of cheeses and meat.
- 4 tablespoons tomato paste Stir into the tomato mixture to intensify tomato concentration and thicken the sauce; tomato paste adds concentrated umami and helps the sauce cling to noodles and fillings.
- 1 tablespoon olive oil Use for sautéing aromatics and browning meat to add fruity, savory richness; olive oil also helps distribute heat evenly and carries fat-soluble flavors through the sauce.
- 1 tablespoon fresh parsley, chopped Fold into cheese filling or sprinkle into the sauce to add fresh, bright herbaceousness; chopped parsley lightens the overall richness and adds visual color contrast.
- 1 1/2 cups ricotta cheese Blend into the cheese mixture to provide creamy, mild base and moisture; ricotta creates a tender, slightly tangy layer that contrasts with melted cheeses and hearty sauce.
- 3 cups mozzarella cheese, divided Layer and melt to create gooey, stretchy topping and interior pockets of cheese; dividing it allows even distribution for both middle layers and a golden top.
- 2 cups shredded parmesan cheese, divided Sprinkle between layers and over the top to add sharp, salty umami and a slightly granular texture; dividing ensures robust flavor throughout and a flavorful crust when baked.
- 1 egg Whisk into the ricotta mixture to bind and enrich the filling with a silky texture; the egg helps the cheese set during baking so slices hold together when served.
- 1 tablespoon fresh parsley, chopped Fold into the cheese mixture or garnish to introduce fresh herb aroma and brighten flavors; repeating parsley reinforces its freshness throughout the dish and enhances presentation.
Instructions
- In an extra-large skillet (or saucepot), on medium-high heat, add your olive oil, chopped onions, minced garlic, Italian seasoning blend, salt, and black pepper. Saute for 2-3 minutes or until the onions start to get tender. Push your cooked onions and spices to the side of your skillet and add your ground beef.: The pan should smell floral from the Italian seasoning blend and savory from the softened onion and garlic , with little sizzling sounds as the aromatics hit the hot olive oil . This is where the flavor base forms, so make sure the onion turns translucent but not browned, which keeps bitterness out of the sauce. You will notice steam rising and a gentle softening under your spoon when the onion is ready. A common mistake is rushing the aromatics at high heat causing them to char, so maintain medium high and stir frequently. The reason for pushing aromatics aside is to give the upcoming ground beef space to sear, producing caramelized fond that will deepen the sauce's flavor profile, and taking this time improves overall balance.
- Cook your beef for another 5-7 minutes or until it is cooked thoroughly and no pink remains in the meat. Stir your cooked onions into your cooked beef. Drain any excess fat if desired before moving on to the next step.: You will hear a steady sizzle as the ground beef browns and see little browned bits forming on the pan, that toasty aroma is key for a robust sauce. Stir the caramelized edges into the softened onion so those flavors blend, and if excess fat pools you can carefully drain it to prevent a greasy finish. The texture should be crumbly and browned, not clumped or steamy, which signals undercooking. Watch out for underbrowned beef which can leave the sauce flat, and avoid overcooking which can make the meat dry, because maintaining juicy, browned meat enhances mouthfeel and depth.
- Add the tomato paste to the beef mixture and stir it around until it is completely incorporated.: The concentrated tomato paste will darken and thicken the pan juices and smell intensely of cooked tomato once it starts to brown slightly. Stir it into the meat so it coats the browned bits and begin to caramelize, this step reduces any raw, acidic edge and builds a rounded base. You will notice the mixture take on a denser texture and a deeper color, and a brief toasting of the paste mellows its sharpness. A typical error is adding paste and immediately adding liquid, preventing it from getting that toasty note, so allow it a short moment to bloom for better flavor integration.
- Add the crushed tomatoes, stir and turn your heat to low to simmer for 20-30 minutes while you prepare the rest of your ingredients. Note: Taste your sauce to see if you need to add any more salt and pepper. This is a personal preference as some brands of canned tomatoes can be saltier than others.: As the sauce simmers gently you will see slow bubbles that release a sweet tomato aroma, and the texture will thicken into a cohesive sauce. Low simmering lets flavors meld and reduces moisture so your layers do not become watery, and a 20 to 30 minute simmer concentrates the sauce while still keeping fresh tomato brightness. Taste and adjust seasoning because canned crushed tomatoes vary; add a little salt if it tastes flat, but do so in small increments. Avoid boiling vigorously which can break down texture and dry the sauce too much, because gentle simmering preserves balance between acidity and sweetness.
- Once your sauce has simmered, turn off the heat and add the 1 tablespoon of fresh chopped parsley and stir. Set aside until ready to assemble your lasagna.: Adding fresh parsley off heat preserves its green, herbaceous lift and keeps the sauce from tasting one dimensional. You will notice a bright, herbal scent when stirred in, which lightens the dense tomato notes. Letting the sauce rest briefly allows flavors to settle and prevents it from being too hot when layered, helping the final structure set more evenly. A common slip is adding delicate herbs too early, which causes flavor loss, so save them for the end to maintain freshness.
- While your sauce is simmering, boil your lasagna noodles for only 5 minutes. You want them to just be partially cooked. Drain the pasta water from the pot and leave your noodles in the warm pot while you are assembling the lasagna.: Parboiling the lasagna noodles gives them enough pliability to layer without becoming mush after the oven bake, and you will see them soften yet retain a faint firmness in the center. Drain and keep them warm to prevent sticking, and separate them gently so they do not clump. An overcooked noodle will fall apart during assembly, so time this step carefully. The slight chew after the oven is desirable, because finishing in the oven yields ideal texture.
- In a medium-sized mixing bowl add your ricotta cheese, 2 cups mozzarella cheese, 1 1/2 cups shredded parmesan cheese, egg, and fresh chopped parsley. Stir to combine.: Mixing the ricotta cheese with mozzarella cheese , parmesan cheese , egg , and parsley creates a cohesive, creamy filling that will hold together when sliced. You should see a uniformly creamy mixture with flecks of herb, and it should feel slightly thick to the touch, not watery. The egg acts as a binder so the layers set into neat slices without collapsing. Avoid over stirring which can make the mixture gluey, and if the mixture seems loose a short chill will firm it for easier spreading.
- Preheat oven to 350 F. Lightly spray, with cooking spray, a deep dish 9×13 casserole pan (also known as a lasagna pan). If you do not use a deep dish then your lasagna may bubble up and overflow a standard 9×13 pan while cooking in the oven.: Preheating to 350 F ensures even baking, and using a deep dish pan gives room for bubbling without spillover, which keeps the oven clean. Lightly spraying with cooking spray makes removing slices simpler and prevents sticking. You will notice the oven reaches temperature with a steady heat that encourages gentle even browning. A common error is using a shallow pan which can cause overflow, so choose a deep dish to accommodate expansion during baking.
- Layering your lasagna: start by adding 1 1/2 -2 cups of sauce into the bottom of the pan and spreading it evenly.: The first layer of sauce acts as a moisture barrier, preventing the bottom noodles from becoming gluey, and it offers a flavorful foundation so the first bites are saucy. Spread the sauce into an even thin coat that will support the noodle layer and allow for consistent heat transfer during baking. If you leave bare spots the noodles can dry or stick, so be deliberate when spreading. The right amount of sauce ensures every slice has moisture without becoming soupy, which is crucial for a well balanced lasagna.
- Next add a layer of 5-6 noodles (they should be slightly overlapping and you can trim them to fit your pan).: Arrange the parboiled lasagna noodles so they cover the sauce evenly, slightly overlapping to seal gaps, and trim as needed for a neat edge. The slight overlap helps structural integrity and keeps the cheese filling from oozing out the sides. You should see a solid carpet of pasta that will support the cheese layer, and if any noodles look too dry moisten the base slightly with sauce. Avoid piling too many noodles, which can make the lasagna dense rather than balanced.
- Then you will layer 1/2 of your cheese filling evenly over the noodle layer.: Spoon the creamy ricotta cheese mixture across the noodles and smooth it into an even layer so each forkful gets a balance of cheese and sauce. The filling should be spread to the edges but not so thick that it overwhelms the sauce. You will notice a pleasing creamy sheen and slight resistance when spreading, indicating a good consistency. A common pitfall is clumping the filling which causes uneven pockets, so take time to distribute it evenly for consistent texture in every slice.
- Once your cheese layer is spread out, very gently spoon over 2 cups of sauce. Do not mix the sauce into the cheese layer, just gently smooth it over.: The gentle spooning preserves the distinct layers so the cheese remains creamy and not dissolved into the sauce, which gives visual appeal and textural contrast. You will hear a soft, liquid sound as the sauce settles, and the top should show a red blanket over the white cheese, promising balanced bites. Avoid aggressive stirring that will blend the layers; instead gently smooth, because maintaining separate layers is key to classic lasagna structure.
- Repeat with another layer of noodles, the other half of the cheese mixture, and another 2 cups of sauce. You will top that with the remaining noodles, then the remaining sauce. You will top your lasagna with the remaining 1 cup mozzarella and 1/2 cup shredded parmesan cheese.: As you repeat layers you will see the lasagna grow taller and feel weightier, which is a good sign of a generous assembly. The final top layer of mozzarella cheese and parmesan cheese will melt and brown, giving that craveable crust. Aim for even distribution so the center sets uniformly in the oven. Avoid overfilling to prevent spillage and ensure the final cheese layer can brown without burning, because that golden finish is part of the appeal.
- Cover your lasagna dish with aluminum foil (you can lightly spray your aluminum foil with some cooking spray, on the side that will be facing the cheese to keep the cheese from sticking when baking) and bake it for 30 minutes, then remove the foil and continue to bake for another 30 minutes or until the cheese is lightly golden and bubbly.: With the foil on the lasagna will steam and the interior will cook through without the top overbrowning, you will hear gentle bubbling as the sauce heats. Removing foil halfway allows the top to brown and develop texture, and the cheese will start to sigh and bubble into a golden surface. Watch for a lightly golden color rather than deep brown to avoid dryness. A typical mistake is leaving the foil on too long, which prevents the top from achieving that desirable golden finish, so time this carefully.
- Once your lasagna has cooked, allow it to cool on the counter for a minimum of 30 minutes, up to 45 minutes, before slicing and serving. It will still be nice and warm but you will get nice pretty slices (and not a lasagna mess all over your plate) by allowing it to rest and set up.: As the lasagna rests the layers settle and firm, and the sauce thickens so slices hold their shape, you will notice less steam and a slight tightening at the edges. The aroma will remain inviting while the texture becomes sliceable, and waiting prevents a runny, messy plate. A common impatience is cutting too soon, which leads to collapsed slices, so allow proper rest time for the best presentation and texture.
Notes
- Prep in stages Divide work into sauce time, noodle boiling, and filling mixing to avoid last minute rushes and keep ingredients at ideal temperatures.
- Use a deep dish pan A deep 9×13 reduces the risk of overflow and helps the lasagna layers set neatly during baking.
- Drain excess meat fat If the browned ground beef releases a lot of fat, drain it to keep the sauce from turning greasy, improving mouthfeel.
- Keep noodles warm and separate After parboiling, nest them in the pot to stay pliable and prevent sticking during assembly.
- Watch the top during the second bake When you remove foil, watch for a golden bubbly top and remove before it deep browns to avoid dryness.
- Adjust salt late Taste the simmered sauce before final seasoning because canned crushed tomatoes vary in sodium levels and you can avoid over salting.