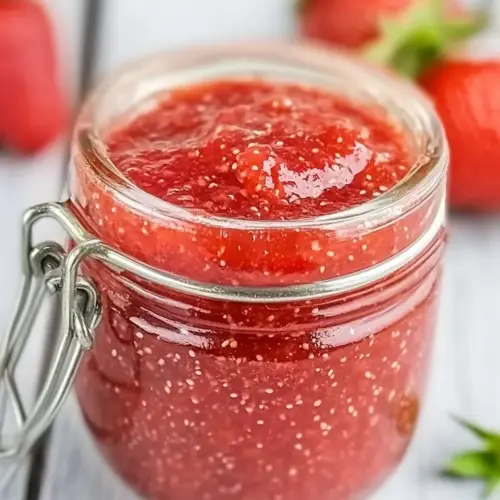
Keto Jam
Keto Jam is a bright, fruity spread made with strawberries, lemon juice, and chia seeds for a naturally thick, low carb topping. This quick and easy recipe yields a creamy yet slightly textured jam perfect for an easy weeknight breakfast or snack, and it keeps well in the fridge for convenient use. Make it for flavor without refined sugar.
Equipment
- Small Saucepan
- Wooden Spoon
- Glass jar
Ingredients
- 2 cups strawberries fresh or frozen * See notes Provide natural sweetness and body while contributing bright, fruity flavor; can be used fresh or frozen and will break down when cooked to form the jam base, releasing juices and color.
- 1 tablespoon lemon juice Add brightness and acidity to balance sweetness and enhance fruit flavor; helps preserve color and acidity for a well-rounded jam.
- 1 1/2 tablespoon chia seeds Thicken and gel the jam naturally by absorbing liquid and swelling; adds a subtle nutty texture along with fiber and a boost of omega-3s.
- 1 -2 tablespoon keto maple syrup optional Sweeten the jam without raising net carbs significantly; use sparingly to taste and dissolve into the fruit mixture for added maple-like flavor if desired.
Instructions
- In a small saucepan, add your fruit and place it over medium heat. Bring it to a simmer, and gently mix through it, for the berries to break down.: The moment the fruit hits the warm pan you'll notice a faint sizzling and a brightening of the color, the sugars starting to loosen from the strawberries . This gentle heat encourages the fruit to break down without burning. The sound will shift to a soft simmer within a few minutes, and you should see the pieces soften and release juice. Why this matters, the moderate heat helps preserve fresh fruit flavor instead of caramelizing everything, which keeps the jam tasting bright. A common mistake here is using too high heat, which can cause scorching and a bitter note.
- Add the lemon juice and chia seeds and mix well, until combined. Allow the jam to simmer for a further 5 minutes. Taste the jam and if it isn't sweet enough, add the maple syrup.: As the mixture comes to a simmer, you'll hear small, steady pops and see steam rising; the strawberries will collapse and the mixture will thicken visually. Stirring gently helps break the berries into a cohesive mass and prevents sticking at the edges. This tactile process also lets you judge how long to cook for your preferred chunkiness. Avoid overly vigorous stirring, which can make the texture mushy rather than jammy.
- Remove the jam from the heat and let it cool completely. Once it has cooled, transfer to a glass jar or container and refrigerate it.: When you add the lemon juice , the aroma sharpens and the color becomes more vivid. Sprinkling in the chia seeds and stirring distributes them evenly so they can swell uniformly. The chia will start to absorb liquid almost immediately, shifting the mouthfeel from soupy to spreadable. The why is important: chia seeds thicken without long boiling, preserving fruit flavor. A troubleshooting tip, if you see clumping, stir more thoroughly and let it sit a minute to hydrate.
- Allow the jam to simmer for a further 5 minutes: During this short simmer the mixture concentrates and the sound of bubbling slows down as viscosity increases. You'll notice the jam coats the back of a spoon, and aromatic sweetness intensifies. This timeframe is enough for chia to begin gelling and for flavors to marry without over reducing. Why this step matters, it balances texture and flavor quickly. A frequent error is simmering too long which can make the jam overly thick or scorch the sugars.
- Taste the jam and if it isn't sweet enough, add the maple syrup: Tasting hot food can be tricky, so use a small spoon and let a bit cool on the spoon before judging. If you add the keto maple syrup , do so in small increments so you can control the final sweetness. The syrup will slightly change the mouthfeel and add a nuanced sweetness that blends with the fruit. This adjustment is about balance, not overpowering. Avoid adding too much at once, because once sweetened it is hard to reverse.
- Remove the jam from the heat and let it cool completely: As the jam cools, the texture firms thanks to the gelatinous nature of hydrated chia seeds . The aroma will mellow and the color may deepen further in the jar. Cooling also helps you assess final consistency accurately, because hot jam appears thinner. The reason this matters, setting at room temperature prevents condensation in the jar and reduces the chance of watery separation. A common mistake is sealing while still warm, which traps steam and can create excess moisture.
- Once it has cooled, transfer to a glass jar or container and refrigerate it: Transferring into a clean glass jar gives the jam a stable home and allows you to see the beautiful color. In the fridge the jam will thicken a little more and develop a cohesive texture. Storing cold slows any microbial activity, which helps it keep. Be careful not to contaminate the jar with fingers or used utensils, which can shorten shelf life.
Notes
- Pick good fruit, ripe strawberries give the purest flavor and the best natural sweetness, which reduces the need for added sweeteners.
- Control thickening, if the jam seems too runny after cooling, let it rest longer in the fridge; chia seeds continue to absorb liquid and firm up over several hours.
- Small batch advantage, making 1 to 2 cups at a time lets you experiment with sweetness and texture without wasting ingredients.
- Clean jars only, always use sterilized or very clean glass containers to extend refrigerator life and maintain quality.
- Label with date, note when you made the jam so you can enjoy it at peak freshness within the recommended weeks in the fridge.