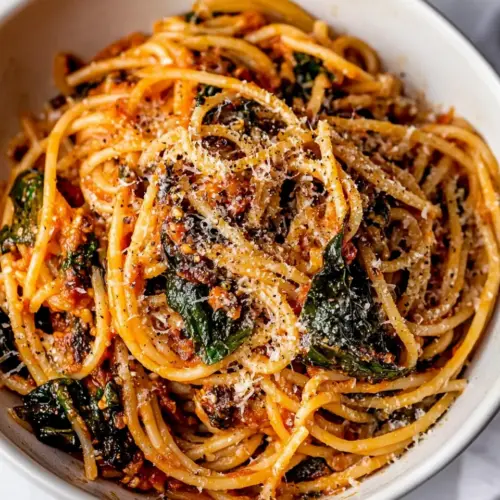
Instant Pot Spaghetti
Instant Pot Spaghetti is an easy weeknight dinner that combines savory browned ground beef, hearty whole wheat spaghetti, and rich marinara into a creamy, comforting bowl. This one pot method yields tender pasta and concentrated sauce with minimal cleanup, perfect for busy evenings when you want a satisfying family meal that feels homemade. Make it for quick comfort and reliable flavor.
Equipment
- Instant Pot
- Wooden Spoon
Ingredients
- 1 tablespoon extra-virgin olive oil Sauté to add richness and a fruity, peppery base flavor while helping brown meat and soften aromatics; use a tablespoon to coat the pot and prevent sticking before cooking other ingredients.
- 1 pound lean ground beef, ground bison, or meatless crumbles Brown to provide savory depth, protein, and a meaty texture to the sauce; cook until no longer pink and broken into small crumbles so flavors meld with the tomato sauce.
- 1 teaspoon kosher salt Season to enhance overall flavor and balance sweetness and acidity in the sauce; add with other seasonings early so salt penetrates the meat and vegetables.
- 1 tablespoon dried parsley Sprinkle to impart a mild herbal note and subtle color; add dried parsley during cooking to release flavor and complement tomato and garlic elements.
- 1 teaspoon onion powder Season to contribute savory, slightly sweet onion flavor without needing fresh onions; stir in so the powder dissolves and distributes evenly through the sauce.
- 1/4 teaspoon red pepper flakes Add for a touch of heat and brightness that lifts the sauce; include sparingly or to taste to provide background warmth without overpowering other flavors.
- 3 cloves garlic, minced, about 1 tablespoon Mince to introduce pungent, aromatic sharpness that becomes sweet when cooked; add early when sautéing to bloom its oils and integrate with the meat and sauce.
- 4 cups chopped kale, chard, or other hearty greens (optional) Wilt to contribute earthiness, vitamins, and a pleasant texture contrast; chop hearty greens and add them so they soften into the sauce while boosting nutrition.
- 2 cups water, divided Measure to control cooking liquid and texture; divide water between initial sauté/deglaze and pressure cooking to ensure proper pasta hydration and prevent burning.
- 1 (24-ounce) jar marinara or other tomato-based pasta sauce Pour to supply concentrated tomato flavor, body, and seasoning as the base of the sauce; choose a preferred marinara to determine overall sweetness, herbs, and consistency.
- 8 ounces dry whole wheat spaghetti Break to fit the pot and cook evenly as the starch component; add dry spaghetti so it softens in the sauce and absorbs flavors during pressure cooking.
- 1/3 cup grated Parmesan cheese plus additional for serving Sprinkle to add salty, nutty umami and finish the sauce with creamy texture; stir in grated Parmesan at the end for richness and balanced acidity.
- Chopped fresh basil or parsley for serving Garnish to provide fresh herbal aroma and bright contrast; chop basil or parsley and sprinkle over plated spaghetti to enhance color and freshness.
Instructions
- Turn the Instant Pot to SAUTE. Add the oil. Once the oil is hot, add the ground beef. Brown the meat, breaking it up into pieces with a wooden spoon. Add the salt, parsley, onion powder, and red pepper flakes. Continue to cook and break apart, until the meat is fully cooked through, about 5 minutes.: As the pot heats you will hear a faint hum and then a sharper sizzle when you add the oil, signaling the surface is ready. The hot base creates contact for browning. You want the oil to shimmer but not smoke, because smoking oil will impart a bitter flavor. A common mistake is adding meat too early, which steams it instead of browning; wait until the oil is hot enough to make the meat sizzle.
- Stir in the garlic and cook 30 seconds. Pour in 3/4 cup of the water and scrape along the bottom of the pot to remove any stuck-on bits.: When the oil hits the hot surface it should spread and glisten, releasing a light fragrance. This thin layer promotes even browning on the ground beef . If the oil pools, tilt the pot to distribute it evenly, and do not overcrowd the surface with meat or it will release moisture and fail to brown.
- Add the kale (if using) and sauce and stir to evenly combine.: You'll hear an immediate sizzle as juices hit the hot base, and the meat will begin to color at the edges. As searing occurs you will notice a richer, savory aroma filling the kitchen. Avoid moving the meat constantly; let it develop a browned crust, then break it up. If the meat releases too much liquid, pause and let some evaporate so you can achieve those browned bits.
- Break the spaghetti noodles in half, and then place them in two layers directly over the beef. DO NOT STIR.: As you work, the texture will shift from raw pink to a deeper brown, with small caramelized fragments clinging to the pot bottom. Those fragments are flavor gold, so you do not want to scrape them off carelessly; instead, collect them when deglazing. A typical error here is underbrowning, which leaves the final sauce flatter in taste.
- Fill the now-empty pasta jar with the remaining 1 1/4 cups water. Place the lid back on the jar, shake gently, then pour the rinsed liquid evenly over the pasta (again, DO NOT STIR).: As these seasonings hit the warm meat you will immediately sense an intensified aroma, the herbs and spices binding with meat juices. Sprinkle them evenly so every bite is balanced. Over-salting at this point can make the dish too salty after adding Parmesan cheese , so measure carefully.
- Cover and seal the Instant Pot. Cook on HIGH (manual) for 8 minutes.: Visual cues include uniform browning and no visible pink, and the meat should crumble easily when stirred. Cook just until done to avoid drying it out, because the pressure cooking step will concentrate flavors further. A mistake to avoid is overcooking then finding the texture too dry in the final dish.
- As soon as the cook time has elapsed, immediately vent to release the remaining pressure. Carefully open the lid and stir in the Parmesan. At this point, the pasta will look a little soupy, but it will thicken up as it sits.: The moment minced garlic hits the hot pot you will smell a bright aromatic spike, but it browns rapidly, so keep it brief. This short burst softens the raw edge and infuses the meat. Burnt garlic tastes acrid, so remove from direct high heat promptly after the quick cook.
- Turn off the Instant Pot. Let sit uncovered a few additional minutes to cool and to allow the extra liquid to absorb. Stir once more. Scoop into serving bowls and sprinkle generously with Parmesan cheese and a sprinkle of fresh parsley.: As the water hits the hot surface you may hear a hiss and see steam rise, and the browned fragments will loosen, dissolving into the liquid and enriching the base. This deglazing step ensures those flavors make it into the sauce and prevents a burn warning later. Skipping it can trap burnt bits and cause off flavors or a stuck-on bottom.
- Add the kale (if using) and sauce and stir to evenly combine: The greens will begin to wilt from the residual heat and the sauce will turn a deeper, unified color. Stirring briefly incorporates everything so the spaghetti can absorb consistent flavor during pressure cooking. Overmixing now is unnecessary and can make the greens limp, but an even distribution matters for balanced bites.
- Break the spaghetti noodles in half, and then place them in two layers directly over the beef: As you nest the broken strands into the pot they will form a structured bed, not a tangled pile, allowing liquid to reach them evenly. Laying them in layers helps the pasta cook uniformly. Avoid stirring, because agitation can cause the strands to clump and cook unevenly.
- DO NOT STIR: After placing the spaghetti keep the surface undisturbed so the liquid can penetrate gradually. The silence here is purposeful, you want the pasta to stay in those layers so it hydrates evenly. Stirring would encourage sticking and an inconsistent texture, which is a common pitfall.
- Fill the now-empty pasta jar with the remaining 1 1/4 cups water: When you pour water into the jar and shake it, you dislodge any remaining sauce, creating a measured rinse that preserves flavor. The visual of tomato swirls diluting into clear water is satisfying, and the final liquid consistency matters for even pasta cooking. Misjudging this volume will affect how soupy or dry the finished dish is.
- Place the lid back on the jar, shake gently, then pour the rinsed liquid evenly over the pasta: As the water streams over the layered strands you will see the sauce settle into gaps, and the surface tension will allow it to spread without immediate sinking. Pouring evenly ensures all pasta gets hydrated. Pour too eagerly in one spot and you risk uneven cooking.
- Cover and seal the Instant Pot: You will hear the valve click into place and the indicator move, guaranteeing a sealed environment for pressure to build. The sealed pot traps steam that forces liquid into the pasta, speeding up cooking while concentrating flavors. Forgetting to seal properly leads to a failed pressure cycle and undercooked pasta.
- Cook on HIGH (manual) for 8 minutes: During the pressure cycle the pot will be quiet, and the magic happens in that steady, high pressure environment which cooks the spaghetti through gently. The chosen time balances tenderness with integrity so the pasta is not mushy. Too short a cook yields firm, underdone strands; too long produces overly soft results.
- As soon as the cook time has elapsed, immediately vent to release the remaining pressure: The swift release stops cooking abruptly, preserving the intended texture. You will hear a focused rush of steam, and the pot will depressurize quickly. Delaying the release can lead to overcooked pasta as residual heat continues to soften the noodles.
- Carefully open the lid and stir in the Parmesan: When you lift the lid you will be greeted by a steamy aroma and a slightly brothy surface; stirring in the Parmesan cheese introduces a salty, creamy note and helps the sauce bind. The texture will change from soupy to glossy as the cheese melts. If the sauce seems too thin, let it rest uncovered to thicken rather than adding more cheese right away.
- At this point, the pasta will look a little soupy, but it will thicken up as it sits: The visual cue is a loose surface that gradually tightens; as steam escapes the sauce concentration increases. Patience here pays off because the final mouthfeel becomes cohesive rather than watery. Rushing to serve can mean a thinner consistency than intended.
- Turn off the Instant Pot: Powering down stops any residual heating from the base and begins the cool down phase. The pot cooling slightly helps the sauce set. Leaving it on can continue gentle cooking and alter texture.
- Let sit uncovered a few additional minutes to cool and to allow the extra liquid to absorb: Resting lets flavors meld and the pasta reach the ideal tenderness, and you will notice the sauce cling more to the strands as it reduces. This pause avoids serving a dish that is too hot to taste or too loose.
- Stir once more: The final stir integrates everything and brings a glossy finish to the plate, distributing melted Parmesan cheese and wilted greens. A final taste check allows seasoning adjustments. Overstirring can break up the pasta strands, so be gentle.
- Scoop into serving bowls and sprinkle generously with Parmesan cheese and a sprinkle of fresh parsley: The last flourish of grated Parmesan cheese and bright parsley offers contrast in texture and flavor, and the aroma becomes more vibrant at the table. Serve warm, and resist adding too many extra toppings that could mask the balanced flavors you worked to build.
Notes
- Adjust protein choice. If you prefer a plant based option, use meatless crumbles as listed; cook them the same way so they pick up those browned flavors. Note that texture will differ slightly, and you might want to shorten the initial browning if the crumbles are pre cooked.
- Control the heat level. Change the amount of red pepper flakes to suit your family. I often start with the listed 1/4 teaspoon and add more at the table for spice lovers, because it is easy to increase heat later but hard to remove it.
- Swap greens thoughtfully. Kale and chard hold up well to the method, while delicate greens will overcook. Chop the greens uniformly so they wilt evenly and do not create pockets of undercooked leaves.
- Choose your sauce carefully. The jarred marinara sets the tone, so pick one with flavor you enjoy. If your sauce is very thick, thin slightly with reserved pasta water to encourage even cooking; if too thin, a brief resting period will help concentration.
- Measure liquid accurately. Using the jar rinse as directed standardizes volume, which is crucial for pressure cooking pasta. Too little liquid can cause scorching or undercooked pasta, while too much will make the dish soupy.
- Finish with fresh herbs. Adding basil or parsley at service brightens the bowl. Fresh herbs lose potency with heat, so reserve them for plating to maintain their aroma and color.