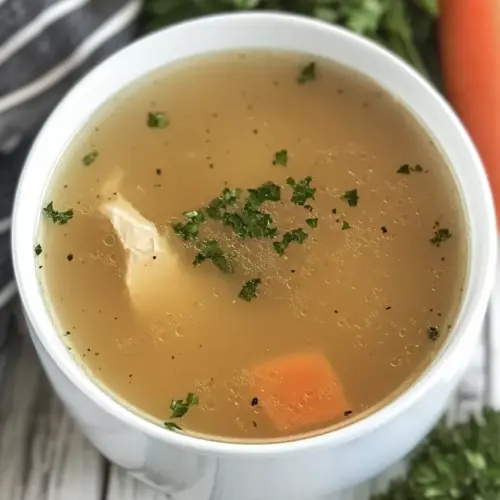
Instant Pot Chicken Stock
Instant Pot Chicken Stock is a rich, savory, easy to make base that brings deep, gelatinous flavor to soups and sauces. This method delivers intense body and clear aromatics in a fraction of traditional time, making it ideal for easy weeknight meals and batch cooking. Keep jars on hand for faster dinners and a tastier pantry.
Equipment
- Instant Pot
- Fine-mesh strainer
- Mixing Bowl
Ingredients
- 1 -2 tablespoons vegetable oil Heat or coat the pot to prevent sticking and help brown aromatics; use a neutral oil with a high smoke point. Helps develop deeper flavor through initial sautéing of vegetables or chicken bits before pressure cooking.
- A whole chicken (giblets, etc. removed) or 3 pounds of bone in white and dark chicken pieces Provide the primary source of bones, meat, and collagen for a rich, gelatinous stock; choose a whole bird for maximum flavor or a mix of white and dark pieces for balance. Add carcass or pieces into the pot to extract marrow and connective tissues during long simmering under pressure.
- 1 large onion, chopped Add savory sweetness and aromatic depth; chop coarsely so pieces release flavor quickly under pressure. Include with other vegetables during sautéing and simmering to build the stock’s foundational taste.
- 2 carrots, peeled and cut into thirds Contribute subtle sweetness and body; peeling and cutting into thirds exposes more surface area to extract flavor. Add with other vegetables to simmer and enrich the broth with natural sugars and nutrients.
- 2 stalks of celery, cut into thirds Provide mild herbal and vegetal notes while adding body; cutting into thirds increases surface area for flavor extraction. Add alongside other mirepoix vegetables to create a balanced base for the stock.
- 2 -3 garlic cloves, peeled and smashed Impart gentle pungency and aromatic complexity; smash cloves to release oils and flavor more effectively during cooking. Toss into the pot whole or slightly crushed so garlic infuses the stock without becoming overpowering.
- 5 sprigs fresh parsley Introduce fresh, bright herbal notes and a clean finish to the stock; use whole sprigs so leaves can be removed easily after cooking. Add near the beginning to allow parsley to gently infuse the broth without turning bitter.
- 3 sprigs fresh thyme Supply woody, aromatic undertones and a slightly floral, savory character; keep sprigs whole to remove easily later. Include with other herbs early to let thyme slowly impart its concentrated flavor into the stock.
- 1/2 teaspoon whole peppercorns Add subtle heat and a rounded, peppery complexity; whole peppercorns release flavor gradually and are easy to strain out. Include during simmering to season the stock evenly without clouding it with ground particles.
- 1 tablespoon kosher salt Season the stock and help draw out flavors from the ingredients; kosher salt dissolves easily and can be adjusted after cooking. Add at the start to begin building seasoning, tasting and adjusting once the stock is reduced or finished.
- 12 cups water Provide the cooking medium to extract flavors, gelatin, and nutrients from bones and vegetables; use cold water to maximize extraction. Fill to the specified amount without overfilling the Instant Pot past manufacturer maximum fill lines.
Instructions
- Set your IP to saute and add vegetable oil. In batches, brown all the chicken pieces and remove to a bowl.: The moment the pot goes into sauté mode you should hear a steady sizzle as the vegetable oil warms, and the smell of browning will begin to build. Browning in batches prevents crowding, so pieces sear instead of steaming, creating a rich caramelized layer on the chicken skin that deepens the final stock flavor. As you pull browned pieces to a bowl, notice the fond stuck to the bottom, those browned bits are flavor gold. A common mistake is using too high heat which can scorch the fond and create bitterness; moderate heat is key. If chicken sticks excessively, deglaze with a splash of water and scrape gently to lift flavorful bits before proceeding.
- When all the chicken is browned, return the chicken to the Instant Pot along with all the other ingredients.: Once the chicken is back in the pot with the chopped onion , carrots , celery , smashed garlic , fresh herbs, peppercorns , salt , and the water , you will see the colors meld as steam starts to rise. The mixture will suddenly smell more layered, a mix of roasted meat and bright vegetables. Adding everything together ensures even extraction. Avoid overfilling beyond the Instant Pot's max line, or the cooker may not seal properly and pressure may not build.
- Select high pressure and set the timer to 60 minutes. When the timer goes off, turn off the IP and either let vent naturally or use the quick release (there will be a lot of steam!).: As the cooker comes to pressure you will hear a low hum and occasional clicks, and the aroma will become richer and rounder. High pressure accelerates collagen and gelatin extraction from bones, producing a silky mouthfeel in far less time than stovetop simmering. Resist the urge to open the lid during pressure build up which can interrupt the process and lengthen cooking time. If the IP struggles to reach pressure, check the sealing ring is properly seated and that the vent is closed.
- When the pressure is released, remove the lid. Remove the chicken pieces to a clean bowl.: Natural release yields a gentler finish and can keep the stock clearer, while quick release ejects steam quickly and speeds the process. Either way you will notice a burst of savory steam and a deepened, concentrated aroma when the lid comes off. Be cautious of the hot steam, and use an oven mitt or long utensil to flip the valve for quick release. A common error is placing your face too close to the vent during release, which risks burns from the intense steam.
- Let the stock cool a bit before pouring through a fine-mesh strainer to remove the vegetables, herbs, and impurities.: After removing the lid you will be greeted by a robust, layered scent. Transferring the chicken to a bowl allows you to cool and shred the meat separately, while the bones remain in the stock to provide body. Touch the meat once it is cool enough, it should pull apart easily; if it is still firm the meat may need a bit more rest. If bones are left too long they can break down and create small fragments in the stock, so strain carefully.
- Cover the bowl and let cool in the refrigerator. When cool, scrape off any accumulated fat on the surface and divide it into storage containers.: As the stock cools slightly you will see fat rise to the surface and solids sink, making straining cleaner and easier. Pushing the liquid through a fine mesh removes small particulates and results in a clear, polished stock. Expect a warm, golden liquid with a glossy surface and a rounded aroma. A common pitfall is pressing solids too hard through the strainer, which can cloud the stock; let gravity do most of the work.
- When the chicken is cool enough to handle, shred the meat and place it in storage containers to use in future recipes.: Chilling will firm up the fat so it lifts away cleanly, leaving a clear, rich stock beneath. Removing excess fat yields a lighter mouthfeel and extends shelf life. Spoon off the congealed fat for other uses or discard it. If you skip chilling, the fat remains dispersed and makes the stock greasier, which may be undesirable depending on your intended use.
- When the chicken is cool enough to handle, shred the meat and place it in storage containers to use in future recipes.: The cooked chicken will be tender and fragrant, perfect for repurposing in soups, salads, or sandwiches. Shredding while slightly warm is easier and helps the meat remain moist. Store the meat separately from the stock to allow you to use each component as needed. One mistake is storing everything together without cooling properly, which can lead to faster spoilage; always cool safely before refrigerating.
Notes
- Brown in batches: Browning the chicken in small batches avoids steaming and creates fond, which deepens the stock flavor significantly. Take care to monitor heat so nothing burns.
- Use mixed bones and meat: Combining white and dark chicken parts balances gelatin and flavor, producing a stock that is both rich and savory without being greasy.
- Cool then skim: Cooling the stock before skimming makes fat removal easy and yields a clearer finished product that stores better in the fridge or freezer.
- Portion before freezing: Freeze stock in usable portions, like 1 cup or 2 cup jars, to avoid waste and speed thawing when you need it for recipes.
- Adjust salt later: Keep salt modest in the stock itself so you can season the final dish precisely without risking over saltiness.