Instant Pot Chicken Noodle Soup
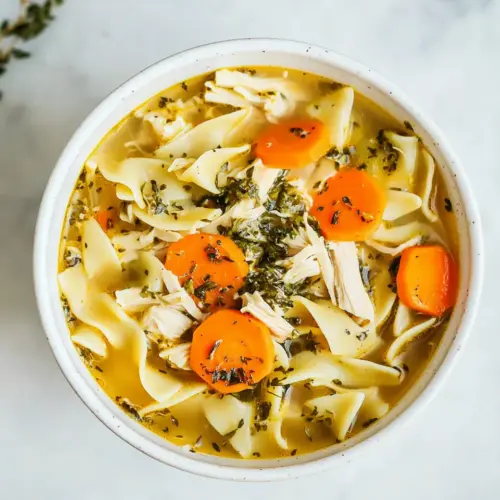
Instant Pot Chicken Noodle Soup is a comforting, savory bowl of tender chicken, soft noodles, and aromatic vegetables in a rich chicken stock. This easy weeknight dinner is creamy in texture from the noodles and full of homey flavor, perfect for chilly evenings or quick family meals. Make it for a fast, nourishing dinner that warms the soul.
Equipment
- Instant Pot
- Wooden Spoon
- Tongs
Ingredients
- 1 tablespoon olive oil Sauté to release flavor and provide the cooking fat needed for browning vegetables and sealing aromatics; olive oil helps prevent sticking and adds a touch of fruity richness to the soup. Use it at medium heat before adding vegetables so they soften without burning and create a flavorful base for the broth.
- 2 large carrots, peeled and sliced Peel and slice to contribute natural sweetness, body, and tender texture; carrots bring color and subtle earthiness that balance savory elements. Simmer until soft so they release sugars into the broth, enhancing overall depth and mouthfeel.
- 2 large celery sticks, sliced Slice to add crisp, aromatic vegetal notes and a gentle crunch that mellows with cooking; celery contributes savory, slightly bitter undertones that round out the broth. Cook with onions and carrots to form a classic mirepoix base that builds layered flavor in the soup.
- 1 small onion, diced Dice to provide foundational savory and sweet aromatics that dissolve into the broth; onion adds depth, complexity, and natural sweetness when softened. Sauté early to caramelize slightly and release flavor compounds that enrich the entire pot.
- 2 cloves garlic, minced Mince to deliver pungent, aromatic intensity that infuses the broth with savory complexity; garlic brightens and enhances other flavors when cooked briefly. Add towards the end of sautéing to avoid bitterness while maximizing fragrant oils.
- 1 pound boneless, skinless chicken breasts Cook whole to supply lean protein, tender texture, and body to the soup; chicken breasts shred easily and absorb broth flavors. Poach in the stock until cooked through, then shred or slice to distribute meaty bites throughout the bowl.
- 6 cups chicken stock Simmer as the flavorful liquid medium that cooks all ingredients and melds tastes; chicken stock provides savory depth and seasoning. Keep at a gentle boil or simmer to extract flavors from herbs and aromatics without over-reducing the liquid.
- 2 teaspoons dried Italian seasoning Sprinkle to introduce a balanced blend of Mediterranean herbs that season the broth; dried Italian seasoning offers oregano, basil, thyme, and rosemary notes. Add early so the dried herbs rehydrate and infuse the stock for consistent herbal aroma.
- 1 dried bay leaf Steep whole to impart subtle aromatic complexity and a bay-like herbal note; a bay leaf adds savory nuance and depth when simmered. Remove before serving to avoid an overpowering texture while retaining its infused flavor in the soup.
- 8 ounces egg noodles Cook until tender to provide satisfying carbs and comforting texture; egg noodles absorb broth and make the soup heartier. Add in the final cooking stage so noodles reach perfect doneness without becoming mushy.
Instructions
- Heat the Instant Pot using the Sauté function.: You will hear a subtle click as the pot wakes up and a faint hum as it begins to warm, signaling the metal inner pot is getting hot. This step is important because it prepares the surface for proper browning, which builds foundational flavor through the Maillard reaction. A common mistake is rushing this step or starting with a cold pot, which can lead to steaming rather than browning, and the vegetables will not develop that sweet, caramelized character. Keep the lid off so you can watch the sheen form on the base and smell the first toasty notes.
- Add the olive oil, carrots, celery, and onion. Cook, stirring occasionally, until the vegetables are tender and starting to brown, about 5 minutes.: As the vegetables sizzle, you will notice the pan filling with warm, sweet aromatics and the onion becoming translucent while the edges pick up golden color. This gives the broth a richer, more layered taste, because the browned bits dissolve into the liquid later. Avoid crowding the pot, which can trap moisture and prevent browning, and stir occasionally so nothing sticks or blackens. If the vegetables begin to burn, lower the heat or add a splash of stock to deglaze.
- Add the garlic and cook for an additional minute.: The garlic will release a fragrant, slightly pungent aroma almost immediately, brightening the whole mixture with a savory top note. This brief sauté is just long enough to bloom the garlic without turning it bitter, which happens quickly if overheated. A common error is leaving garlic in too long, resulting in a sharp, unpleasant taste. Watch closely and stir constantly during this short phase so the garlic softens and becomes glossy rather than browned.
- Next, add the chicken, chicken stock, water, Italian seasoning, and bay leaf.: When the cool chicken hits the hot pot it will hiss softly and the surface will tighten as it sears slightly, locking in juices. Pouring in the chicken stock will loosen any browned bits from the bottom, adding depth to the broth. The herbal perfume from the Italian seasoning and the subtle warmth of the bay leaf infuse the liquid as you seal the pot. A typical oversight is adding too much liquid or too little, so measure carefully; too much can dilute the flavor, too little can trigger a burn notice.
- Attach the lid and ensure the valve is in the sealing position.: You'll feel a reassuring click as the lid locks and the valve seating prevents steam from escaping. This step is crucial for building pressure uniformly, which is what concentrates flavors and cooks the chicken quickly. A frequent mistake is forgetting to set the valve to sealing, which leads to slow pressure buildup and undercooked meat. Double check the valve and the lid alignment before selecting the cooking program.
- Set the Instant Pot to Pressure Cook – Manual for 12 minutes.: As the display counts down to build pressure, the pot will emit a low rumble and subtle steam sounds from the regulator as it stabilizes. Pressure cooking at this time tenderizes the chicken while extracting savory juices into the stock. Overcooking can dry out the breasts, while undercooking leaves them tough, so this calibrated time is essential. If your cut of chicken is very thick, consider slightly longer time, but avoid overshooting by more than a couple of minutes.
- Once the instant pot has finished cooking, allow the pressure to release naturally for 10 minutes.: The pot will settle and the pressure will drop gradually, and during this quiet period the residual heat continues to finish the cooking gently. This resting phase helps the chicken stay moist and allows flavors to integrate more fully. A common misstep is quick releasing right away, which can shock proteins and make them stringy. Letting the pressure come down naturally preserves texture and yields a smoother broth.
- Release any additional pressure manually by switching the valve to the venting position.: When you hear the soft whoosh of steam escaping, the pressure is safely equalizing and you can remove the lid. The aroma will intensify as steam lifts, and you should see the surface of the broth shimmer with tiny beads of fat. Be careful of the hot steam and always use a long utensil to move the valve if needed to avoid burns. Rushing this step or leaning directly over the pot is a frequent safety oversight.
- Remove the chicken and bay leaf. Set the Instant Pot to the Sauté function again and add the egg noodles. Cook according to the package directions– or just until the noodles are soft.: Lifting out the chicken , you will feel its weight and see the juices cling to its surface; these juices are flavor gold and will return to the pot after shredding. The noodles will sink into the simmering broth and release a comforting, starchy cloud that makes the broth silkier. Overcooking the noodles will make them disintegrate and turn the soup gluey, so test early and often for the tender chew you prefer.
- While the noodles cook, shred the chicken. Once the chicken has been shredded, add it back to the Instant Pot and stir to combine. Season with salt and pepper to taste.: The act of shredding releases more juices and creates tender ribbons that soak up the broth. As you stir the returned chicken into the pot you will see the surface glisten and the soup take on a homier body. Taste and adjust with salt and pepper sparingly, keeping in mind the saltiness of your chicken stock . A common mistake is over seasoning early, which can leave the final bowl too salty after reduction.
- Enjoy warm. Store any leftovers in an airtight container in the fridge for up to three days.: Ladling the soup into bowls, you should notice a comforting steam and a layered aroma of herb and vegetable, promising the cozy mouthfeel ahead. Cooling and refrigeration will mellow the flavors further, and reheating gently preserves the texture of the noodles and chicken . Avoid leaving the soup at room temperature for extended periods, which risks spoilage, and store promptly once cooled to maintain freshness.
Notes
- Finish with fresh herbs, such as a sprinkle of chopped parsley or thyme right before serving to brighten the soup and add a fresh, green note that complements the savory broth.
- Salt carefully, tasting after the noodles are cooked because the broth concentrates slightly during final simmering, and you can always add more but you cannot remove excess salt.
- Store properly by cooling the soup quickly and refrigerating in airtight containers for up to three days, or freeze in portions for up to three months to preserve the best texture.
- Reheat gently on the stovetop over low heat to avoid overcooking the noodles and drying the chicken; add a splash of stock or water if the soup seems thick after chilling.
- Adjust noodle timing by adding them at the end and testing early to achieve your preferred bite, since egg noodles vary in cooking time between brands.
- Double the batch when feeding a group, then cool and refrigerate in individual portions for quick lunches or comforting dinners throughout the week.