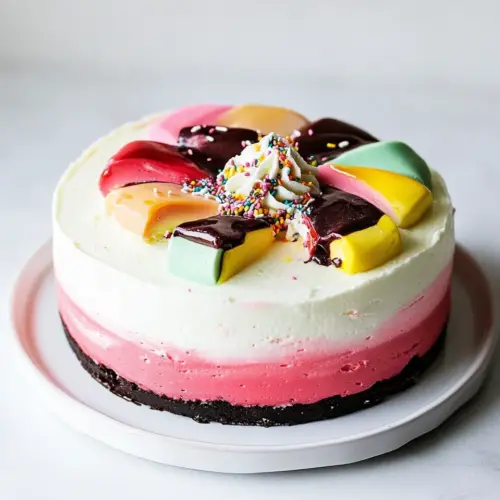
Ice Cream Cake
Ice Cream Cake is a creamy layered dessert that pairs a tender chocolate loaf with pistachio gelato, salted caramel ice cream, and bright raspberry sorbet. This easy make ahead treat is perfect for summer gatherings, offering contrasting textures and flavors in each slice. It is a showy, crowd pleasing dessert that you can assemble in stages for minimal stress on the day you serve it.
Equipment
- 9 x 5 loaf pan
- Spatula
- Mixing Bowl
- Knife
- Parchment Paper
Ingredients
- 1/2 recipe Vegan Chocolate Cake Provides a moist, chocolatey base layer that supports frozen fillings and adds structure to the cake. Can be baked ahead and cooled, then trimmed to size to create even layers. Offers deep cocoa flavor that contrasts with sweet and fruity ice cream components.
- 1 pint Pistachio Gelato Contributes a creamy, nutty pistachio layer bringing natural green color and subtle savory notes. Should be softened slightly for easy spreading between cake layers while maintaining frozen firmness during assembly. Balances richer flavors and adds textural interest with smooth, dense gelato.
- 1 pint Salted Caramel Ice Cream Adds a rich, sweet, and slightly salty caramel layer that imparts decadent flavor and creamy mouthfeel. Salted caramel provides contrast to the pistachio and fruity sorbet while enhancing overall sweetness complexity. Freeze briefly after spreading to keep distinct layers intact during final chilling.
- 1 pint Raspberry Sorbet Supplies a bright, tart fruit layer that cuts through richness and refreshes the palate between creamy components. Raspberry sorbet brings intense berry flavor and icy texture, creating a lively contrast to the denser gelato and ice cream. Use slightly softened for even layering but keep chilled to preserve sharp flavor.
- 6 ounces fresh raspberries Garnishes with fresh raspberries to provide bursts of natural acidity, color, and a juicy finish. Fresh fruit adds visual appeal and textural contrast to frozen layers, and can be arranged on top or between layers just before serving to prevent sogginess. Enhances the dessert with authentic berry aroma and flavor.
Instructions
- Preheat the oven to 350°F and grease a 9 x 5” loaf pan.: You will notice the warmth from the oven filling the kitchen as you set it, and the faint metallic scent that signals readiness. Properly greasing the pan prevents sticking, which is essential for clean removal later, and the 9 x 5" dimension gives you the right thickness of cake to support layers. One common mistake is skimping on grease, which can make the cake cling and tear when you remove it. If your pans run hot, watch the cake closely near the end of the bake to avoid overbrowning, which will change the flavor and texture of the base.
- Prepare the cake batter according to the directions in this post. Pour the batter into the prepared pan and bake for 18 to 22 minutes, or until a toothpick inserted comes out clean. Let cool completely. Run a knife around the edges of the pan and flip the pan over (bang it onto your work surface) to remove the cake from the pan. If desired, use a sharp serrated knife to slice off the domed part of the cake to create a flat surface for the next layer. Wash and dry the loaf pan, lightly grease it, and line the bottom and sides with parchment paper. Place the cake back into the pan. Freeze for at least 3 hours.: As the batter mixes, listen for the gentle hum of the mixer and watch for a smooth, uniform batter that holds together without lumps. The right batter texture ensures an even crumb and proper rise, which affects how well the cake supports the frozen layers. Avoid overmixing, which can develop gluten and make the cake tough, and under mixing, which leaves pockets of dry flour. If the batter seems too runny, check your ingredient measurements, because a thin cake might compress under the weight of the ice cream layers.
- When ready to add the first ice cream layer, allow the pint of ice cream to soften, then scoop into a bowl and stir until it’s evenly spreadable. Pour the softened ice cream onto the cake and use a spatula to smooth it. Freeze for 4 hours. Repeat with the remaining 2 ice cream layers, freezing 4 hours between each layer. Top the final layer with the raspberries and freeze overnight.: You will smell a toasty, sweet aroma as the cake bakes and see the top set and pull slightly away from the edges when it is done. Testing with a toothpick is reliable because it shows whether the interior has cooked through. A common error is relying solely on color, which can be misleading; always use the toothpick or a gentle spring back test. If the top browns too fast, tent loosely with foil to prevent burning while the center finishes cooking.
- When ready to serve, let the cake sit at room temperature for 5 minutes, then flip it over and bang it out onto a large baking sheet. Use a second baking sheet to flip the cake right side up. Slice and serve right away or freeze.: Cooling allows the cake crumb to stabilize, and you will notice the steam subside and the surface firm up. If you try to remove or cut the cake while warm, it will crumble and may compress under the ice cream layers. Patience here avoids an uneven base. A typical mistake is rushing to assemble immediately, which can cause melting or soggy layers when you add the softened ice cream.
- Run a knife around the edges of the pan and flip the pan over to remove the cake: You may hear a soft pop as air releases and the cake drops from the pan, revealing the even loaf. Using a sharp serrated knife to slice off any domed top creates an even platform for the next steps. If the cake sticks, gently tap the pan on a work surface to loosen it, instead of forcing it, which could tear the crumb. Make sure the cake is fully cool before flipping to prevent any collapse.
- Wash and dry the loaf pan, lightly grease it, and line the bottom and sides with parchment paper: Lining with parchment creates a nonstick jacket that helps with later removal, and the grease helps the paper hug the pan. Smooth the paper into the corners so the cake and frozen layers form straight sides. A sloppy lining can create air gaps that lead to uneven freezing, so press firmly into the edges. If you skip this, you risk cracking or breaking the cake when you unmold the finished dessert.
- Place the cake back into the pan: Setting the cake snugly back into the lined pan gives you a structured vessel for building layers. The cake should sit flat and even, otherwise the frozen layers will tilt. Press gently to seat it without compressing the crumb. A mistake people make is forcing a misshapen cake in; if it does not sit flat, trim small high spots to ensure even layers.
- Freeze for at least 3 hours: A firm cake base is crucial so it does not compress when you add softened frozen layers. During this long chill you will notice the cake temperature drop and the crumb firm up under your fingertip. If you skip this extended freeze, the first ice cream layer can cause the cake to slump. Use this time to clean tools and prepare your softened pints.
- When ready to add the first ice cream layer, allow the pint of ice cream to soften, then scoop into a bowl and stir until it’s evenly spreadable: Aim for a consistency similar to thick frosting, where the ice cream moves smoothly but still holds some body. Softening just enough makes spreading easier and prevents large air pockets from forming. If your ice cream melts too much, it will be runny and won’t set firmly, so chill briefly if it becomes too soft. Stirring helps reintroduce smoothness and remove icy crystals.
- Pour the softened ice cream onto the cake and use a spatula to smooth it: When you spread the layer, notice the cool sensation on your hands through the spatula and the glossy sheen as the surface evens out. Smooth strokes help achieve uniform thickness, which ensures even freezing and clean slices later. A common pitfall is piling ice cream in the center without smoothing, causing uneven layers and longer freeze times. Aim for an even edge to avoid trimming later.
- Freeze for 4 hours: Allowing this first layer to solidify gives you a stable foundation for subsequent layers. You will see the surface lose gloss as it freezes and become dull and firm. Patience here prevents blending of flavors and helps maintain defined layers. If you try to add the next layer too soon, the layers can merge, leading to a muddy flavor profile and messy slices.
- Repeat with the remaining 2 ice cream layers, freezing 4 hours between each layer: Each repetition reinforces structure, and you will notice that assembly becomes easier as the cake grows firmer. Follow the softening, smoothing, and freezing rhythm to preserve distinct bands of flavor. One mistake is rushing to stack without full freezing, which causes slumping or uneven distribution. Keep a timetable so you know when each layer is ready for the next.
- Top the final layer with the raspberries and freeze overnight: Fresh raspberries add a bright note and a pretty finish, and freezing overnight ensures everything is rock solid for slicing. The raspberries may release tiny juices as they settle, which fuse into the top surface and add a pleasant bite. A common oversight is using very soft fruit that bleeds excessively; choose firm berries and arrange them gently to avoid crushing.
- When ready to serve, let the cake sit at room temperature for 5 minutes, then flip it over and bang it out onto a large baking sheet: The brief rest softens the outer edges just enough for a clean release, and the bang is a satisfying way to unmold without damage. Use a second baking sheet to flip the cake right side up so the pretty raspberry top shows. If you skip the short rest, your knife may drag and tear frozen layers; conversely, wait too long and the layers may become too soft and ooze during slicing.
- Slice and serve right away or freeze: Use a sharp knife warmed slightly under hot water and wiped dry for clean slices, and you will notice distinct color bands with a firm yet creamy bite. Serving immediately preserves the best texture, but you can return leftovers to the freezer for later. A common mistake is sawing aggressively, which creates ragged edges; instead use steady, single strokes for tidy portions.
Notes
- Use different ice cream brands to adjust sweetness and texture, choosing firmer premium brands for clean layers.
- Try sorbet for a lighter finish on the top layer to cut richness and add refreshing acidity.
- Add chopped nuts between layers for crunch, but press them into the ice cream so they freeze into place and do not fall out when slicing.
- Swap flavors seasonally for holiday variations, such as using spiced or citrus frozen treats in cooler months.
- Slice after a brief rest at room temperature so the knife glides through without compressing the layers.
- Freeze in individual molds for single serve portions that are easier to transport and serve at parties.