How to Make Cold Brew Coffee
How to Make Cold Brew Coffee is a smooth, low acidity iced coffee that brews slowly to reveal chocolate and nutty notes. This easy cold brew method is perfect for make ahead mornings, creamy coffee drinks, and summer gatherings. With simple ingredients and minimal equipment, it’s an approachable way to enjoy rich, chilled coffee any day of the week.
Equipment
- Pitcher
- Fine-mesh strainer
- Cheesecloth or coffee filter
- Mixing bowl or pitcher for creamer
Ingredients
- 4 quarts filtered water or tap water Measure precisely to ensure consistent dilution and extraction; used as the solvent to steep ground coffee for cold brewing over many hours. Provides a clean base flavor and controls strength depending on water quality and ratio. Filtered water reduces off-flavors and produces a clearer, smoother final concentrate.
- 8 ounces dark roast coffee grounds Coarse grind dark roast provides bold, rich flavors and deep chocolatey or smoky notes when steeped slowly in cold water. Supplies the solids and oils that extract into the brew to create concentrated coffee strength and body. Choosing a coarse grind helps prevent over-extraction and reduces sediment in the finished cold brew.
- 1/2 cup heavy cream or half-and-half Pourable dairy adds creaminess and a silky mouthfeel when blending into cold brew servings; can be adjusted for richness by choosing heavy cream or lighter half-and-half. Balances bitterness and enhances the perceived sweetness of the drink without altering coffee flavor dramatically. Useful for making cafe-style cold brew lattes and creamy coffee beverages.
- 1/2 cup sweetened condensed milk Sweetened condensed milk imparts thick, rich sweetness and a custard-like texture when mixed into cold brew, lending dessert-like depth and body. Acts as both a sweetener and creamer, dissolving into cold liquid to create a smooth, indulgent profile. Ideal for recipes that call for a sweet, milky finish or for making Vietnamese-style coffee variations.
- coffee syrups Flavoring syrups provide concentrated sweet and aromatic notes such as vanilla, hazelnut, or seasonal flavors to customize the cold brew. Allow small additions to modify the taste profile without changing texture, and choose complementary flavors to enhance coffee characteristics. Syrups dissolve readily in chilled beverages and are ideal for crafting specialty drinks.
- sugar Granulated sugar supplies straightforward sweetness and can balance acidity and bitterness in cold brew when dissolved into warm simple syrup or directly stirred into chilled coffee. Enables control over sweetness level and pairs well with milk or cream to create smoother, more approachable flavors. Use sparingly or convert to syrup for easier integration into cold beverages.
- caramel sauce Drizzleable caramel sauce adds buttery, toasted sugar notes and a sticky sweetness that pairs well with dark roast cold brew and cream. Provides both flavor and a decorative element when swirled into cups or layered at the bottom of glasses. Complements chocolate and vanilla flavors to create dessert-style coffee treats.
- chocolate syrup Squeezable chocolate syrup contributes rich cocoa flavor and a glossy sweetness that blends into cold brew for mocha-like beverages. Enhances body and aroma while pairing especially well with cream or condensed milk for decadent results. Useful for creating sweet, chocolate-forward cold brew drinks or garnishing cups.
- ground cinnamon Warm spice adds a hint of aromatic complexity and a subtle, sweet heat that complements roasted coffee notes without overwhelming them. Sprinkle lightly to accentuate depth and garnish finished drinks for visual appeal and nuanced flavor. Can be mixed into cold brew or combined with syrups for spiced variations.
Instructions
- Pour half the water in two half-gallon pitchers. Sprinkle 4 ounces ground coffee over the water in both pitchers. Cover and let sit 30 minutes. After 30 minutes, stir.: As the mixture sits you will notice the grounds slowly wetting and darkening, releasing a layer of coffee aroma that is fragrant but not scorched. The first 30 minutes encourages initial saturation so flavors can begin to extract evenly, and the gentle stir helps all the grounds contact water . A common mistake is to aggressively agitate, which can encourage gritty particles to stay suspended. If you see too many fines floating, let them settle for a few minutes before covering again.
- Cover again and let sit at room temperature overnight.: Overnight steeping is where the brew develops its smooth character, and you should detect a calmer, sweeter scent compared to hot brewed coffee. The slow extraction reduces acidity and brings out chocolatey undertones from the dark roast coffee grounds . Avoid placing the pitchers in direct sunlight or near heat, which can accelerate unwanted flavors. If your kitchen is warm, aim for a cooler corner to keep the profile balanced.
- Line a fine mesh strainer with a double layer of fine cheesecloth or a coffee filter set over a large bowl or pitcher. Pour the coffee mixture through the strainer and allow the liquid to run through. The coffee mixture will take several minutes to strain, and will need to be done about 2 cups at a time. When finished, discard the coffee grounds.: During straining you will hear a slow, steady drip and see a clear, deep brown liquid collect. This step clarifies the brew by removing grounds and fines, which improves mouthfeel and storage life. Work in manageable batches to avoid overflowing and be patient, because rushing leads to cloudy results. If the flow is extremely slow, lift and re fold the cheesecloth to redistribute the grounds, then continue straining.
- Pour the strained coffee in a covered container in the fridge until cooled.: Chilling the brew not only makes it ready for iced drinks, it also helps flavors settle and mellow further. You should notice the aroma tightening into sweeter notes as it cools, and keeping it covered prevents it from picking up fridge odors. A common oversight is leaving it uncovered, which can dull the flavor; always store cold brew in a sealed container for best longevity.
- In a pitcher or bowl whisk together the heavy cream and sweetened condensed milk. Store in the fridge in an airtight container until ready for use.: Whisking these together creates a smooth, homogeneous creamer that blends easily into cold liquids. The mixture should be glossy and viscous, with a sweet aromatic scent. If your creamer is lumpy, whisk longer or strain it through a fine sieve. Avoid adding plain granulated sugar directly to cold liquid, because it may not dissolve, instead integrate it into the creamer if you need extra sweetness.
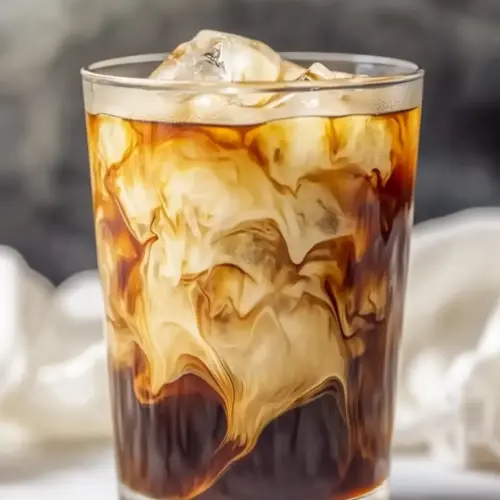
- Fill a glass with ice (or better yet, coffee ice!). Pour 3/4 full with coffee. Fill the remaining 1/4 with the creamer mixture. If you prefer a sweeter and creamier iced coffee you can do equal parts instead.: The immediate sensory reward here is the bright brown swirl when the creamer hits the cold coffee, and the aroma of roasted coffee lifting from the glass. Coffee ice cubes maintain strength as they melt, avoiding dilution. A tip to avoid over sweetening is to taste before adding the full amount of creamer, then adjust. Watch for separation; give a quick stir to combine fully.
- Add in optional add-ins if desired.: This is where you personalize the cup with sauces, syrups, or a dusting of ground cinnamon . The aromas will bloom and the surface may gain a glossy sheen from caramel or chocolate syrup. Add small amounts and taste incrementally, because syrup and sauce can quickly overpower the coffee. If your drink becomes too sweet, add more cold brew to rebalance.
Notes
- Make coffee ice cubes: Pour cold brew into an ice cube tray and freeze. These cubes keep drinks from watering down and intensify flavor as they melt, a trick I use when I want long sipping sessions without dilution.
- Adjust steeping time for strength: Steep 12 to 18 hours depending on how bold you like it. Shorter steeping keeps the cup milder, longer steeping increases body, but avoid going past 24 hours to prevent unpleasant bitterness.
- Mix creamer ahead: Whisk heavy cream and sweetened condensed milk together and store chilled. Having it ready lets you assemble drinks quickly and ensures a consistent sweetness and texture.
- Use syrups sparingly: Add coffee syrups one teaspoon at a time and taste. They bring concentrated flavor, so measuring helps you avoid over sweetening and maintains balance with the cold brew.
- Store properly: Keep the strained cold brew in a sealed container in the fridge for up to a week. This preserves freshness and prevents flavor loss or contamination from other fridge aromas.