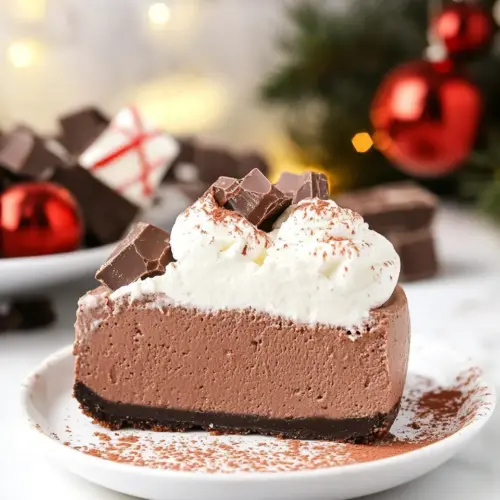
Hot Cocoa Cheesecake
Hot Cocoa Cheesecake is a creamy, chocolate forward dessert with a crunchy Oreo crust and marshmallow finish. This decadent yet approachable cheesecake blends melted chocolate with creamer for a rich, silky filling, making it a perfect winter treat or dessert for gatherings. It is easy to make with reliable techniques and rewards patience with perfect texture and deep cocoa flavor, ideal for impressing guests.
Equipment
- 9-inch Springform Pan
- Stand mixer
- Food Processor
- Large microwave-safe bowl
- Wire Rack
- Large roasting pan
Ingredients
- 20 Oreo cookies crushed in a food processor until they form fine crumbs Crushed finely to create the base and provide texture for the crust; press into the pan to form an even, compact foundation that holds the filling and offers a chocolate cookie flavor contrast.
- 3 tablespoons unsalted butter melted Melted and combined with the cookie crumbs to bind them together; adds richness and helps the crust set firmly while contributing a subtle buttery flavor.
- 32 ounces cream cheese room temperature Softened to room temperature and beaten until smooth to create the creamy, tangy structure of the cheesecake; provides the main body, mouthfeel, and stability for the dessert.
- 1/2 cup granulated sugar Dissolved into the cream cheese mixture to add sweetness and balance the tang; helps with structure slightly when mixed and ensures an evenly sweetened filling.
- 4 large eggs room temperature Brought to room temperature and added one at a time to incorporate air and create a smooth, custardy texture; eggs set the filling during baking and lend richness and structure.
- 2 teaspoons pure vanilla extract Added to the batter to introduce aromatic complexity and enhance the overall flavor profile; provides a warm, sweet note that complements chocolate and marshmallow elements.
- 2 cups semisweet chocolate chips Melted into the cream cheese mixture to deliver deep chocolate flavor and a velvety texture; contributes to the filling's richness and color while intensifying the hot cocoa theme.
- 1/2 cup flavored coffee creamer or heavy cream (I used Coffee-Mate Marshmallow Hot Cocoa Creamer) Stirred in or used to thin the chocolate mixture to achieve a silky consistency; adds creamy sweetness and can impart a flavored note depending on the creamer used.
- 2 tablespoons all-purpose flour Incorporated sparingly to slightly thicken the filling and improve sliceability; helps stabilize the batter and can give a modest lift and smoother texture.
- whipped cream Piped or dolloped on top as a light, airy garnish to add creaminess and visual appeal; balances the dense cheesecake with a soft, sweet finish that complements cocoa flavors.
- Campfire® Mini White Marshmallows Scattered over the finished cheesecake or toasted briefly as a playful, chewy topping; provides a classic hot cocoa garnish and adds contrasting texture and sweetness.
Instructions
- Preheat oven to 350°F. Tightly wrap a 9-inch springform pan in heavy duty foil. This step prevents leaks when using a water bath. I also take the extra step by placing the foil wrapped springform pan inside an oven bag while baking, but this is optional. Lightly spray the inside of the pan with nonstick cooking spray.: As you preheat, notice the dry warm air filling the oven and the comforting expectation that comes with it. Wrapping the springform pan in heavy foil is about safety and patience, preventing water from seeping into your buttery Oreo crust . I like to feel the foil snug against the pan with no gaps, because even one small tear can let water in and ruin the base. When spraying the pan, focus on a light, even coating so the crust and filling release easily later. Common mistake to avoid is skipping the foil step, which can produce a soggy bottom if the water bath leaks; take a moment to double wrap if your foil seems thin.
- Mix together the Oreo cookie crumbs and butter and press them into the bottom of your pan. Bake for 8 minutes and place on a wire rack to cool.: After combining the Oreo crumbs and melted unsalted butter , press firmly into the pan until you feel a compact, even layer under your fingertips; the crust should be dense enough to support the filling. The warm oven will slightly toast the crumbs, releasing a toasty aroma that signals readiness. Remove and set on a wire rack so air circulates and the base firms without steaming. A typical error here is under pressing, which leads to a crumbly crust that falls apart when sliced; press with consistent pressure to avoid that.
- Begin to boil a pot or kettle of water for the water bath.: The pot bubbling away produces steam that will wrap the cheesecake in gentle heat, which helps prevent cracks and promotes even cooking. When the water reaches a full but controlled boil, you will see continuous steam rising, which is the signal to prepare your larger pan for the bain marie. Don’t overfill the outer pan or you risk water spilling over during transfer. A common misstep is adding cold water to a hot oven; always pour boiling water carefully and steadily to avoid temperature shock.
- Combine the chocolate chips and coffee creamer in a large microwave-safe bowl. Microwave at 50% power in 30-second increments until the chocolate is melted and the mixture is smooth. Be sure to stir the mixture every 30 seconds. Set aside to cool while you prepare the filling.: Melting the chocolate chips with creamer produces a glossy, velvety emulsion that smells intensely of cocoa. As you stir between bursts, you will see the chocolate soften then shine as it becomes a uniform sauce. Allow it to cool to lukewarm; too hot and it can compromise the warmth of your batter and affect texture. A typical pitfall is overheating, which makes chocolate grainy; use the 50 percent power setting and frequent stirring to keep control.
- In the bowl of your stand mixer fitted with your paddle attachment, beat the cream cheese until smooth. Add sugar and mix until combined. Add eggs, one at a time, fully incorporating each before adding the next. Make sure to scrape down the bowl in between each egg. Add vanilla and mix until combined.: When the cream cheese reaches a silky consistency, it will lose lumps and become glossy under the paddle. Adding sugar next dissolves into that sheen, slightly loosening the texture. Introduce the eggs one at a time, and watch the batter tighten and then relax with each addition; that tactile change is a good cue that they are integrating properly. Scraping the bowl is essential to avoid hidden pockets of unmixed cream cheese, which lead to lumps in the bake. Avoid whipping too vigorously here, which traps air and can cause cracking as the cheesecake cools.
- Add in the chocolate mixture and beat until it is fully incorporated into the cheesecake filling. Add in the flour and mix until combined. Scrape down the sides of your bowl and beat again until the mixture is completely smooth.: Pouring the cooled chocolate into the batter transforms the pale base into a glossy, mocha colored custard that smells deep and inviting. The batter should appear homogenous, with no streaks of chocolate or cream. Stirring in the flour last gives the filling stability, and you will notice the batter thicken slightly. Scrape thoroughly and give a final gentle beat to ensure every part of the bowl is even. A common mistake is adding hot chocolate directly to cold cream cheese, which can cause streaks or seizing; always cool the chocolate a bit first.
- Pour batter into prepared crust. Place pan into a larger pan and pour boiling water into the larger pan until halfway up the side of the cheesecake pan. Bake for 60 minutes. The edges will appear to be set, but the center will still have a slight jiggle to it. At this point, turn off the oven, but leave the door cracked and allow the cheesecake to rest in the cooling oven for one hour.: Pouring the filling over the crust should feel effortless, the batter gliding into place with a glossy sheen. Sliding the springform into the larger pan and adding boiling water creates a moist, even baking environment; the steam muffles direct heat and preserves a tender texture. During the bake, watch for the telltale set around the edges and a gentle wobble in the center, which means the custard is done but not overcooked. Turning off the oven and letting it rest inside prevents rapid temperature swings that cause cracks. A frequent error is removing the cake too soon, leading to a sunken center, so resist the urge to open the door early.
- After one hour has passed, carefully remove the cheesecake from the water bath and place on a cooling rack to cool completely. Once the cake is completely cooled, place it into the refrigerator for at least 8 hours.: Lifting the foil wrapped pan from the water bath will release a warm chocolate aroma, and placing it on a rack lets air circulate to cool the cake slowly. Cooling fully at room temperature before chilling reduces condensation on the surface and helps the texture set evenly. The long refrigeration time lets flavors meld and the filling firm into a sliceable consistency. Avoid rushing this step by cutting too early, which yields sloppy slices with a soft center.
- Before serving, top with whipped cream and Campfire® Mini White Marshmallows.: Right before you plate, crown the cheesecake with soft whipped cream for a creamy contrast and scatter the Campfire Mini White Marshmallows for a nostalgic, chewy garnish. If you want toasted marshmallows, use a torch briefly until they caramelize and puff, listening for the faint sizzle. Finish with a gentle dusting if you like, but keep toppings light so the chocolate filling remains the star. Avoid adding marshmallows too early, which causes them to deflate in the fridge.
Notes
- Crust stability Use finely crushed Oreo cookies and press them firmly into the pan; if you need a firmer base, add an extra half tablespoon of melted butter to help the crumbs bind more securely.
- Chocolate choice Swap semisweet chocolate chips for higher quality chocolate chips if you want a cleaner cocoa flavor; couverture or chopped baking chocolate will melt more evenly and intensify the chocolate profile.
- Creamer vs heavy cream If you prefer a neutral dairy fat, replace the flavored coffee creamer with equal parts heavy cream; this will still produce a glossy melt but with less added flavor from the creamer.
- Preventing cracks Use a water bath and rest the cheesecake in the cooling oven with the door cracked for one hour after baking; this gradual cooling reduces cracks by minimizing temperature shock.
- Whipped cream topping Make fresh whipped cream to top the slices right before serving, and stabilize it with a teaspoon of powdered sugar if you need it to hold for longer display times.