Hot Chocolate
Hot Chocolate is a creamy, comforting drink made with warm milk and melted chocolate for a rich, cozy sip. This easy recipe yields a smooth cup with flexible texture options, from decadent to lighter, making it perfect for a quick treat or a relaxing evening. It is a fast, soothing choice that's worth making whenever you want a warm, chocolatey pick me up.
Equipment
- Saucepan
- Whisk
- Mug
Ingredients
- 1 cup whole milk Heat gently and provide creamy body and rich mouthfeel; acts as the primary liquid that carries chocolate flavor and balances sweetness. Adds natural fats and proteins that create a smooth, velvety texture when warmed and foamed. Helps moderate temperature so the chocolate melts and disperses evenly throughout the drink.
- 1/4 cup water, optional Add sparingly to loosen and adjust consistency when a thinner, lighter hot chocolate is desired; can temper the richness of milk for a lighter mouthfeel. Offers a neutral base to dissolve cocoa or chocolate more easily at higher temperatures than milk alone. Optional for those preferring a lighter-bodied beverage.
- 1/4 cups semi-sweet chocolate chip, loosely packed (or scant 2 tablespoons cocoa powder) Melt or whisk to impart concentrated chocolate flavor and structure; provides the core cocoa intensity and sweetness when using semi-sweet chips, or concentrated chocolate aroma when using cocoa powder. Contributes to texture and sheen when fully melted into the warm milk, helping create a cohesive chocolate emulsion. Adjust quantity to control bitterness and depth.
- 1 tablespoon sugar Sweeten and balance the bitterness of chocolate; helps round out flavors and create a pleasant sweetness level in the beverage. Dissolves easily into warm liquid, integrating quickly with chocolate components. Adjust amount to taste, especially if using sweetened chocolate chips or whipped toppings.
- sweetened whipped cream, optional Top the beverage for added creaminess and a decadent finish; contributes airy texture and extra sweetness when spooned or piped onto the hot chocolate. Enhances visual appeal and provides a cooling contrast to the warm drink. Optional for those who enjoy a richer presentation and mouthfeel.
- cocoa powder, for garnishing Sprinkle lightly to add aromatic cocoa notes and visual contrast; enhances perceived chocolate intensity and offers a slightly dry, bitter counterpoint to the sweet drink. Can be sifted over whipped cream or directly on the surface to create an appealing garnish. Use sparingly to prevent overpowering the drink's sweetness.
- 1 pinch pumpkin spice, optional Dust lightly or infuse subtly to introduce warm spice complexity and seasonal aroma; pumpkin spice rounds out chocolate with cinnamon, nutmeg, and clove notes when desired. Adds depth and aromatic interest without altering the base texture of the hot chocolate. Optional for a festive or spiced variation.
- 1 piece chocolate Garnish or stir to provide an extra burst of chocolate and a tactile finishing touch; melts slightly into the hot liquid adding concentrated cocoa flavor and a touch of sweetness. Serves as an attractive accent and can be used to customize portion size or presentation. Use as a decorative or flavor-enhancing piece.
Instructions
- Heat the milk and water (if using) over medium heat. As soon as it bubbles, add the chocolate chips or cocoa powder and sugar. Stir to mix well. Turn off the heat and transfer the hot chocolate to a mug.: You will notice the milk warming and thin wisps of steam rising from the pan, with a faint sweetness starting to emerge. This stage is about bringing the liquid to a gentle bubbling point where it is hot but not boiling, because overheating can scald the milk and produce a burnt smell which flattens the flavor. Keep the heat on medium to maintain control, and stir occasionally to ensure even warmth and to break up any developing skin. If you hear a light simmer or see tiny bubbles along the edges, that is the right cue. A common mistake is leaving the pan unattended, which can lead to boiling over or a scorched bottom, so stay close and stir.
- Top with whipped cream (if using), cocoa powder, and pumpkin spice (if using). Serve hot with a piece of chocolate on the side.: At this moment the kitchen will fill with rich chocolate aromas as the chocolate begins to melt, or the cocoa powder blooms into the hot liquid. Adding the sugar now helps it dissolve into the warm matrix. Use a whisk to fully incorporate the ingredients, aiming for a glossy, homogeneous texture without streaks. The warmth helps the cocoa compounds open up for fuller flavor, which is why we add them while the liquid is hot. Avoid adding cold ingredients straight from the fridge because that can shock the mixture and produce lumps.
- Stir to mix well: As you stir, notice the transformation from milky liquid to a thicker, silky suspension that coats the whisk. This step develops the mouthfeel, so take your time to break up any lingering pockets of unmelted chocolate or dry cocoa. The sound is gentle, and visually you want a sheen on the surface and no grainy specks. If you encounter grittiness, continue stirring gently off heat, because residual warmth will smooth it out. One pitfall is stirring too aggressively which can introduce foam; keep motions steady and even.
- Turn off the heat and transfer the hot chocolate to a mug: Once the texture is smooth and the aroma is inviting, remove the pan from the burner to prevent overcooking. Pouring into a warmed mug helps retain heat and keeps the drink at an ideal sipping temperature. The moment you pour you should see a glossy surface and perhaps a slight steam halo; these are good indicators the drink is ready. A typical error here is leaving the hot chocolate on heat too long, which can darken the flavors and make the texture thicker than intended.
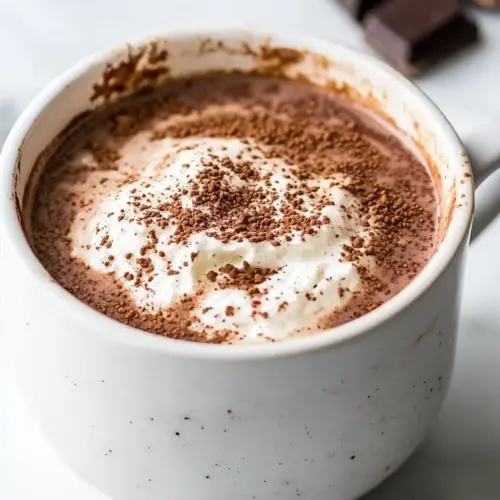
- Top with whipped cream (if using), cocoa powder, and pumpkin spice (if using): The final presentation adds sensory contrast, with fluffy whipped cream cooling the first sip and cocoa powder lending a dry bitterness on top. A pinch of pumpkin spice introduces aromatic lift, creating a layered sip from top to bottom. Use small dollops or a light dusting so the garnishes complement rather than overpower the drink. Avoid piling on too many toppings, which can make each mouthful inconsistent.
- Serve hot with a piece of chocolate on the side: Serving with a small piece of chocolate allows guests to nibble between sips or stir it in for an extra hit of richness. The contrast of temperature and texture is delightful, and the chocolate piece doubles as a charming finishing touch. Be mindful of temperature, serve while still warm but not scalding, and warn guests about very hot beverages. A common oversight is leaving the cup to cool too long before serving, diminishing the immediate warmth and aroma.
Notes
- Start with warm milk, not scalding; moderate heat helps the chocolate melt smoothly without burning and prevents a skin from forming.
- Whisk thoroughly after adding cocoa powder or chocolate to avoid lumps, and scrape the bottom of the pan to catch any unmelted pieces.
- Adjust sweetness by tasting after the chocolate melts, because different chocolates and cocoas have varying levels of bitterness.
- Use optional water if you want a lighter beverage; add it incrementally and taste so the chocolate intensity remains balanced.
- Garnish last with sweetened whipped cream and a dusting of cocoa powder to keep presentation clean and aromatic.