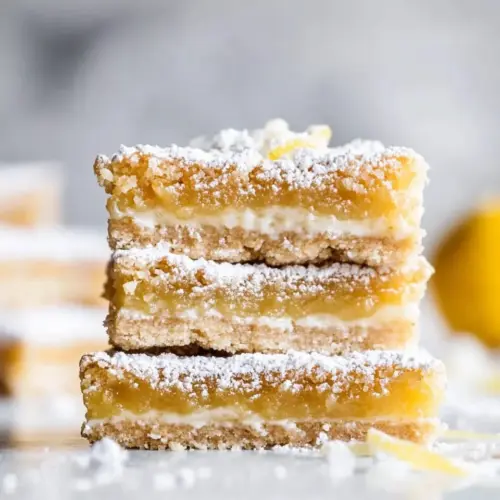
Honey Lemon Bars with Whole Wheat Shortbread Crust
Honey Lemon Bars with Whole Wheat Shortbread Crust are creamy and bright with a slightly crisp whole wheat shortbread base and a glossy honey sweetened lemon filling. The bars are easy to make with pantry staples and perfect for an easy weeknight dessert or a springtime gathering, offering a balanced, not overly sweet finish you will want to make again and again.
Equipment
- 8-inch Square Baking Dish
- Food Processor
- Metal cooling rack
- Mixing Bowl
- Whisk
- Parchment Paper
Ingredients
- 6 tablespoons white whole wheat flour Provide structure and fiber to the shortbread crust while keeping a slightly nuttier flavor than refined flour; combine with all-purpose flour for tender yet sturdy base.
- 6 tablespoons all purpose flour Add fine texture and gluten for binding in the shortbread, helping the crust hold together and provide a delicate, flaky bite when baked.
- 1/4 cup light brown sugar, not packed Sweeten and deepen the crust's flavor with mild molasses notes while helping to tenderize the dough; measured lightly to balance sweetness.
- 3 tablespoons cornstarch Thicken the lemon-honey filling and stabilize it as it bakes, ensuring a smooth, jam-like consistency that sets properly without becoming rubbery.
- 2 teaspoons grated lemon zest Impart concentrated citrus aroma and bright lemon flavor throughout both crust and filling; finely grate to avoid bitter pith while maximizing scent.
- 1/2 teaspoon baking powder Leaven the crust slightly to prevent it from being overly dense, creating a subtle lift and lighter mouthfeel in the shortbread base.
- 1/4 teaspoon kosher salt Enhance overall flavor by balancing sweetness and bringing out the lemon brightness; also helps with chemical reactions in the crust.
- 4 tablespoons unsalted butter, cut into bits and chilled Contribute rich, tender richness and flavor to the crust while adding moisture; chill and cut into bits to create flaky pockets as it bakes.
- 1 tablespoon 0% Greek yogurt Add a touch of moisture and slight acidity to the dough, improving tenderness and contributing a faint tang that complements the lemon filling.
- 1/3 cup honey Provide natural sweetness and floral depth to the filling, marrying with lemon to create a smooth, viscous custard-like layer when baked.
- 3 large eggs, lightly beaten Coagulate and set the filling while adding richness and body; beaten eggs create a custardy texture that holds the honey-lemon mixture together.
- 2 tablespoons white whole wheat flour Contribute additional body and slight thickening to the filling, helping attain a balanced, smooth consistency and subtle whole-grain character.
- 1/8 teaspoon kosher salt Season and elevate flavor in the filling with a hint of saltiness, brightening the lemon and honey while balancing overall sweetness.
- 1 teaspoon grated lemon zest Boost concentrated lemon aroma and provide an extra burst of citrus brightness in the filling to enhance the overall lemon profile.
- 5 tablespoons fresh lemon juice Add tartness and acidity to the filling, balancing the honey's sweetness and helping the custard set with a clean, refreshing flavor.
- 1 tablespoon powdered sugar, for dusting on top Dust on top to create an attractive, slightly sweet finish that contrasts the tangy filling and adds a delicate visual touch to each bar.
Instructions
- Preheat the oven to 350 F.: You will feel the kitchen warm as the oven comes up to temperature, a faint electrical hum and the smell of dry heat. Preheating ensures the crust begins baking immediately, producing a consistent, golden color instead of slowly drying out. A common mistake is skipping preheat, which can yield an underbaked or uneven crust; always wait until the oven reaches the set temperature.
- Prepare an 8-inch square glass or ceramic baking dish pan by lightly spraying the inside with baking spray.: The slick surface of the pan should glint subtly where the spray landed, which helps the parchment and the finished bars release cleanly. Glass and ceramic conduct heat evenly, promoting a consistent bake across the shortbread. If you skip this light spray, the parchment may stick, making it harder to lift the bars out intact.
- Make a sling: Cut 2 sheets of parchment paper 15 x 15 inches each. Fold them in half so they are 7 1/2 x 15 inches, which will make them sturdier.: Cut 2 sheets of parchment paper 15 x 15 inches each. Fold them in half so they are 7 1/2 x 15 inches, which will make them sturdier. : Folding the parchment doubles its thickness, and you can feel the added weight in your hands. This reinforcement acts like handles, so the baked bars come out without crumbling. A frequent oversight is using parchment that is too short, which prevents easy lifting later; measure carefully.
- Line the pan with the 2 long sheets of parchment paper placed perpendicular to each other in the pan. This is so you can get the bars out after they are cooked, so don't skip this step. They should be long enough to hang over the sides to use as handles to lift out the baked lemon bars before cutting.: The intersecting sheets create a cross sling, and when you press them into the pan you will see tidy corners. This makes removing the whole block effortless after baking. If the sheets are not perpendicular or do not overhang, you risk tearing when pulling the bars out.
- Spray the inside of the parchment with baking spray.: The parchment will look slightly glossy where the spray landed, and that tiny layer prevents the crust from adhering to paper fibers. It also helps the crust release cleanly when you lift the sling. Overlooking this can cause the crust to stick, and bits may tear away when you remove the bars.
- For the crust: In a food processor combine the flours, brown sugar, cornstarch, lemon zest, baking powder and salt and process until well combined.: In a food processor combine the flours, brown sugar, cornstarch, lemon zest, baking powder and salt and process until well combined. : You will notice a faint, warm citrus aroma as the zest distributes, and the dry mixture should look uniformly pale with tiny flecks of zest. Processing blends everything quickly without overworking gluten. A common misstep is overprocessing which can warm the mixture and change texture; pulse until the components are blended but still dry.
- Add the butter and yogurt to the flour mixture at once and pulse at least a dozen times before turning out into the prepared pan and pressing into an even layer and up the sides of the dish about 1/4-inch so the filling doesn't spill out.: As you pulse, you will see pea sized bits of butter coated in flour, which bakes into flaky pockets. The dough should hold together when squeezed, yet remain slightly crumbly. Pressing evenly creates a uniform thickness, and bringing the crust up the sides forms a shallow rim to contain the filling. If you press unevenly, the filling may collect in low spots and bake irregularly.
- Bake until evenly browned about 30 minutes. Shut the oven off and cool the crust on a metal rack for at least 20 minutes.: The kitchen will fill with a warm, toasty scent and the crust edges should take on a pale golden hue. Even browning signals that the crust's moisture has driven off and the structure has set. Using a glass dish, you can watch the color deepen. Underbaking leaves a gummy center, while overbaking will make the crust too hard, so aim for that even pale brown stage.
- Once cooled, heat the oven to 325°F.: Cooling on a rack allows air to circulate and prevents residual heat from continuing to bake the bottom. The crust firms as it cools, and this resting step helps it support the filling without collapsing. Skipping the rest can cause the filling to seep into a still warm crust, making the bottom soggy.
- Prepare the filling in a medium bowl by whisking together the eggs, honey and lemon zest. Add the flour 1 tablespoon at a time, and the salt and mix well. (this is best to prepare just before baking): Bringing the oven up to this slightly lower temperature ensures the filling cooks gently, setting without browning too much. You will notice a calmer heat compared to the initial preheat, which is kinder to custard textures. Failing to lower the temperature can produce a cracked or overcooked topping.
- Stir in the lemon juice and pour over the cooled crust.: When you whisk, the mixture will lighten and the aroma will become bright and floral from the honey and zest. Adding the small amount of flour gradually avoids lumps and helps the eggs incorporate smoothly. Mixing too far in advance can let the flour absorb moisture or cause separation, so I combine these just before pouring.
- Bake until filling is set, about 22 to 25 minutes.: As the acidic lemon juice meets the egg and honey base you will see a glossy, fluid custard form, then settle evenly into the crust. The contrast between the pale shortbread and the glossy filling is visually satisfying. Pour gently to avoid making indentations in the crust rim.
- Cool completely before lifting the bars out of the pan with the parchment. For best results, refrigerate overnight for a firmer topping.: During baking you may notice the filling change from glossy to a satin matte finish and the center will no longer wobble with a gentle shake. That visual cue means the custard network has formed and proteins have set. A mistake people make is overbaking until the top cracks, which dries the filling out; aim for a slight jiggle at the center for a tender set.
- Cut into 12 squares using a clean hot knife, clean in between slices.: Cooling brings the filling to its final texture, and refrigeration overnight firms it for clean slicing. The bars will slice neater and hold shape after chilling. Cutting too soon risks squashed pieces and uneven edges.
- Dust with confectioners sugar just before serving.: Heat a knife, wipe it clean, and then slice so each cut is smooth and glossy. The warmth helps the blade glide through without dragging crumbs. Cleaning between cuts prevents buildup that tears edges, and results in elegant squares.
- Dust with confectioners sugar just before serving.: A light sprinkle of powdered sugar adds a snowy finish and a soft first taste that complements the honey and lemon . It also visually elevates the bars for presentation. Dusting too early can cause the sugar to dissolve into the surface, so apply it right before serving for the best look.
Notes
- Chill your butter: Keeping the unsalted butter cold before pulsing ensures flaky pockets in the crust, which bake into a tender, shortbread like crumb.
- Measure flour properly: Spoon and level the all purpose flour and white whole wheat flour to avoid a dry, dense crust from packed flour.
- Fresh lemon matters: Use fresh lemon juice and zest for the brightest flavor, bottled juice will mute the citrus character.
- Pulse don’t overwork: In the food processor, pulse the dough ingredients until just combined to avoid warming the butter and overdeveloping gluten.
- Chill before slicing: Refrigerate the bars overnight for the firmest topping, allowing tidy, clean cuts and better texture.