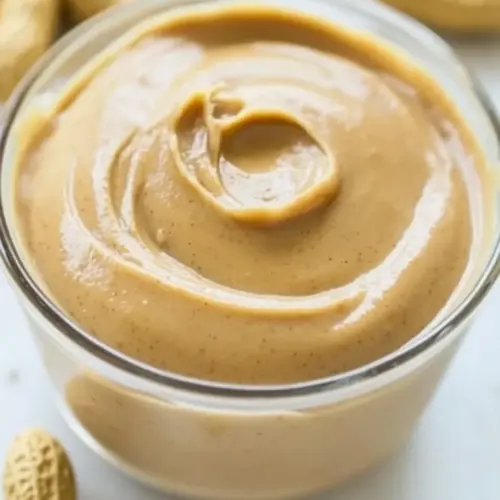
Homemade Peanut Butter
Homemade Peanut Butter is a creamy, nut forward spread that highlights roasted peanuts with minimal fuss. Rich, silky, and naturally flavorful, this easy recipe yields a fresh jar perfect for toast, snacks, and baking. Make a batch for an easy weeknight pantry upgrade that tastes better than store bought and costs less in the long run.
Equipment
- our Vitamix A2300
- Food Processor
Ingredients
- 4 cup Dry roasted peanuts Roasted to deepen flavor and provide a rich, nutty base for the butter, offering natural oils that create a creamy texture when processed. Ground to release oils and transform solids into a spreadable consistency, contributing both body and authentic peanut flavor. Seasoned simply by adjusting salt or sweeteners after grinding, allowing the peanut character to remain prominent.
Instructions
- Turn on the Vitamix and slowly increase the speed to the maximum.: As the machine spins up you will first hear a grainy, rhythmic crunch, then a smoother hum as the mixture begins to break down. The sound will change from intermittent thumps to a steady motor note, and that auditory shift signals that oils are loosening. You want to avoid rushing this, because a gradual speed increase helps the nuts shed oils uniformly, preventing big chunks from slamming into the blades. If you jump straight to top speed you might cause the container to heat quickly, which can slightly alter the flavor. One thing to watch out for is vibration or wobbling, which indicates an uneven load; stop and redistribute the peanuts if that happens.
- Use the tamper to push down the ingredients if anything is stuck to the sides. Push it hard. Don't be afraid, the tamper will not reach the blades.: When pieces cling to the vessel, the tamper becomes your tactile partner. Press firmly but confidently, pushing the mass toward the blade while keeping the tamper clear of the cutting zone. You will feel a change in resistance as the mixture becomes creamier, moving from shaggy clumps to a cohesive mass. This action ensures even processing and helps prevent pockets of unprocessed nuts. A frequent error is not using the tamper and assuming the machine will fix everything on its own, which can lead to uneven texture and longer processing time.
- Vitamix usually needs at most 2 minutes to be ready. Per their website notes, you shouldn't process it more than 1 minute after the mixture is circulating freely.: Pay attention to the visual cue of a glossy, flowing mass. Once the nut butter circulates like a smooth river, limit continued processing to prevent overworking the oils or generating heat that dulls the fresh roasted aroma. The surface will look shiny and slightly glossy, and when you stop the machine the butter should slowly slump back into itself. Overprocessing can make the texture overly liquid or thin, so stop as soon as the desired silkiness is reached.
- When ready, use a silicone spatula to gently scrape all the yummy peanut butter out of the container.: The first scrape rewards you with that rich, glossy sheen and the warm scent of roasted peanuts . Use a flexible spatula to reach the corners, and take a moment to fold any slightly drier bits into the center so nothing is wasted. Temperature matters here, as warmer butter spreads more easily; if the jar will be stored in a cool place expect a firmer set. A common slip is leaving significant paste in the container, so scrape thoroughly while the butter is still pliable.
- Pulse a couple of times in the beginning before turning it on completely.: Those initial pulses help break the nuts into more uniform fragments, reducing stress on the motor when you increase speed. You will hear a chopped, granular sound that gradually smooths out as particles become finer. This technique also helps avoid sudden surges of whole peanuts flying toward the blade and keeps the process controlled. Skipping pulsing can force the machine to work harder immediately, which might shorten the motor's lifespan over time.
- You must stop and scrape for a couple of times as the peanut butter will likely stick to the sides.: The beating heart of success here is frequent scraping. Each interruption reveals drier pockets and ensures the blender or processor has a chance to incorporate them evenly. You will notice the mixture pulling away from the vessel walls and gathering into a glossy center when it is close to done. If you forget to scrape, the final product can be uneven with crunchy islands, and you may run the machine longer than needed, creating excess heat.
- To make peanut butter in a food processor you need more time than with a Vitamix. If the mixture or the food processor gets too warm, stop and continue only after everything has cooled down.: With a food processor you will feel the process take longer and the sound remain more intermittent. Heat is the enemy of fresh nut flavor, because it can make oils taste flat or slightly bitter. If the bowl gets hot to the touch, let it rest for several minutes before continuing, and that pause preserves the bright roasted notes. A typical mistake is pushing through despite warmth, which risks altering flavor and stressing the machine.
- Be patient! Depending on the power of your food processor, you might need 5-10 minutes to get the buttery consistency.: Patience here pays off with a silkier final product. Expect cycles of crumbly texture, damp clumping, and then a glossy finish as oils fully release. Keep your ears and eyes tuned to the change in sound and surface sheen, because those sensory cues tell you more than a clock. Rushing often results in a coarse finish or overheated processors, so accept the time requirement and the payoff will be worth it.
Notes
- Preserve freshness: Store your Homemade Peanut Butter in a sterilized jar with a tight lid, and refrigerate it to slow oil separation and extend shelf life.
- Adjust texture: For a chunkier result, reserve a few chopped peanuts and fold them in after processing, adding desired bite without extra work.
- Cool down cycles: If using a food processor and it warms up, pause for five to ten minutes to let the motor and mixture cool before resuming.
- Flavor boosts: If you ever choose to season, add a tiny pinch of salt after processing to lift flavors, but do so sparingly so the peanut taste remains primary.
- Use the tamper: When using a high speed blender, the tamper ensures even contact with the blades and reduces processing time while protecting the motor.