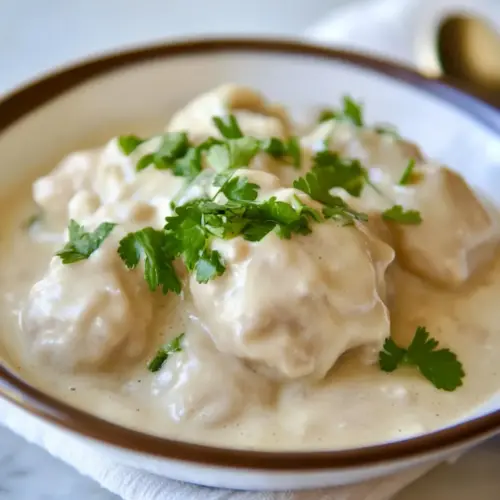
Homemade Chicken and Drop Dumplings
Homemade Chicken and Drop Dumplings delivers a creamy, savory bowl with tender chicken and pillowy dumplings. This easy weeknight dinner combines browned meat, aromatic vegetables, and light dumplings that soak up rich broth for maximum comfort in every spoonful. Make it when you want a straightforward, satisfying meal that feels like a warm hug and will disappear fast.
Equipment
- 6 quart stock pot or cast iron dutch oven
- Saucepan
- Wire mesh skimmer
- Paper sack
Ingredients
- 3 -4 lb whole roasting chicken cut into 8 pieces see tips and tricks Roast to develop rich flavor and provide the primary protein and body for the dish; cut into pieces so heat penetrates evenly and bones add depth to the broth. Use pieces with skin and bones to yield a more flavorful stock and tender meat for serving.
- 1/2 cup flour Coat to lightly thicken pan juices and help create a subtle roux when combined with butter; dust chicken pieces to encourage browning and slightly crisp the skin. Sprinkle evenly and shake off excess to avoid clumping while searing.
- 2 Tb unsalted whole sweet cream butter Melt to brown and sauté aromatics, adding a creamy, rich mouthfeel and helping form the base for sauce and dumplings; use whole sweet cream butter for a smooth, slightly sweet finish. Add early in cooking to prevent burning and to carry flavors from flour and vegetables.
- 1 medium onion - quartered Quarter and sweat to release natural sugars and aromatic depth, contributing savory background notes and body to the broth. Add to the pot early so pieces soften and infuse the liquid over a slow simmer.
- 3 cloves garlic - whole Crush lightly and simmer to infuse pungent, savory aromatics into the stock, boosting overall flavor without overpowering other ingredients. Add whole cloves to avoid small pieces in the finished broth while extracting garlic essence.
- 3 carrots cut in half lengthwise and then in 3rds. Slice to add natural sweetness, texture, and color; their sugars enhance the savory profile and balance the dish. Add with celery and onion to build a classic mirepoix base for the chicken broth.
- 3 celery stalks cut into thirds Chop to contribute aromatic, slightly peppery notes and crisp texture that softens with long simmering, rounding out the mirepoix. Use stalks cut into thirds so they release flavor efficiently during cooking.
- 1 Tb kosher salt Season early to enhance and deepen overall savory flavors throughout the cooking process; kosher salt helps extract moisture and draw out aromas from vegetables and meat. Adjust amount during simmering and before serving to achieve balanced seasoning.
- 1 teaspoon ground black pepper Season to provide sharp, warming heat and to elevate the savory profile of the broth and finished dish; freshly ground black pepper adds complexity. Add gradually and taste near the end to control pungency.
- 2 bay leaves Simmer whole to impart subtle herbal, slightly floral notes and to add a layered, savory bouquet to the stock without overwhelming other aromatics. Remove before serving to avoid chewy bay leaf pieces.
- 1 cup all purpose flour Combine with fat to create light dumpling batter and to slightly thicken cooking liquid if needed; all-purpose flour provides structure and tenderness. Mix with other dry ingredients before adding milk to ensure even distribution.
- 1 teaspoon table salt Season the dumpling batter and final dish, helping balance flavors; table salt dissolves quickly and seasons uniformly. Add to dry mix and taste-adjust after cooking to ensure proper saltiness.
- 2 1/2 teaspoon baking powder Leaven to make dumplings tender and airy by providing lift during steaming, creating a light, pillowy texture that contrasts the rich broth. Measure carefully to avoid metallic aftertastes or uneven rising.
- 1/2 cup milk Moisten to bind dry ingredients and form a soft, scoopable dumpling dough; milk adds richness and tenderness while contributing to steam for rising. Stir just until combined to prevent overworking the batter and ensure fluffiness.
Instructions
- Rinse the chicken and pat it dry with a paper towel.: Your first tactile cue is the dryness of the skin, which matters more than you might expect because a drier surface browns more readily. When you pat the pieces, you will feel moisture lift off and the skin become tacky but not wet. Browning is all about surface contact and evaporation, so this step prevents steaming in the pan. A common mistake is skipping the drying, which results in pale, steamed skin instead of that desirable golden color.
- Place a heavy 6 quart stock pot or preferably a cast iron dutch oven on the stove top to heat over medium high heat while you begin preparations for the chicken.: You will notice the pot warming, releasing a faint metallic heat into the air before you add fat. A heavy pot keeps heat even, preventing hot spots when browning the chicken . The weight also holds temperature when you add cold pieces, allowing immediate sear rather than a drop that causes sticking. Avoid using a very thin pan, which can scorch the butter quickly.
- Put another saucepan of water on the stove to boil (2-4 quarts).: A rolling boil in a separate pot ensures you have hot water ready for filling the main pot without chilling the browned pieces. You will hear the increasing rumble and see steady bubbling, which signals readiness. Adding near boiling water keeps the braise continuous. If you add cold water, it will lower the temperature and slow the cooking time.
- Melt the butter in the dutch oven on the stove top.: As the butter melts, it will foam and then begin to smell nutty as the milk solids toast, giving you fragrant brown butter notes. That toasty aroma is a major flavorful building block for the stock. Watch carefully so it does not burn; if it begins to smoke, pull the pot off heat and start over with fresh butter.
- Place the flour into a paper sack.: By putting the flour in a paper sack or bag you create an easy dredging method that keeps hands cleaner and distributes coating evenly. When you shake the bag, you will hear the flour tumble and see chicken pieces become lightly dusted. Avoid clumping by not overfilling the bag, and if the flour feels damp, spread it out and stir to aerate before using.
- Put the chicken pieces one by one (as you are ready to use them) into the paper sack and shake it thus coating each piece of chicken very well with flour.: The tactile action of shaking ensures an even coat. You will feel the flour cling to nooks of skin and crevices, which later gives you the roux effect when it hits the hot butter . A pitfall here is overcrowding the sack which causes uneven coating; do one piece at a time for best results.
- Just as the butter in the dutch oven starts to turn brown, place the chicken pieces (no more than 2 at a time) in the butter and allow the skin to brown and crisp on each side. Brown each piece on all sides and then remove from the pot to a separate plate (the chicken won’t be cooked through - so don’t worry about that - we are just doing this to build flavor). (Add more butter if you need to as you fry to keep the pan wet to allow the frying process to take place).: The moment the chicken hits the pot you should hear a steady sizzle, and within minutes the skin will release and caramelize to a golden brown. Browning two pieces at a time prevents the pan from cooling too fast and ensures crispy skin instead of steaming. If you rush and crowd the pan, steam accumulates and you lose that caramelized flavor.
- When all of the chicken has been browned and removed to a plate, add the onion, garlic, carrot and celery and let those cook in the butter to brown slightly. Then add the chicken pieces back to the pot and fill the pot with just enough boiling water to cover the chicken. (If you don't have quite enough boiling water, just add a little tap water).: You will rotate pieces and watch edges darken to deep gold, hearing the change in sizzle intensity as moisture leaves. The browned bits left behind will be scraped up later by the vegetables, creating intense flavor. A frequent oversight is discarding pan fond; instead, use it by cooking the aromatics in the same pot.
- Add the salt and pepper and bay leaves.: The vegetables will soften and pick up the browned sediment, releasing a savory perfume that deepens the broth. You will notice the edges of the onion taking on color and a fond loosening from the bottom. Adding just enough boiling water keeps the heat steady and preserves the concentrated flavor; adding too much cool water will dilute the stock.
- Place the lid on the dutch oven and reduce the heat to medium low until water comes to a simmer (small barely there bubbling action).: When these seasonings hit the pot the aroma rounds out and the scent becomes savory and herbaceous. The bay leaves will diffuse their faint floral note into the simmer, and the salt helps extract flavor from the chicken and vegetables. Avoid over salting at the start; you can always adjust near the end once the broth has reduced slightly.
- Let simmer until the chicken is tender and cooked through. The water will thicken slightly due to the flour on the chicken.: Watch for a delicate trembling of the surface rather than a full boil, which ensures even, tender cooking and keeps the meat moist. A vigorous boil will toughen proteins and break the broth's clarity. If the pot is boiling hard, lower the heat and give it a moment to calm down.
- Once the chicken is cooked through, use a wire mesh skimmer to scoop the chicken, onion, garlic, carrot, celery and bay leaves from the pot and place on a clean plate (not the same one you used for the browned chicken meat). Remove the dutch oven from the heat and set aside.: Over time the simmer will soften the meat and the starch from the dredge will meld into the liquid, giving slight body. You will see the broth become silkier and smell richer as collagen and flavors extract. A common error is rushing this stage; under simmered meat will be firmer and less flavorful.
- Allow the chicken to cool enough that you can safely touch it and then remove the chicken meat from the bone. Discard the skin, bones and any organ tissue. Reserve the meat.: Using a skimmer helps keep the broth clear of large solids while preserving the concentrated liquid. The vegetables will be soft and fragrant, and the skimming motion should be gentle to avoid breaking pieces apart. Avoid dumping everything into a colander because you want to keep as much of the rich liquid as possible.
- Place the chicken meat back in the cooking liquid and return to the stove top over medium heat. Not all of the chicken will be completely covered probably. That is ok.: When you pull the meat, it should come away easily and feel tender. Shredding or chopping the meat into bite sized pieces integrates it back into the soup more evenly. Discarding skin and bones is about texture and clarity, though you retain flavor by returning the meat to the broth.
- Sift together the flour, salt and baking powder. Slowly add the milk and mix with a spoon until the batter just comes together.: As the pot returns to a gentle simmer the shredded chicken releases flavor and warms through. You will see steam rise and the pot will emit a deep savory aroma that signals readiness for the dumplings. If the surface seems calm but not bubbling, nudge the heat slightly to maintain gentle motion.
- Once the chicken mixture is again simmering, Drop scant teaspoonfuls of the biscuit mix into the simmering liquid. The biscuits will immediately expand and bob on the surface. Some will rest on top of pieces of the chicken. This is all desired and the way things should be.: The sifted dry mix will look uniform and pale, and when you add the milk you will fold until a slightly thick, dropable batter forms. It should cling to the spoon but still fall slowly. Over mixing develops gluten and yields tougher dumplings, so stir until just combined and stop.
- Once all of the dumpling mix is added to the pot, put the lid back on and allow to simmer for 10 minutes. (see tips and tricks). After 10 minutes, check one of the dumplings to make sure it is cooked through - you can remove one and cut in half to see or remove one and taste it to see. If not done, replace the lid and simmer and check in 5 minute intervals until done.: You will see the batter balloons puff up and float, creating little islands in the broth. Their tops will dry slightly while the undersides cook against the hot liquid. The sound is a soft plop followed by quiet bubbling. Avoid dropping large spoonfuls because they will be doughy inside and take much longer to cook.
- Once all of the dumpling mix is added to the pot put the lid back on and allow to simmer for 10 minutes see tips and tricks After 10 minutes check one of the dumplings to make sure it is cooked through you can remove one and cut in half to see or remove one and taste it to see If not done replace the lid and simmer and check in 5 minute intervals until done: During this covered simmer the dumplings steam and set, and you will notice a soft, pillow like texture when you press gently with a spoon. The broth underneath will be bubbling gently and fragrant. If a dumpling tastes raw or dense, continue simmering in small increments until the center is cooked through, avoiding an extended vigorous boil which could break them apart.
Notes
- Smaller dumplings for quicker cooking: Use the smallest spoon you have to drop scant teaspoonfuls so dumplings cook through in the allotted simmer time and never taste raw in the middle.
- Thicker soup option: Toss the dumpling batter in an extra tablespoon of flour before dropping to increase the starch load in the pot, which yields a heartier mouthfeel.
- Make ahead the stock: Brown and simmer the chicken earlier in the day and refrigerate the broth so you only finish dumplings when guests arrive, keeping the active time short.
- Adjust salt late: Taste at the end and season gradually because reduction concentrates saltiness and you can overshoot early.
- Control dumpling texture: Mix the batter until just combined; overmixing produces tougher dumplings, so stop when the dough forms a cohesive mass.