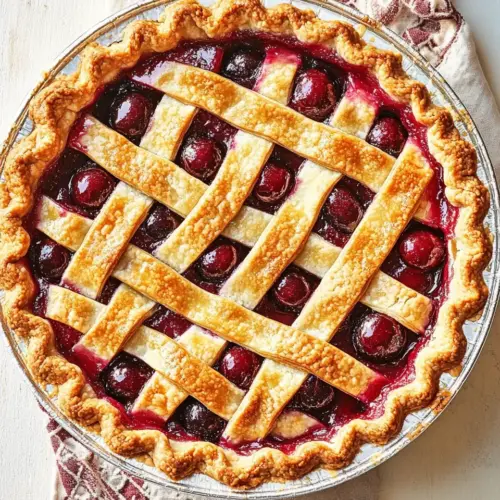
Homemade Cherry Pie
Homemade Cherry Pie combines tart cherries, a glossy, spiced filling, and a flaky crust into an irresistible dessert. Vibrant and slightly tangy with warm cinnamon and a hint of almond, this easy classic is perfect for summer gatherings and easy weeknight celebrations. The lattice top and golden crust make it beautiful on the table, so you have every reason to bake and share it.
Equipment
- Strainer
- Mixing Bowls
- Saucepan
- Rolling Pin
- Pie Plate
- Baking Sheet
- Knife or pizza cutter
Ingredients
- 2 pounds frozen pitted tart cherries, thawed, juices reserved Provide juicy, tart fruit and natural syrup for the filling; thawing releases flavorful juices used to build the pie’s base and balance sweetness. Maintain reserved juices to help adjust consistency when cooking the filling, and ensure cherries are evenly distributed in the crust for consistent baking.
- 1/4 cup cornstarch Act as a thickening agent when mixed with reserved cherry juices and heated; cornstarch creates a glossy, stable filling that sets as it cools. Dissolve fully to avoid lumps and incorporate early so the filling reaches the desired sliceable texture without becoming gummy.
- 1/4 cup plus 1 tablespoon water Help hydrate the cornstarch and create a smooth slurry that prevents clumping when added to hot cherry juices; use the specified amount to achieve proper viscosity. Add gradually while stirring to ensure even thickening and a consistent filling texture.
- 3/4 cup cane sugar Provide sweetness to balance the cherries’ tartness and enhance flavor; cane sugar caramelizes slightly during baking to deepen the filling’s taste. Adjusting a small amount is possible for personal preference, but the listed quantity yields a balanced classic cherry pie.
- 1/2 teaspoon cinnamon Add warm, aromatic spice that complements cherries without overpowering them; cinnamon contributes depth and a cozy flavor note to the filling. Use measured amount so the spice supports other flavors while maintaining the pie’s bright fruit character.
- 1/2 teaspoon ground ginger Introduce subtle heat and complexity that lifts the fruit’s profile; ground ginger pairs with cinnamon to add warmth and a hint of sharpness. Use cautiously to avoid dominating the delicate cherry flavor, keeping it as a background accent.
- 1/4 teaspoon almond extract Impart a concentrated nutty-floral aroma that enhances the cherry flavor; almond extract delivers a small but impactful boost to the overall profile. Measure carefully since it’s potent; a little goes a long way toward rounding out the filling.
- Pinch salt Enhance overall flavor by balancing sweetness and elevating other seasonings; a pinch of salt brightens the filling and reduces cloying notes. Distribute evenly so the salt supports rather than stands out in the finished pie.
- 1 recipe Pie Crust, chilled at least 2 hours Provide the structure and flaky base that holds the filling; a chilled pie crust ensures a tender, crisp shell that bakes evenly. Keep chilled at least two hours to relax gluten and maintain shape when transferring and crimping before baking.
- 1 large egg Enable an egg wash to promote a glossy, golden-brown crust and help any coarse sugar adhere; beating the egg and brushing lightly yields an attractive finish. Use cautiously around edges to avoid burning and ensure even browning.
- Coarse sugar, optional Offer a crunchy, sparkling topping when sprinkled on the crust before baking; coarse sugar adds visual appeal and textural contrast. Apply sparingly to highlights like the lattice or rim for sweetness and a pleasant crunch.
- Vanilla ice cream, for serving Provide a cold, creamy accompaniment that contrasts warm tart filling; vanilla ice cream mellows acidity and adds richness to each slice. Serve scoops alongside warm pie to create classic temperature and flavor contrast that many enjoy.
Instructions
- Place the cherries in a strainer set over a bowl to capture the excess juices. Measure 1 cup of the cherry juice. Save any remaining juice for another use. Transfer the cherries to a large bowl.: The moment you drain the cherries you will hear a soft glug as the juices collect, and the room will briefly smell sweet and sharp. Using a strainer helps you separate the fruit from the liquid cleanly, and measuring exactly 1 cup of that juice ensures your filling will set properly. If you find you have less than 1 cup, warm the cherries briefly to coax out more liquid, rather than diluting the mixture. A common mistake here is rushing the drain and letting bits of fruit pass through the strainer, which can make the measured juice too pulpy and affect final texture.
- In a small bowl, stir together the cornstarch and 1/4 cup of the water until smooth. Set aside.: As you whisk the cornstarch into the water, you are creating a silky slurry that will dissolve without lumps when heated. The sound is quiet, the texture smooth, and the color becomes uniformly opaque. This step matters because adding cornstarch dry to hot liquid causes clumps and uneven thickening. If lumps do appear, strain the slurry or whisk vigorously to break them up before adding to the hot juice.
- Place the 1 cup cherry juice in a small saucepan and bring to a boil. Add the sugar, stir, and return the mixture to a boil. When the sugar is dissolved, add the cornstarch mixture and stir until the juices thicken and become clear and glossy. Remove from the heat and pour over the cherries. Stir in the cinnamon, ginger, almond extract, and salt. Allow to cool completely.: Bringing the juice to a full boil concentrates flavor and activates the thickening power of the slurry, and you will notice the liquid changing from translucent to glossy as the starch swells. Stir constantly when you add the slurry so the heat distributes evenly and prevents localized gelatinization. Pouring the hot syrup over the cherries infuses the fruit and helps distribute warmth evenly. Cooling completely is crucial so the filling sets and does not steam the crust later. A frequent error is cutting the cooling time short, which yields a runny pie.
- Make the bottom crust. Follow the instructions in the pie crust recipe to roll out the bottom crust, leaving a 1/2-inch overhang on all sides of the pie plate. Loosely cover with plastic wrap and chill for 30 minutes. Arrange an oven rack in the bottom third of the oven. Place a baking sheet on the rack and preheat the oven to 425°F with the baking sheet inside it.: Rolling the dough to an even thickness and leaving that half inch overhang provides room to crimp and creates a neat edge. Chilling the assembled bottom crust firms the fat in the dough so it produces flakiness during baking. Preheating the oven and the baking sheet builds an intense hot surface that helps the bottom crust set quickly, keeping it crisp. If you skip chilling or preheating, the crust can become greasy or soggy. Avoid over rolling which thins the crust and weakens its structure.
- Meanwhile, make the top crust. Use the same method to roll out the remaining pie dough. Transfer it to a baking sheet, loosely cover it with plastic wrap, and place in the fridge until the bottom crust has chilled for 30 minutes.: While the bottom rests, rolling out the top dough on a floured surface gives you control for the lattice. Keeping the dough cold prevents it from stretching and tearing as you transfer it. I always keep a bench scraper close to lift the dough gently, rather than pulling which can distort the shape. A typical mistake is leaving the top crust at room temperature where it becomes sticky and hard to handle.
- Assemble the pie. In a small bowl, whisk together the egg and the remaining 1 tablespoon water. Set aside.: Whisking the egg with water creates an egg wash that will give the crust its glossy, golden color and help any coarse sugar adhere. The sound is just a light whisk, and the color turns uniform. Keep the wash covered until needed to avoid skin forming. A problem I see is over brushing with wash which can pool and cause the crust to brown unevenly.
- Remove the bottom crust from the refrigerator and pour in the cooled filling. Transfer the top crust to a cutting board and use a sharp knife or pizza cutter to cut it into 1-inch strips. Evenly space 4 to 5 strips crosswise over the pie. Weave 4 to 5 more strips through the crosswise strips to create a lattice, pulling back the original strips as necessary to weave. Trim the edges of the lattice, then fold the edges of the bottom crust up and over it so that the edge of the dough is in line with the edge of the pie plate. Crimp the dough with your fingers or a fork to seal.: Filling the pie should create a satisfying, slightly heavy mound of glossy cherries. As you weave the strips, you will hear the soft friction of dough against dough and see the pattern come together like a woven mat. Trimming and crimping seals the juices in and creates a tidy rim that bakes evenly. If the lattice is not cold, it may sag in the oven, so keep the dough chilled until assembly. A common error is cutting strips unevenly, which makes weaving fussy and the finished look irregular.
- Brush the lattice with the egg wash and sprinkle with coarse sugar, if using. Place the pie on the hot baking sheet in the oven. Bake for 20 minutes, then reduce the heat to 375°F and bake for 40 to 50 minutes, or until the crust is golden brown and the filling has been bubbling for several minutes. If the edges of the crust start to brown too much before the filling is bubbling, tent them with foil and continue baking until the filling bubbles.: The initial high heat jump starts the crust browning while setting the bottom, and lowering the heat prevents overbrowning while allowing the filling to reach an active bubble. You want to watch for bubbling that signals the filling has thickened in the center. Tent the edges with foil if they brown too quickly to avoid a burned rim. A trap I warn against is opening the oven frequently to check, which drops oven temperature and lengthens bake time.
- Allow to cool completely before slicing and serving, about 4 hours.: As the pie cools, the filling firms and the juices reabsorb into the structure, so slices hold their shape. You will notice the aroma settle from a hot steam to a lasting sweet smell that fills the room. Patience here is rewarded with clean slices and ideal texture. Cutting too soon yields runny pieces and a messy plate, so resist the temptation to slice while still hot.
- Serve with vanilla ice cream.: The contrast between warm pie and cold Vanilla ice cream creates a lovely temperature and texture interplay, the ice cream melting into the lattice and adding creamy richness. A small scoop placed beside each slice is ideal. Serving only straight from the oven or without a cooling period will lead to slipping slices, so pair thoughtfully.
Notes
- Chill the dough thoroughly Before rolling, refrigerate the pie dough for at least two hours so the fat stays cold, ensuring a flaky crust that browns evenly.
- Measure the cherry juice Having exactly 1 cup of juice is essential for the filling to set correctly with the specified amount of cornstarch, avoid eyeballing.
- Make a smooth slurry Combine the cornstarch with cold water before adding to hot juice to prevent lumps and achieve a glossy finish.
- Use a preheated baking sheet Placing the pie on a hot baking sheet helps the bottom crust cook quickly, preventing sogginess.
- Tent with foil if edges brown If the rim crisps too fast, cover it loosely with foil to allow the filling to continue bubbling without burning the edges.
- Cool completely before slicing Wait about four hours for the filling to set for neat slices and a stable texture, patience pays off.