Homemade Caramels
Homemade Caramels melt with a creamy, buttery chew that tastes richly toasted and satisfying. This easy candy recipe yields soft, hand wrapped pieces perfect for gifting or snacking, with precise steps to get the texture just right. Make a big batch for holidays or to keep in the fridge for sweet surprises, and enjoy the warm aroma of caramelized sugar in every bite.
Equipment
- Wax paper squares
- Candy thermometer
Ingredients
- 2 cups white granulated sugar Provide intense sweetness and structure to the caramel, dissolving during cooking to create the base that caramelizes for flavor and color. Use granulated sugar to control texture and help achieve the desired chewiness when combined with syrups and dairy. Monitor temperature carefully to avoid burning and ensure a smooth, even caramelization.
- 1 cup brown sugar, firmly packed Contribute deep, molasses-rich sweetness and moisture that enhances the caramel’s flavor complexity while helping retain chewiness. Pack firmly for accurate measurement and allow the brown sugar’s tiny crystals and molasses to integrate during cooking for a softer finished texture. Stir thoroughly as it melts to prevent graininess and ensure even distribution.
- 1 cup golden syrup Supply a clear, viscous sweetener that promotes smoothness and helps prevent crystallization by interfering with sucrose crystal formation. Add golden syrup to improve chew and glossy finish, and incorporate it early so it blends well with sugars and dairy. Use as measured to maintain the correct balance of sweetness and texture.
- or homemade golden syrup(click link for recipe – it's so easy to make!) Offer an alternative source of glucose that can be homemade, providing the same anti-crystallization and textural benefits as commercial golden syrup. Prepare and use homemade golden syrup to control flavor and consistency while keeping the caramel smooth and stable. Ensure it’s of similar viscosity to commercially available syrup for best results.
- 1 cup unsalted butter Bring rich fat and a silky mouthfeel that rounds flavor, adds creaminess, and helps the caramel set with a tender bite. Use unsalted butter so salt levels can be controlled separately; add at the recommended stage to emulsify with sugars and dairy for a homogeneous texture. Melt evenly and avoid overheating to prevent separation or a greasy finish.
- 2 cups heavy whipping cream Introduce high fat content and liquid volume that create a luscious, creamy texture and influence final softness and shelf life. Use heavy whipping cream to supply richness and moisture; slowly heat with sugars to prevent scalding and promote even incorporation. Choose full-fat cream for best body and stability in the caramel.
- 1 cup evaporated milk Provide concentrated milk solids and a creamy, slightly caramelized flavor that enhances body and helps achieve a pliable set. Add evaporated milk for additional milk solids without excess water, contributing to depth and stability in the final candy. Incorporate slowly and blend well to avoid lumps and ensure smoothness.
- 2 teaspoons quality pure vanilla extract Deliver aromatic sweetness and depth that brightens and balances the rich caramel flavors with a warm vanilla note. Use a quality pure extract for clean, consistent flavor; add near the end of cooking off heat to preserve its delicate volatile compounds. Measure carefully to avoid overpowering the confection’s balance.
Instructions
- Grease a 12×15 inch sheet cake pan. In a medium sized stainless steel pot, combine the white and brown sugars, the corn syrup, butter, heavy cream, and evaporated milk. Cook the mixture over medium heat, stirring constantly until melted. Once the sugars and butter are melted place a candy thermometer in the pot. Continue to simmer the mixture, stirring constantly, until the mixture reaches 250 F / 121 C, then remove the pot from the heat and stir in the vanilla. Immediately pour the caramel mixture into the prepared pan and let it cool almost completely until firm but still soft enough to cut. If you like salted caramels wait for about 20 minutes and then lightly sprinkle the top with flaked salt. Then let it cool completely. Cut the caramels into small bars or squares. Wrap each caramel bar in wax paper, twisting the ends. Note: If the caramels are too too messy/sticky to cut, put the caramel in the freezer for about 30 minutes or in the fridge for a few hours to firm it up. Store the wrapped caramels in a jar or container in the fridge where they will keep for several weeks. Enjoy them straight from the fridge or let them sit at room temp for 10-15 minutes before eating. Will make roughly 60 caramels depending on size.: The warm smell of butter or neutral oil as you coat the pan makes prep feel like an intentional start. Greasing the pan well prevents the caramel from bonding to the surface, which would make removal and cutting difficult, and the glossy coating will reflect the caramel as it sets. A common mistake is to under grease the corners, so take time to reach every edge, and if you prefer line the pan with parchment for extra insurance.
- In a medium sized stainless steel pot, combine the white and brown sugars, the corn syrup, butter, heavy cream, and evaporated milk: As the ingredients meet in the pot, you’ll notice the sugars absorb moisture and the butter begins to soften, producing a faint, buttery aroma. Using a stainless steel pot helps distribute heat evenly so no small hot spot causes local burning. Avoid using a thin pan that heats unevenly, and stir gently to integrate everything before turning the heat on so no dry pockets remain.
- Cook the mixture over medium heat, stirring constantly until melted: You will see the mixture first foam and then smooth into a gleaming syrup, and the sound changes from a soft simmer to a steadier bubbling as it warms. Constant stirring at this stage prevents sugar crystals from forming on the pot sides, which can cause grainy texture later. A common error is to raise the heat too quickly, so be patient and keep the motion even and slow to maintain a homogeneous mixture.
- Once the sugars and butter are melted place a candy thermometer in the pot: The thermometer gives you clear guidance, and placing it now avoids disturbing the liquid later. You should anchor it so the bulb sits in the center of the mixture, not touching the pot, to read accurately. If the thermometer is placed too early or touches the metal, the reading may be off, so check the position to ensure reliable temperature tracking.
- Continue to simmer the mixture, stirring constantly, until the mixture reaches 250 F / 121 C: As the temperature climbs you will notice the bubbling intensify and the color deepen slightly; it will smell caramelized and complex. Hitting 250 F signals the correct stage for a soft, chewy caramel. If you go too far beyond this temperature, the caramel will become too firm or may taste overly toasted, so remove from heat promptly once the target is reached, and if unsure err on the lower side and allow residual heat to finish the process.
- then remove the pot from the heat and stir in the vanilla: Off heat, the addition of vanilla extract releases a fragrant top note that brightens the whole batch, and the steam carries a clean, sweet aroma. Stirring now preserves the delicate flavor that high heat would diminish, and blending at this moment integrates aroma without risking evaporation. A common pitfall is adding vanilla too early, which can blunt its scent, so always wait until the pot is off the burner.
- Immediately pour the caramel mixture into the prepared pan and let it cool almost completely until firm but still soft enough to cut: When you pour, the caramel will glisten and spread with a slow, syrupy movement, and the aroma of butter and toasted sugar fills the air. Letting it cool to just under firm ensures you can cut neat pieces without compressing or tearing the candy. If you try to cut too early you will end up with ragged edges, so patience here pays off; if the batch remains too soft, a brief chill will help.
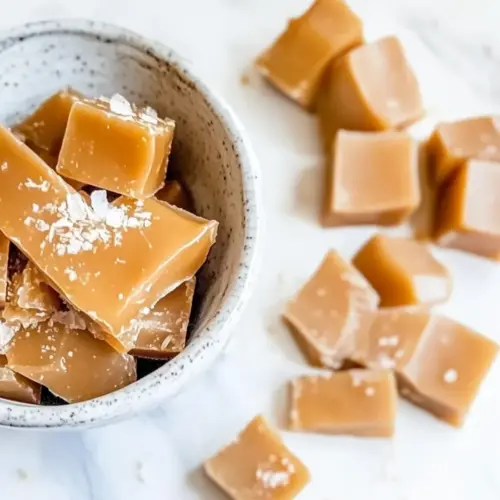
- If you like salted caramels wait for about 20 minutes and then lightly sprinkle the top with flaked salt: After the initial cool down the surface will still be tacky enough for the salt to adhere, giving you that brilliant contrast of sweet and briny. The visual pop of crystals also signals a gourmet finish. Avoid using fine table salt here, which dissolves into the surface and loses texture; flaky salt provides the best mouthfeel and look.
- Then let it cool completely: As the caramel reaches room temperature it will set into its final texture, tightening slightly and becoming chewier. The smell deepens into an inviting toffee note, and when fully cooled it should hold shape without being brittle. Resist the urge to rush this stage, because cutting too soon creates sticky, deformed pieces, while over chilling a bit is reversible by letting the pieces sit at room temperature briefly before serving.
- Cut the caramels into small bars or squares: Cut with a sharp knife for clean edges, and you will hear a subtle, firm resistance as the blade moves through the set candy. Warm the knife under hot water and dry between passes to improve the cut and prevent dragging. Take care to score evenly so each piece is similar in size for consistent eating experience and attractive presentation.
- Wrap each caramel bar in wax paper, twisting the ends: Wrapping preserves texture and prevents sticking, and the tactile work of folding and twisting makes the final product feel artisanal. The wax paper also protects the caramels from humidity during storage. If wrapping is tedious, set up a small assembly line to speed the process and maintain uniform presentation; unwrapped caramels will tack together and lose their shape.
- Note: If the caramels are too too messy/sticky to cut, put the caramel in the freezer for about 30 minutes or in the fridge for a few hours to firm it up : A quick chill changes the texture visibly, tightening and making clean cuts possible while the scent becomes slightly subdued. This trick rescues batches affected by high humidity or slight undercooking. Avoid freezing for too long, which can make them brittle and prone to cracking when cut.
- Store the wrapped caramels in a jar or container in the fridge where they will keep for several weeks: Stored properly they maintain their flavor and chew, and you will notice their aroma stays fresh when kept cool. The fridge also reduces stickiness during warm months and makes them easy to pull out individually. If you plan to present them, let them sit at room temperature for 10 to 15 minutes before serving so the texture softens slightly.
- Enjoy them straight from the fridge or let them sit at room temp for 10-15 minutes before eating: Eating chilled gives a firmer, almost cool chew, while room temperature yields a softer, creamier mouthfeel as the fats loosen. Both are delightful in different ways, and personal preference will guide your serving choice. If pieces feel too stiff after refrigeration, a brief rest at room temperature will restore the intended tenderness.
- Will make roughly 60 caramels depending on size: The final yield depends on how large you cut each piece, and you can scale the count by adjusting dimensions or thickness. Keep in mind smaller squares make them ideal for gifting or portion control, while larger bars suit indulgent snacking. Planning your packaging ahead ensures you get the presentation and quantity you want.
Notes
- Temperature patience: Allow the pot to reach the exact temperature slowly, because rushing leads to uneven cooking and increased risk of burning. Medium heat and steady stirring create a uniform caramel base, and the thermometer will be your best guide to achieve the correct chewy texture.
- Prevent crystallization: Make sure to dissolve the sugars fully and avoid splashing crystallized sugar onto the surface; use a wet pastry brush to wash down any crystals on the pot walls. Crystals are the main culprit for grainy caramel, and keeping a smooth surface will give you a silky result.
- Room humidity matters: On humid days, the caramel can absorb moisture and stay sticky, so consider slightly increasing the target temperature or cooling in the fridge for a short time before cutting. Humidity affects final set more than most people expect, and a little adjustment keeps the texture consistent.
- Flavor layering: Add the vanilla off the heat to preserve its aroma, and consider stirring gently to distribute it without evaporating fragile notes. This simple step makes the finished pieces smell and taste brighter without changing texture.
- Storage strategy: Keep the wrapped caramels in an airtight container in the fridge to maintain chew and prevent sticking, because cool storage stabilizes the fats and sugars. Label the container with the date to track freshness, and let pieces sit a bit at room temperature before serving for ideal softness.